1. How to convert tweets to RSS feeds

    This is part 5 in a series explaining how pipes works and what you can do with it. Read part 1 to learn how to filter feeds, part 2 to see how to combine feeds, part 3 to create feeds for sites that have none and part 4 to convert a shortened feed to a full text RSS feed.

    Maybe you do not want to read tweets on Twitter, or you want to embed a bunch of them somewhere else. It might be useful to access them as an RSS feed, and in the process be able to sort and combine them into one bigger feed. That’s something pipes can help you with.

    Like always we will first create a new pipe.

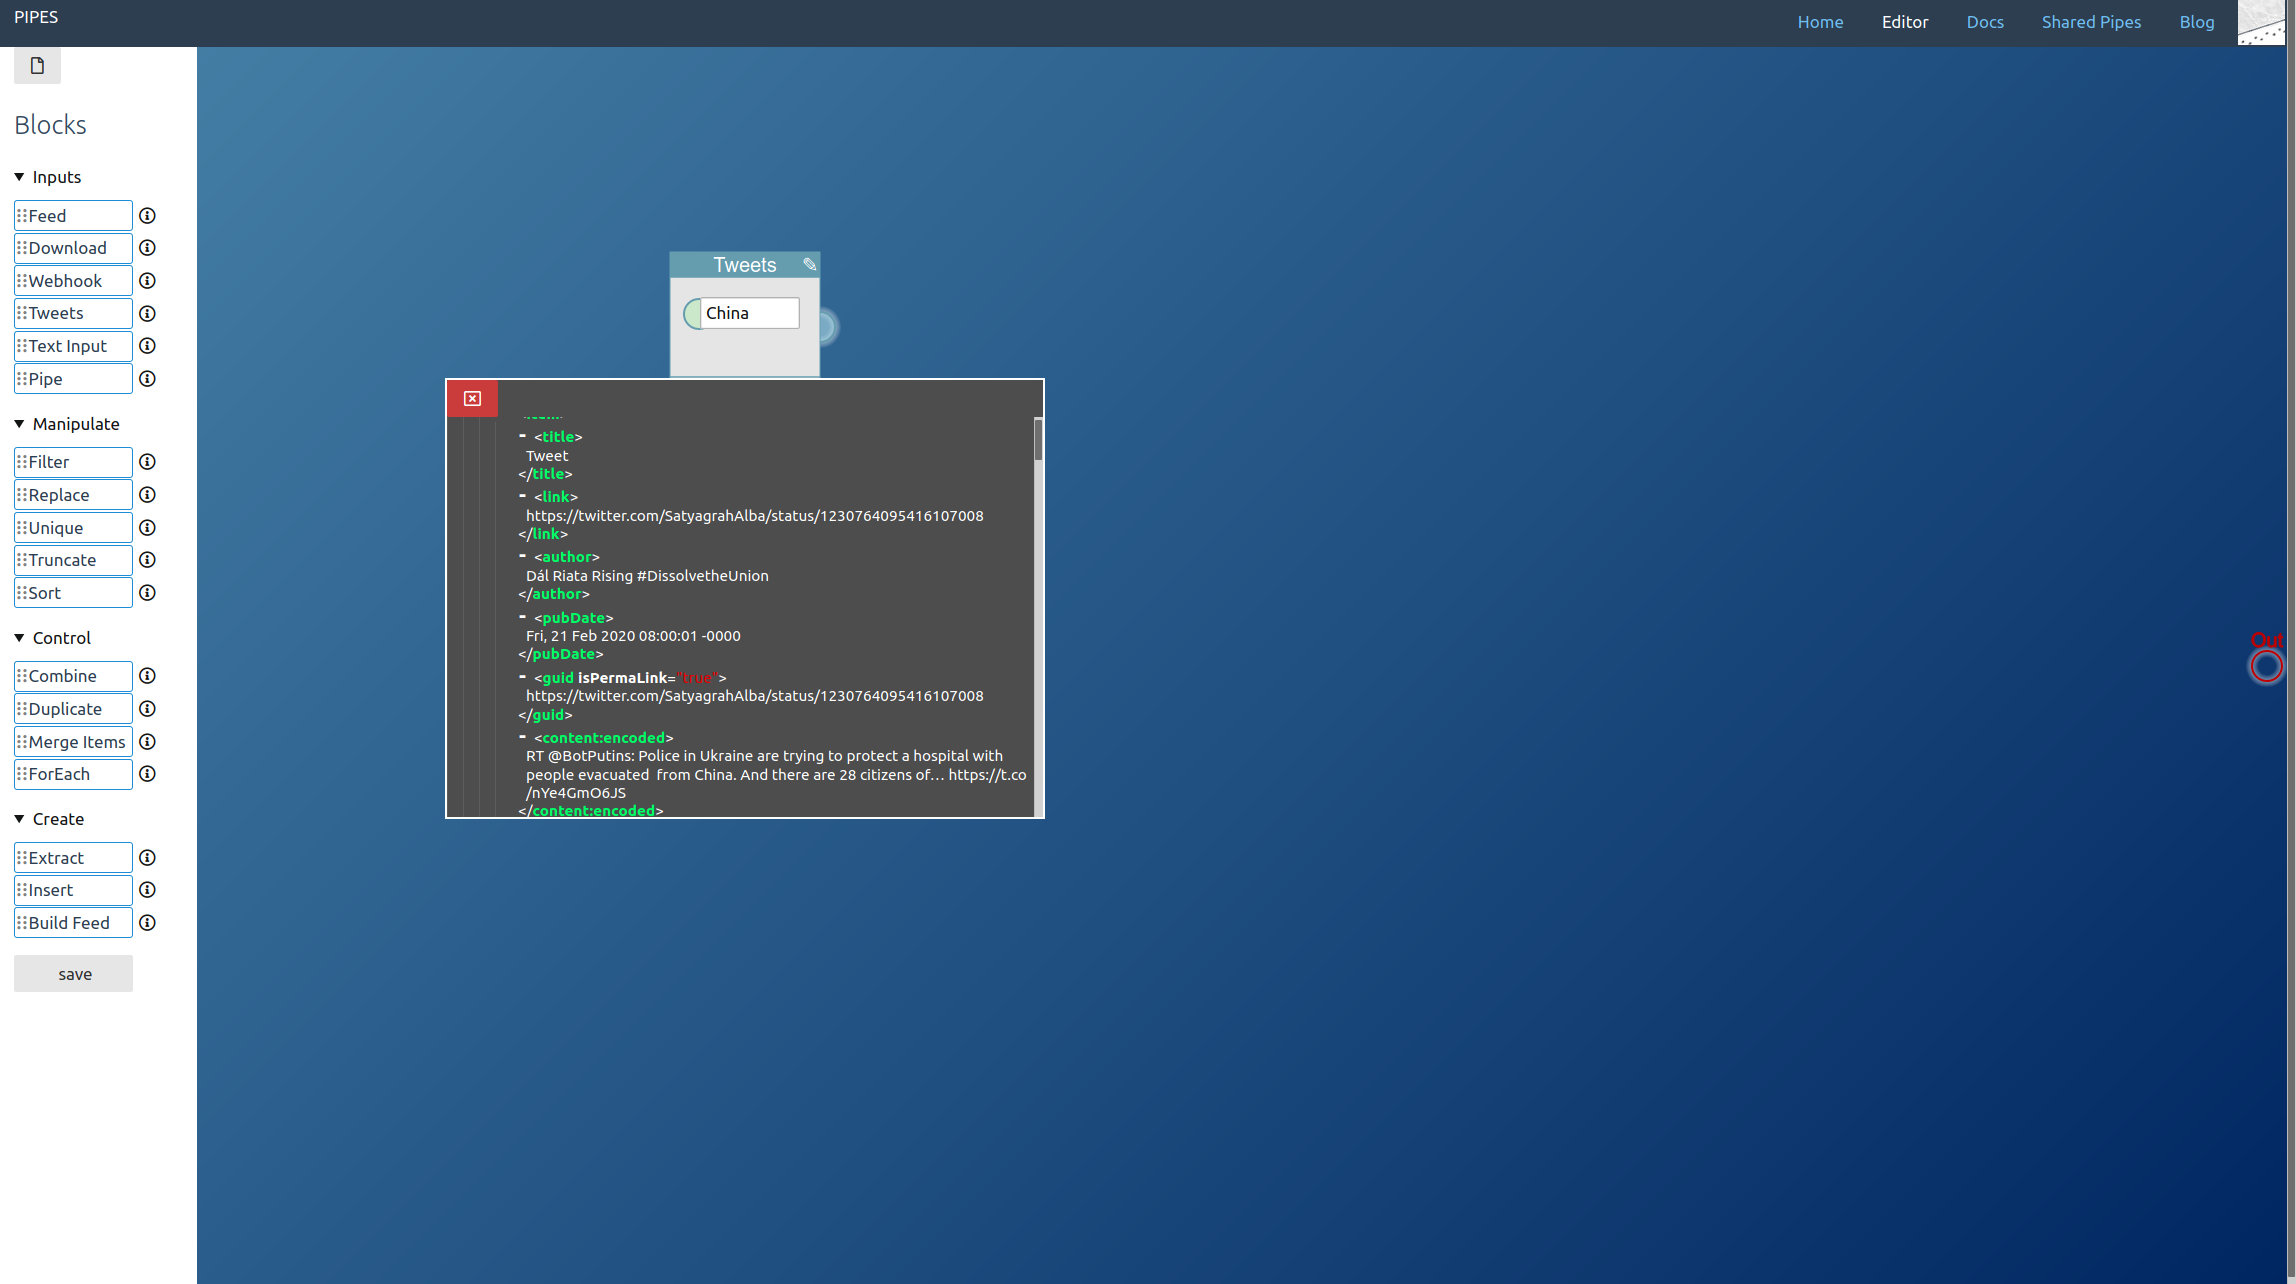
    Now in the editor, start by dragging a Tweets block from the left toolbar into the editor area. Pipes supports three modes for accessing tweets. Let’s start with the search, just enter a keyword. Note how in the inspector first tweets appear:

    /blog/upload/tweets_search.jpg

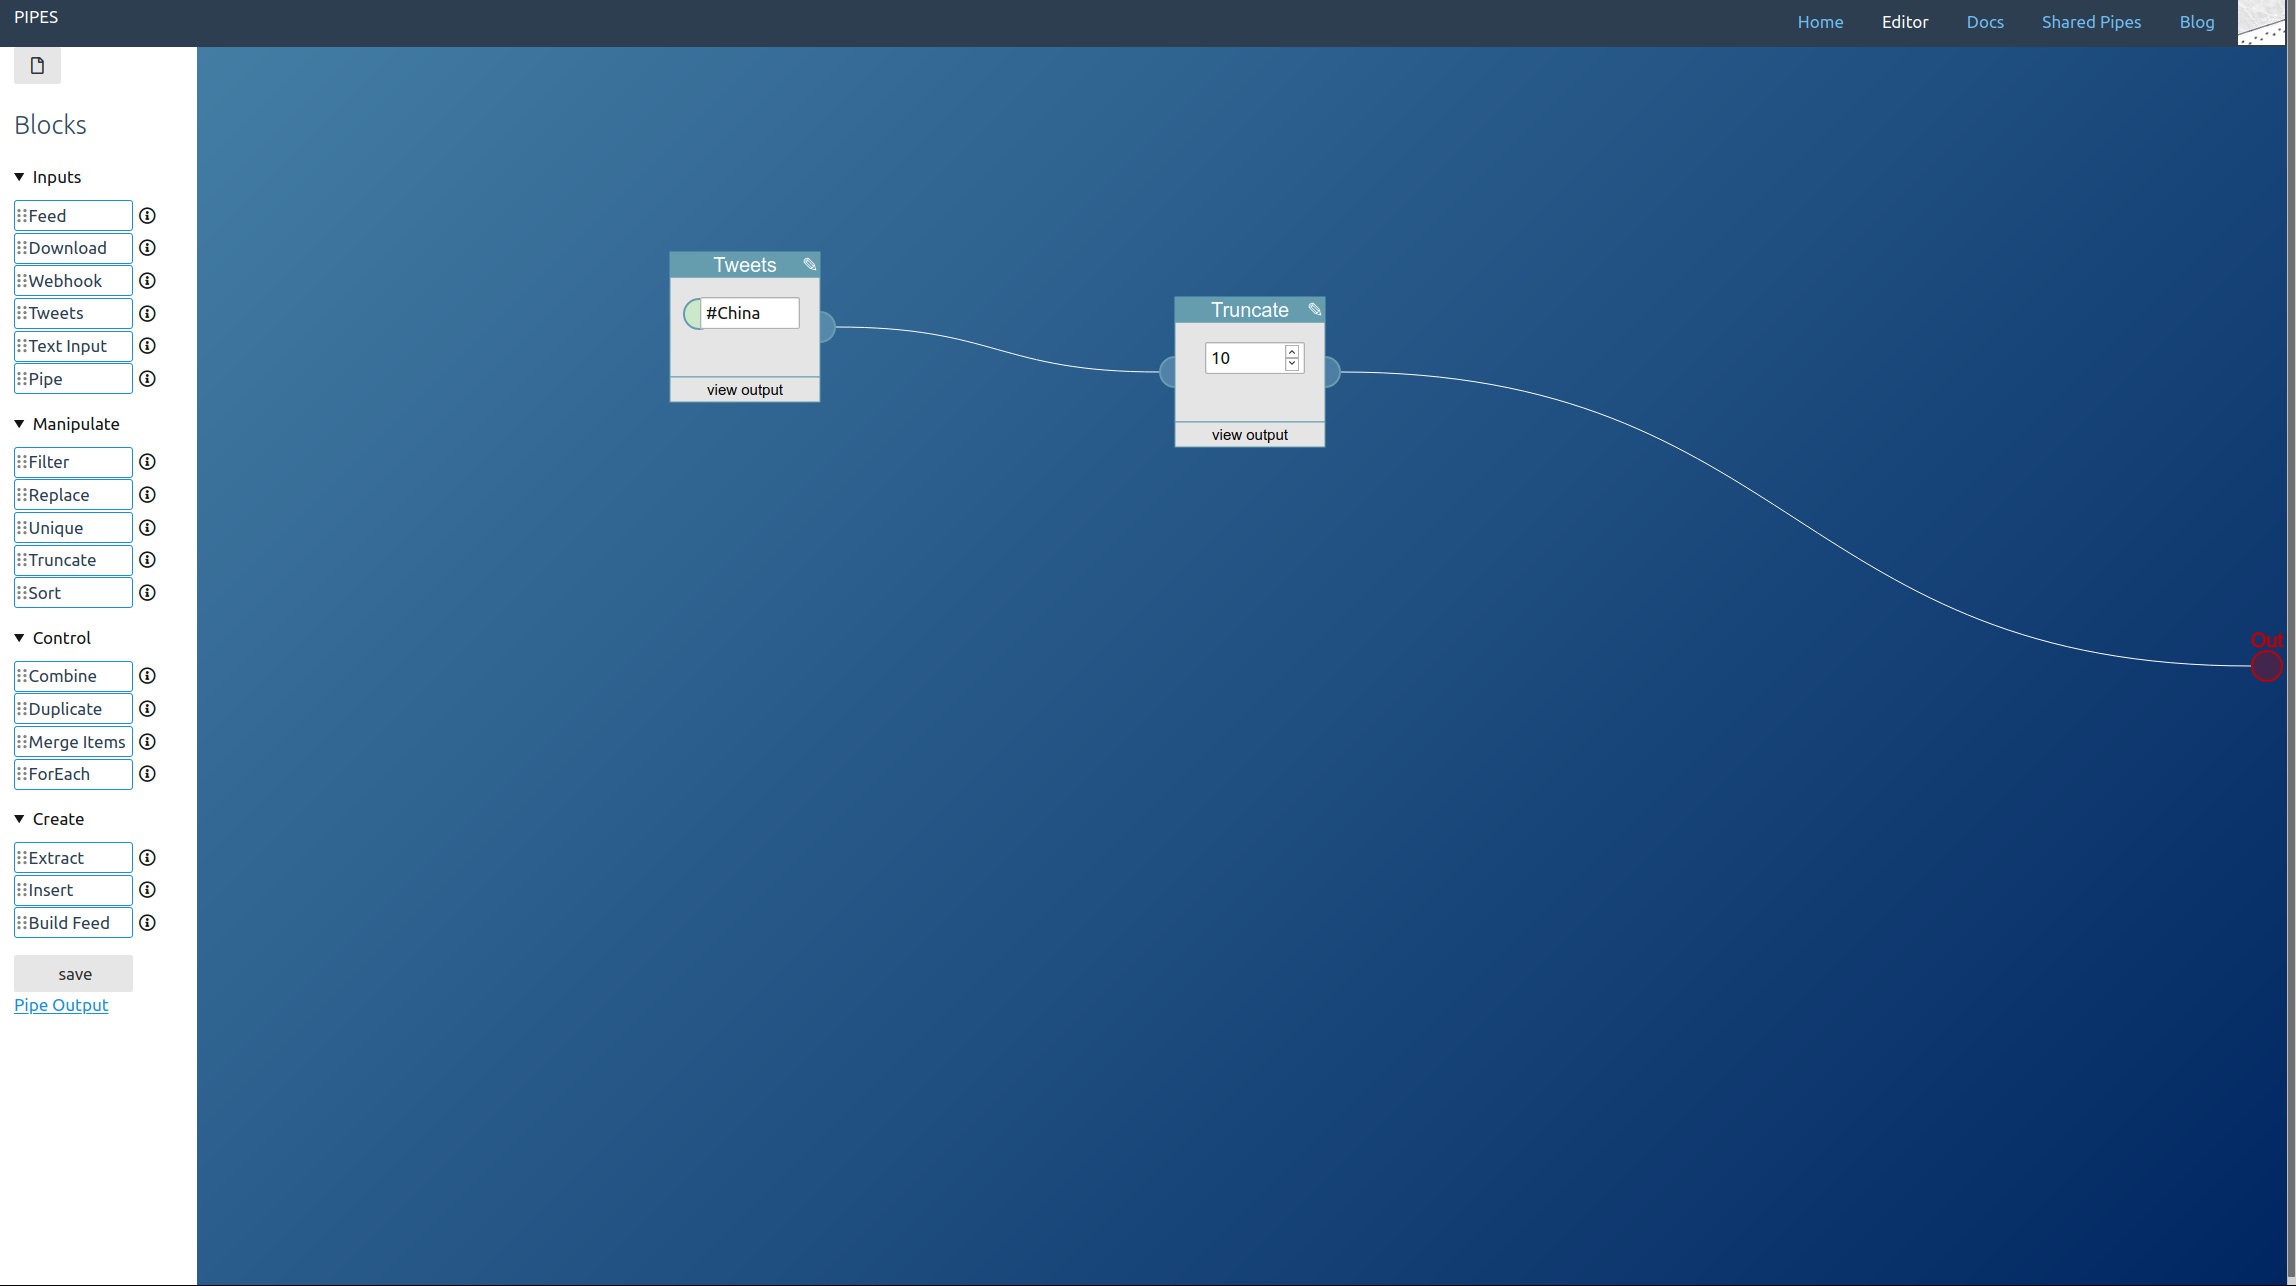
    The second method is accessing a hashtag by prepending #. I also added a truncate block, that way we can limit how big the final feed will be:

    /blog/upload/tweets_hashtag.jpg

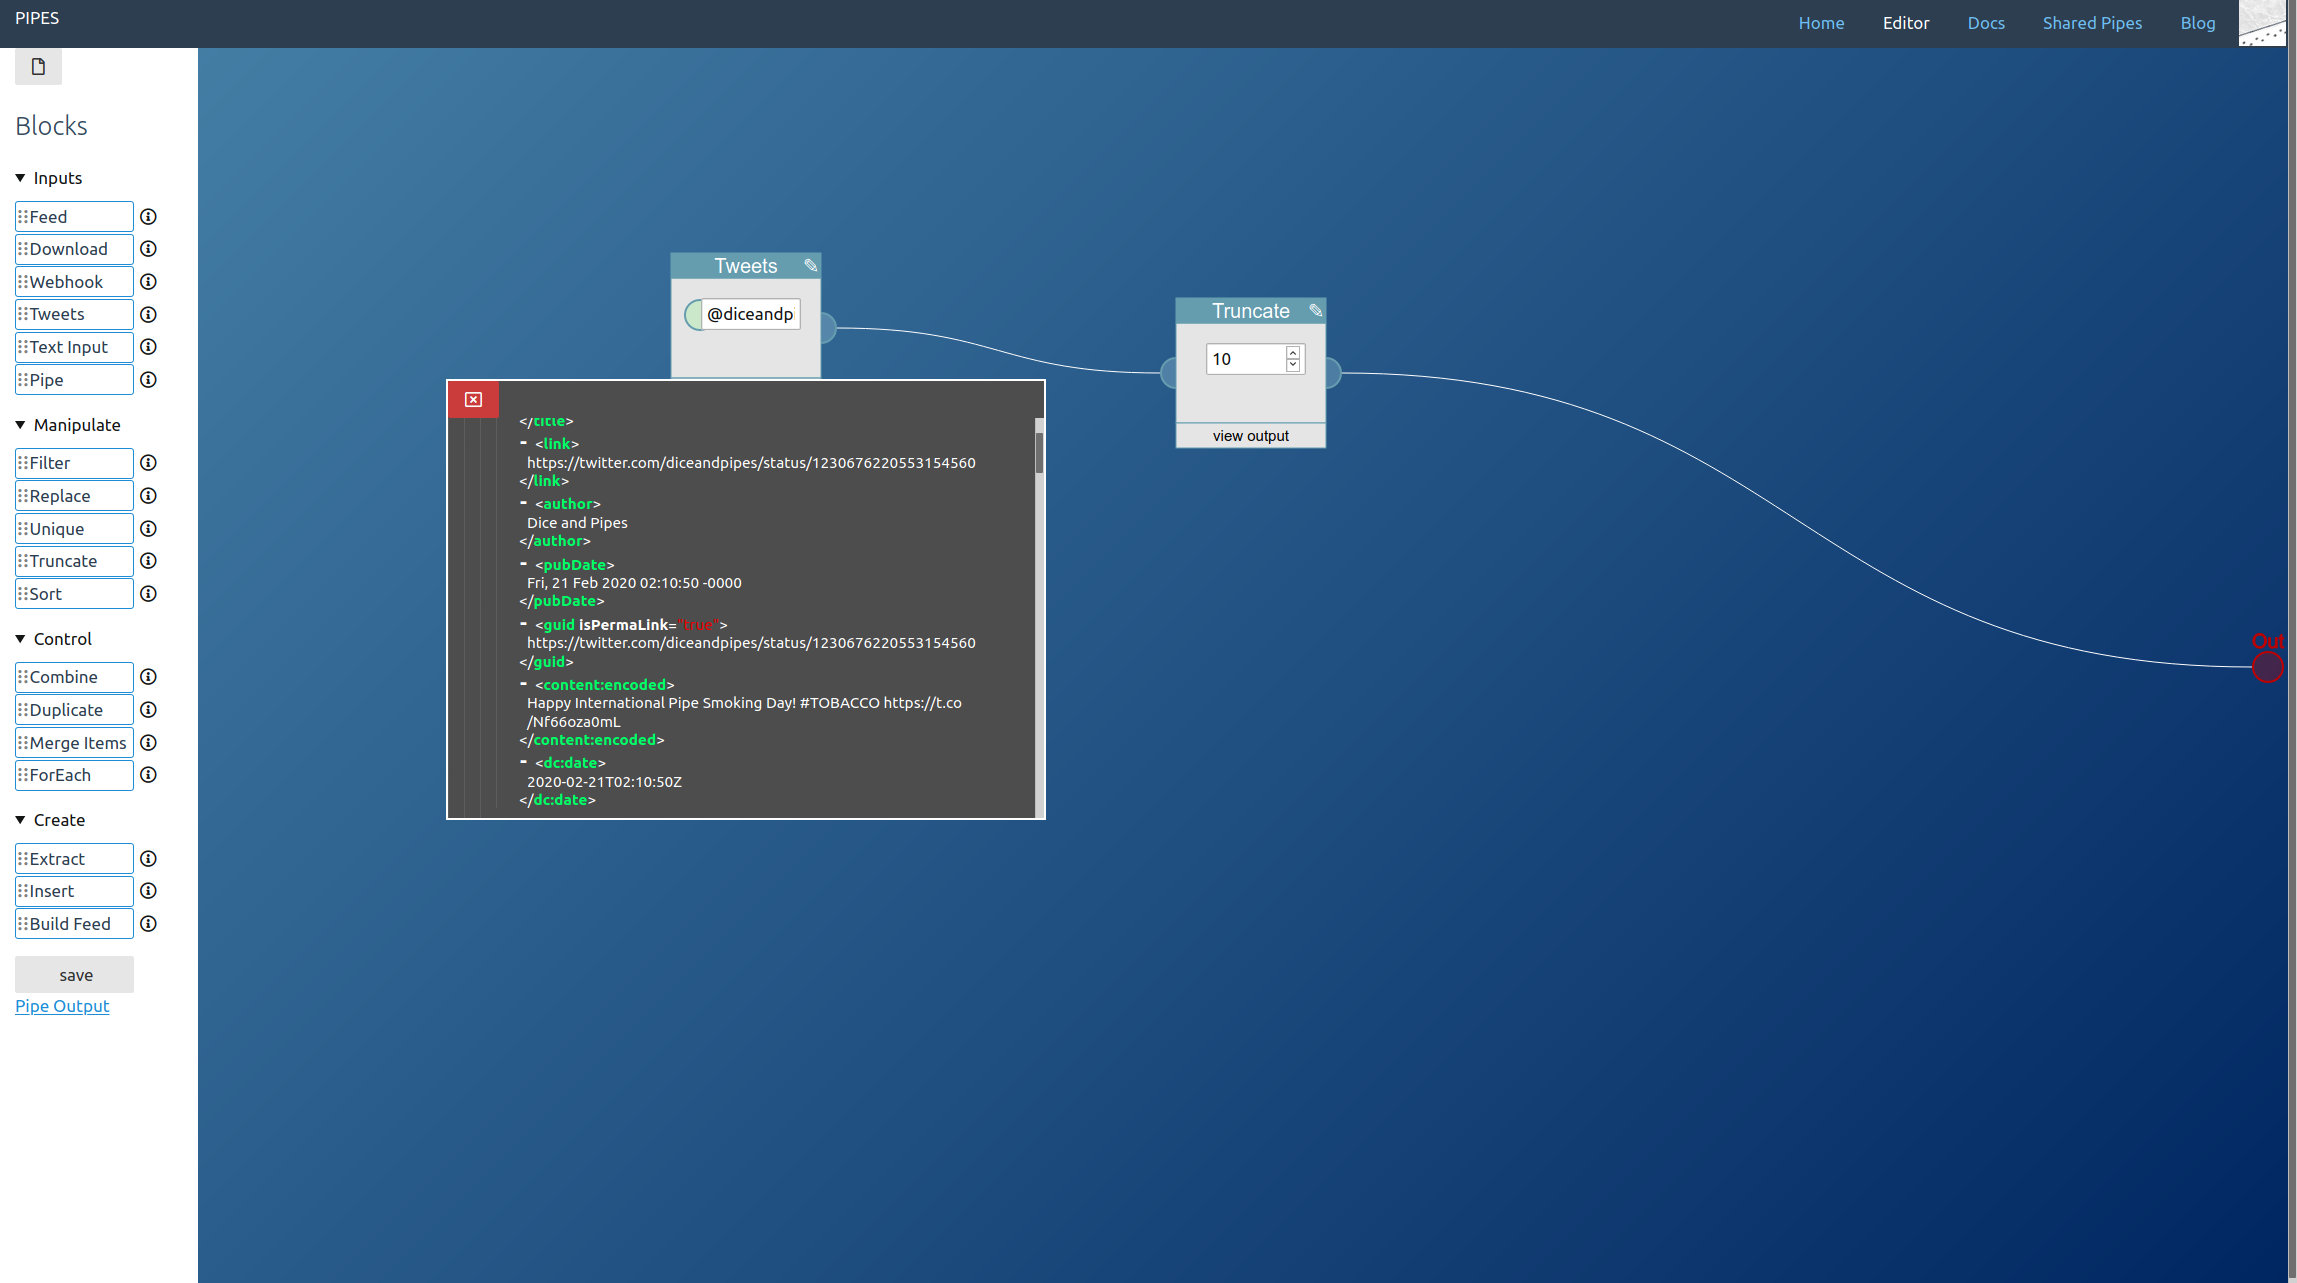
    And the third option is accessing the public tweets of a user account, by entering @username:

    /blog/upload/tweets_username.jpg

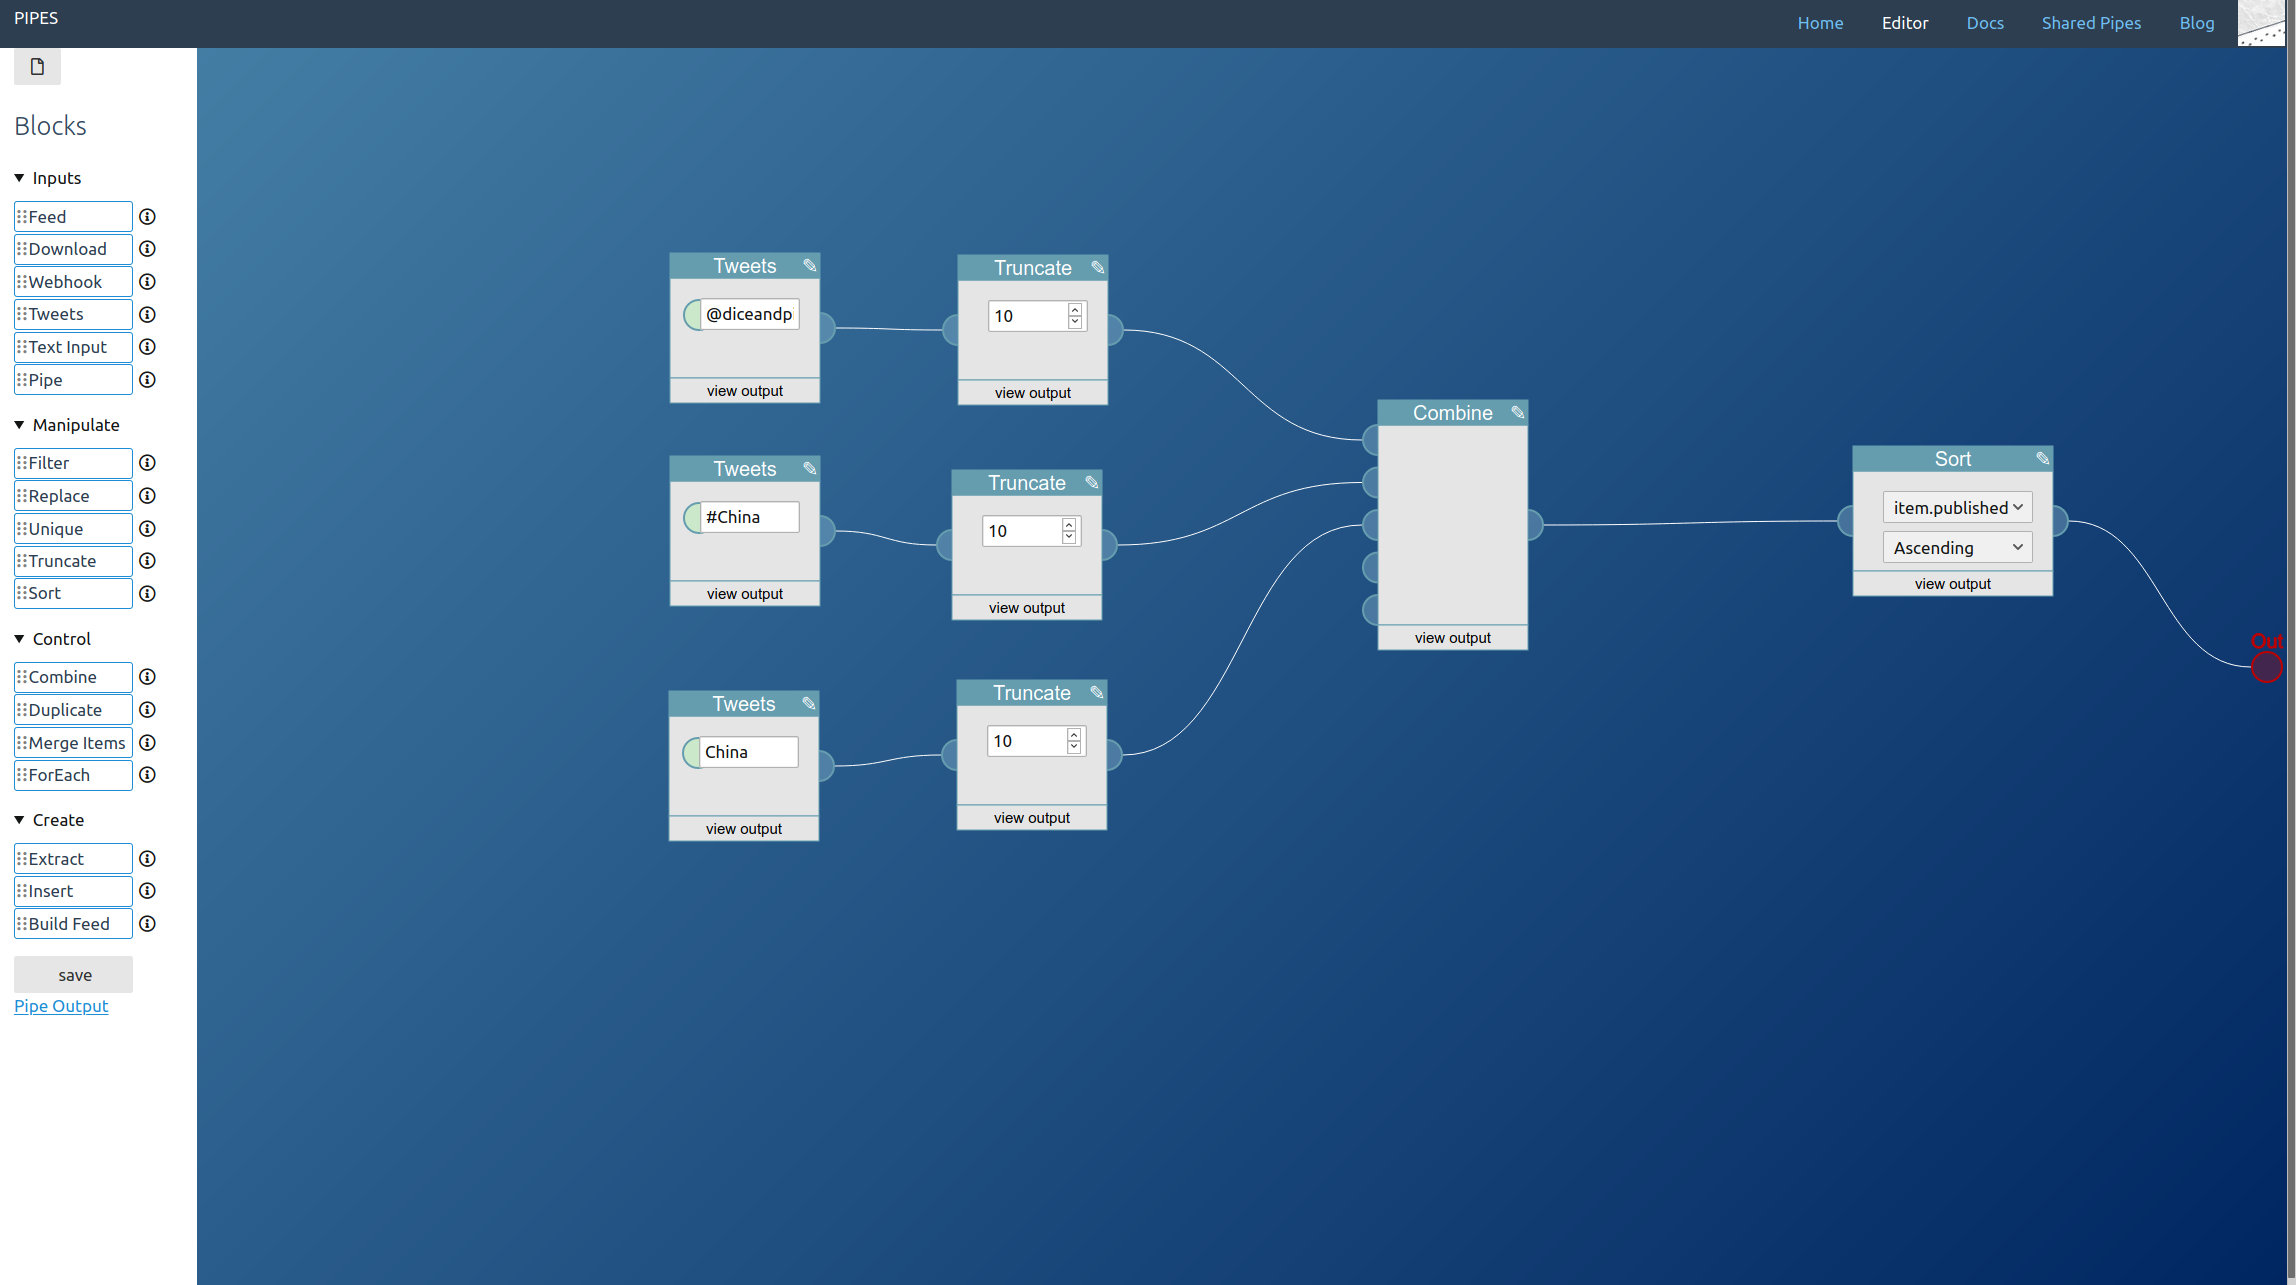
    You can combine all three. You place one tweets block for every type of tweet you want to access and lead them to a combine block. Remember that the combine block adds the feeds together block by block, so you almost always want to add a sort block behind it:

    /blog/upload/tweets_combined.jpg

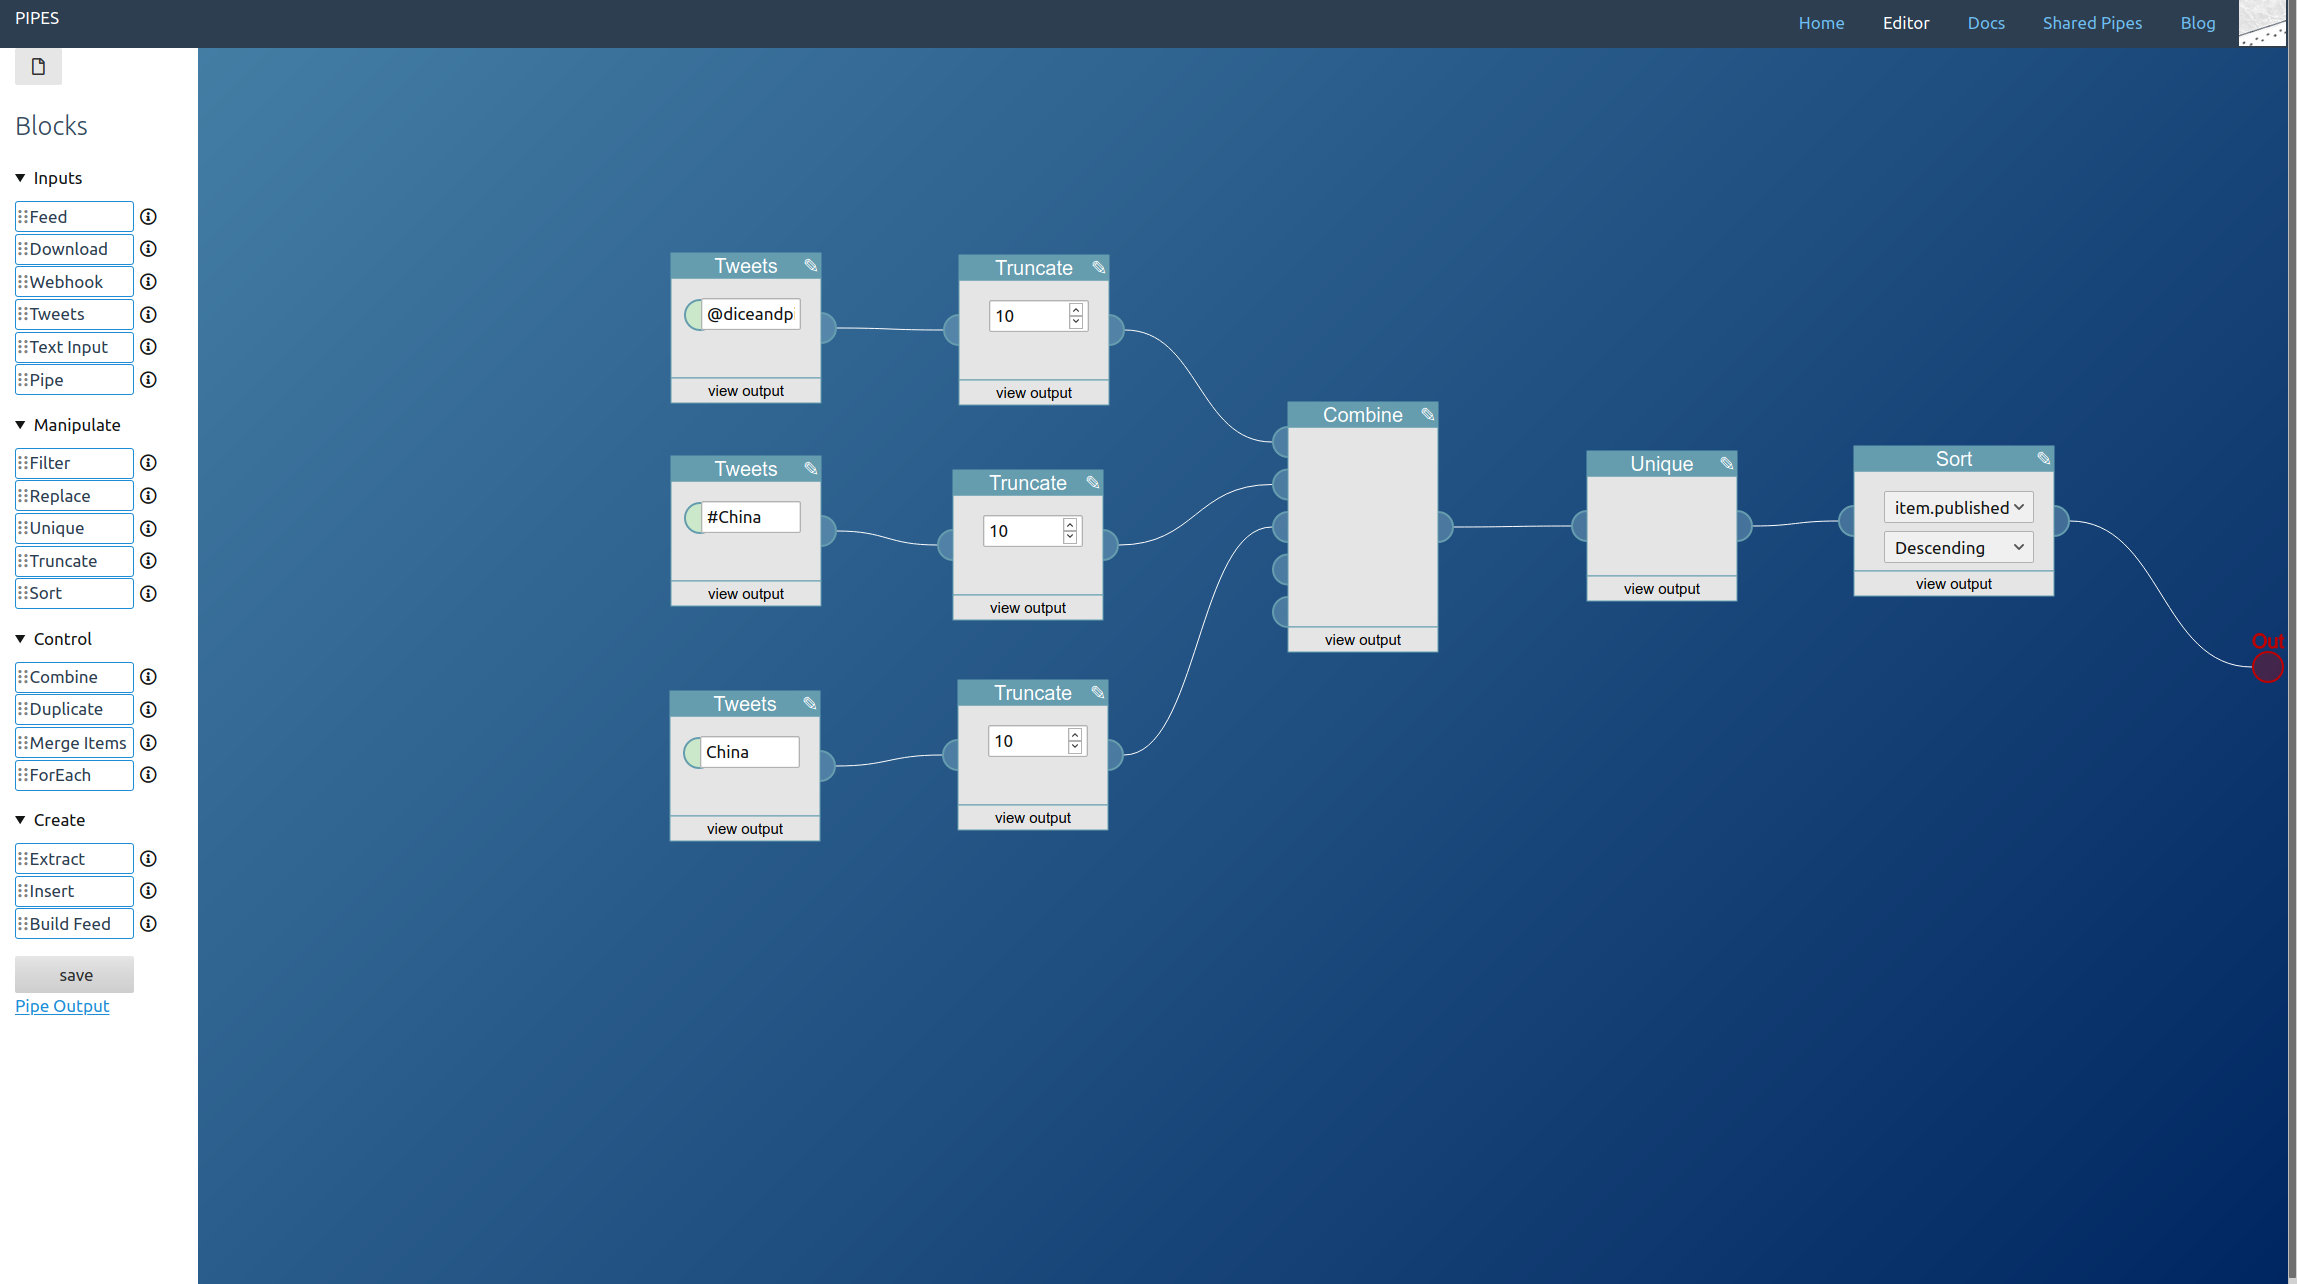
    A further small improvement is possible: If like in our example the tweet blocks might output the same tweets, those duplicates can be filtered out by adding a unique block to the mix. Here I also changed the sort order to the more twitter like descending:

    /blog/upload/tweets_combined_unique.jpg

    And that’s it. Adding tweets to your pipe is as simple as adding a tweets block. The result is a working RSS feed (with a rather strange mix of tweets in this example) you could use anywhere you want:

    /blog/upload/tweets_preview.jpg

    You can see the pipe I created for this article here. You could fork it to access the tweets for hashtags, accounts and search keywords you would prefer.
  2. How to make a full text RSS feed out of a shortened feed

    This is part 4 in a series explaining how pipes works and what you can do with it. Read part 1 to learn how to filter feeds, part 2 to see how to combine feeds and part 3 to create feeds for sites that have none.

    Some sites prefer not to put the whole article into their RSS feed. For them, having an RSS feed is nice to inform users that new articles are available, but they want you to visit the site, to see the article in the full design, and often to have a chance to show ads. As a reader you might want to respect that. But if not, that’s okay as well. Pipes often can transform such a feed into a full text feed, and here I will show how that works.

    The prior article explaining how to create a feed for a site will be useful for this, because that’s basically what we will do to get the full text feed content, but with the original feed as a starting point.

    Like always we will first create a new pipe.

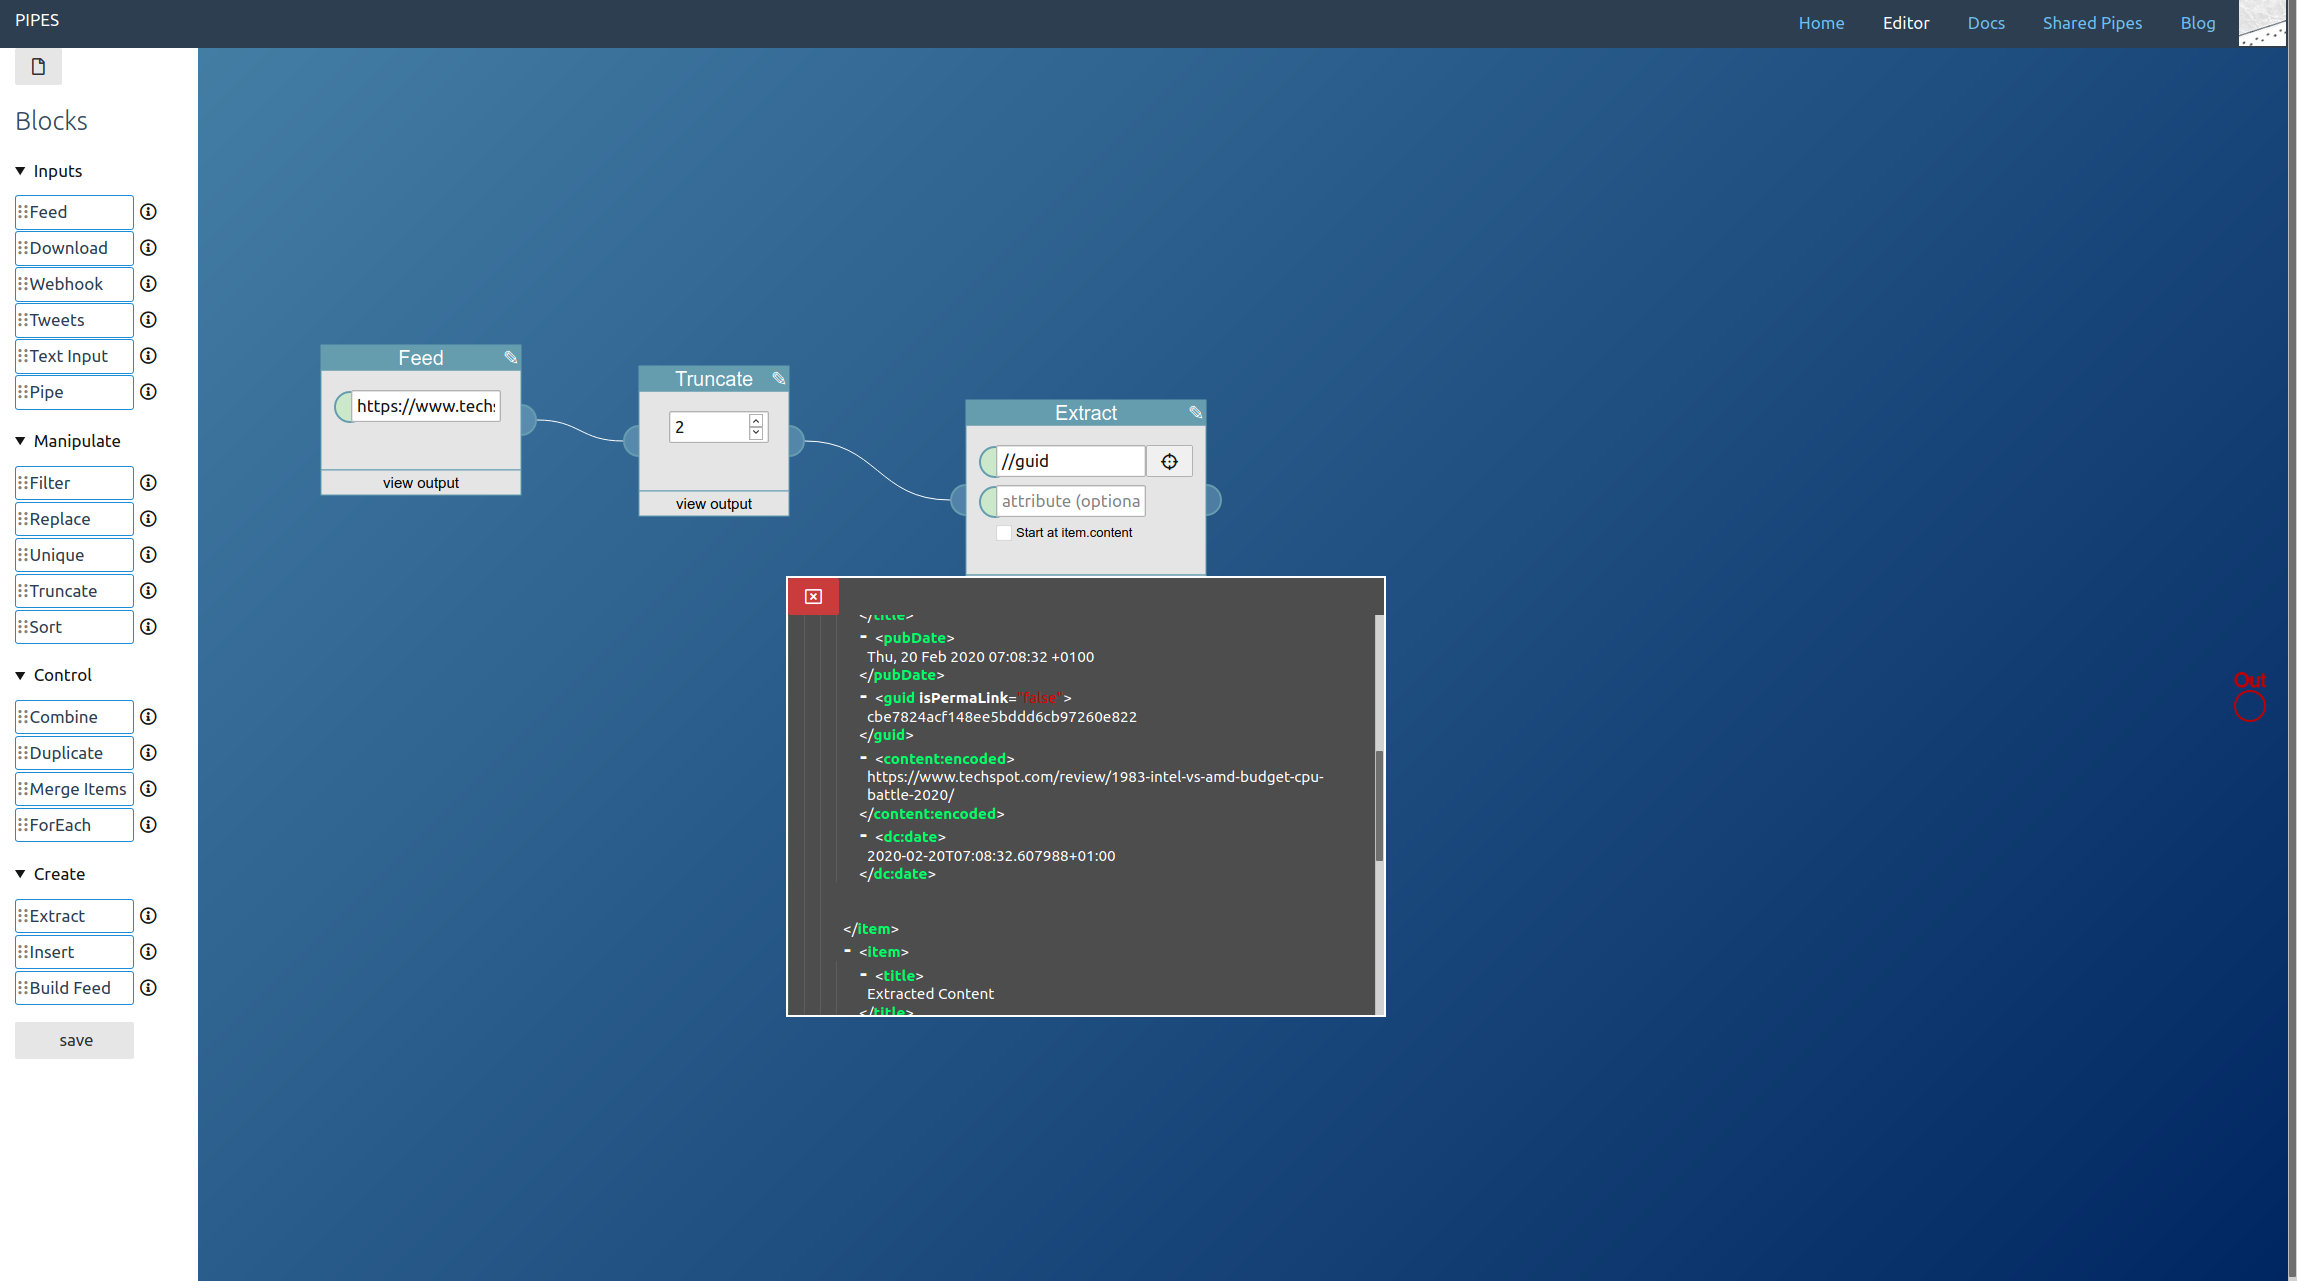
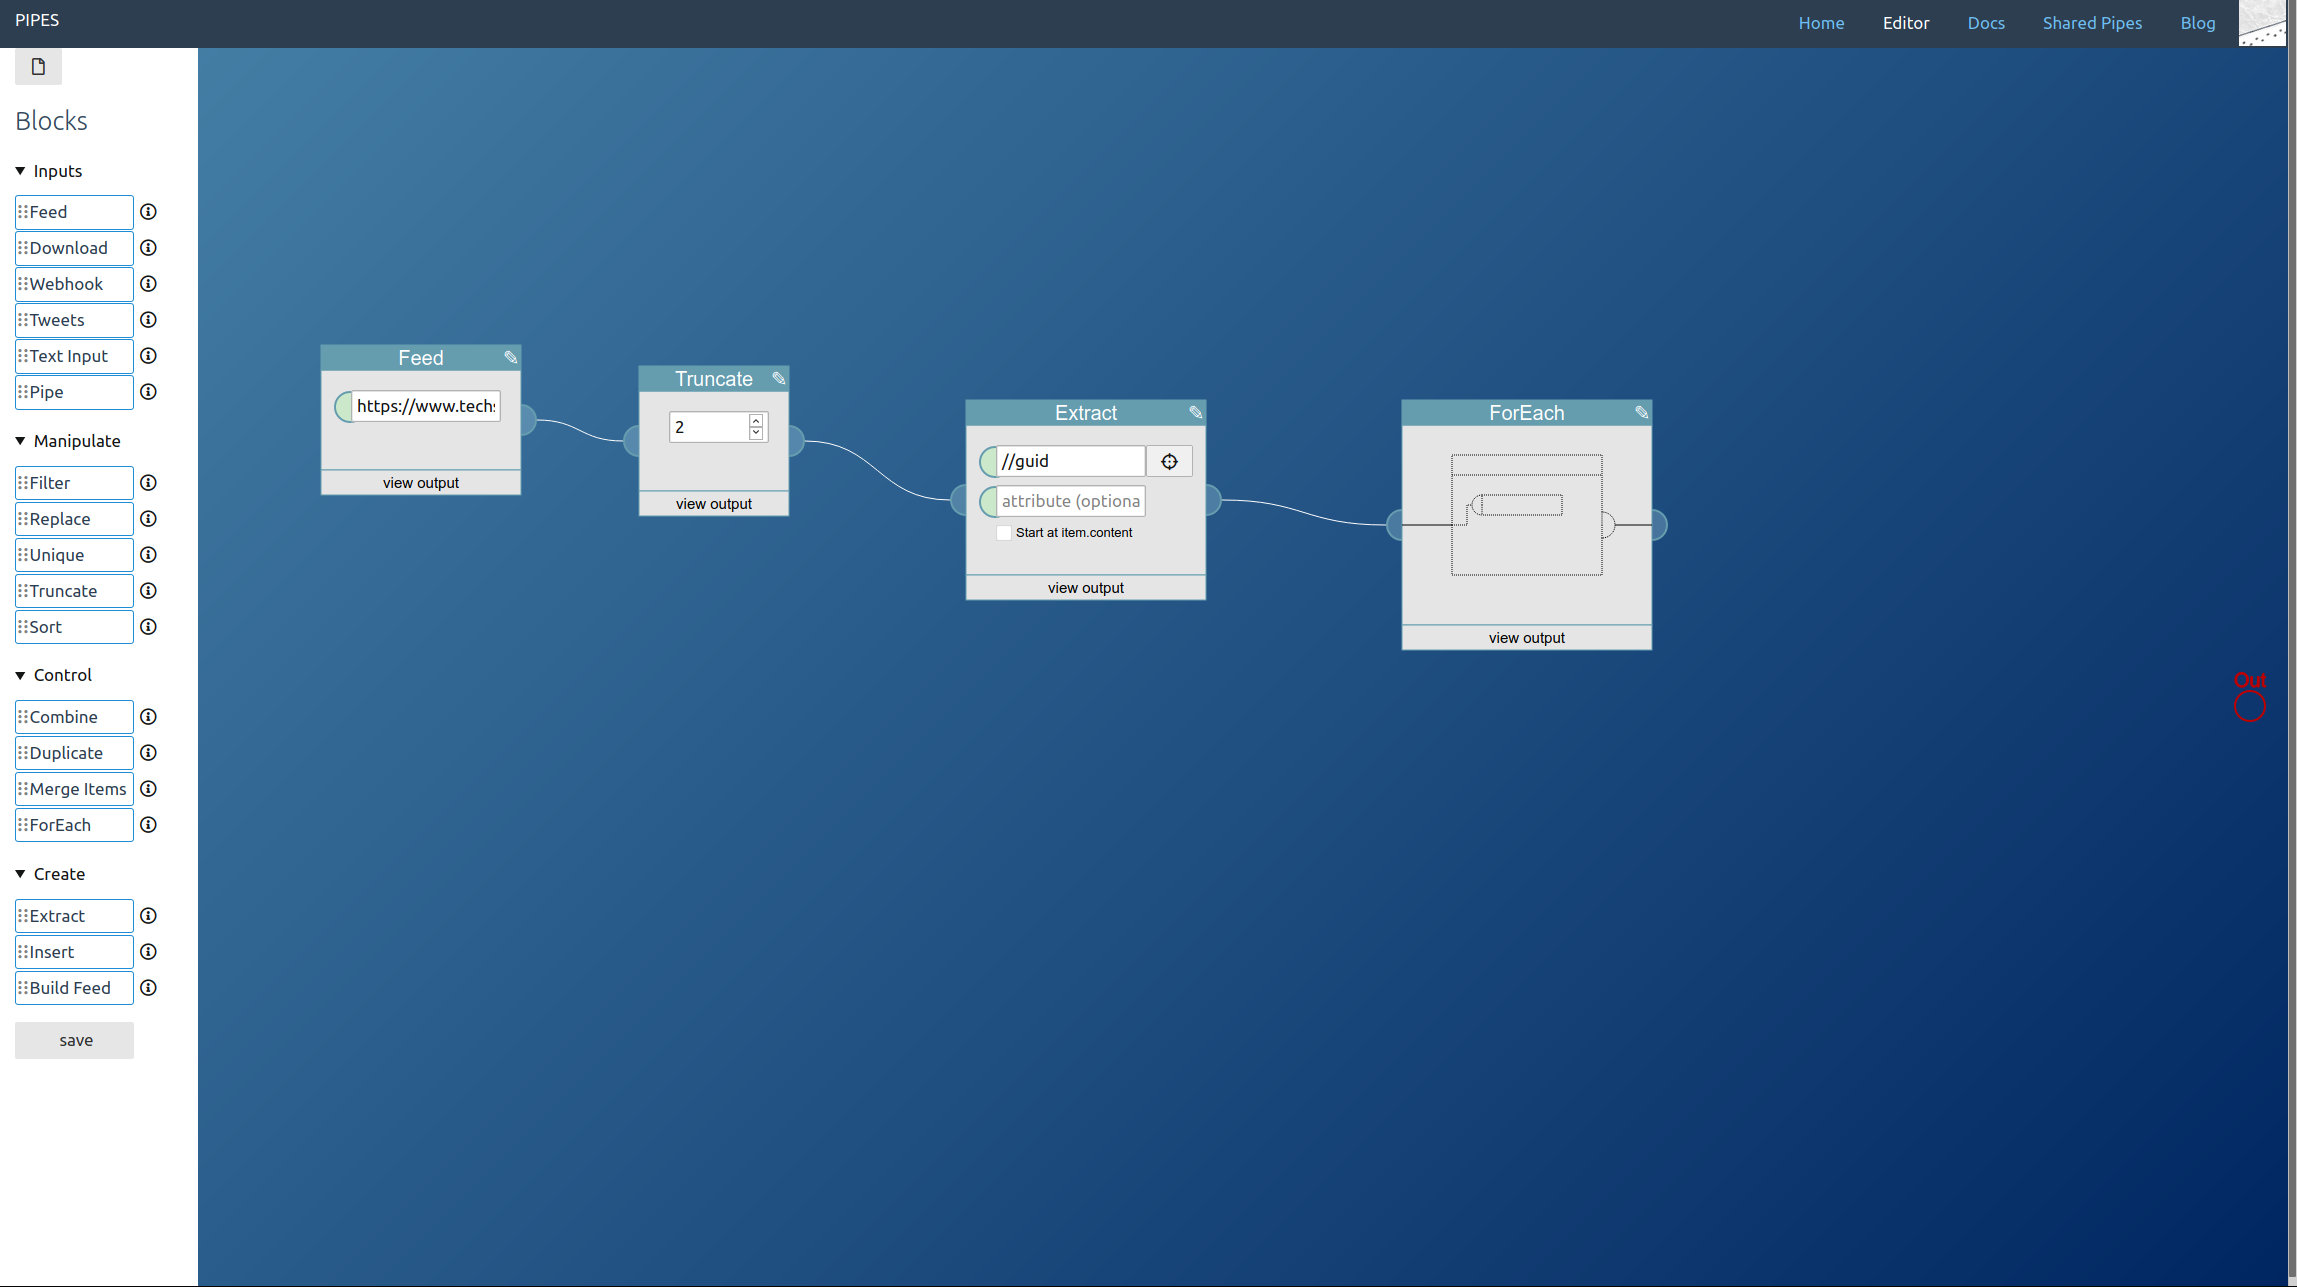
    First drag a feed block into the editor area. Enter the feed url. In this example, we will also truncate it to get only the two newest feed items: If we already crawl the site it is only fair to keep the load low. But that’s optional.

    /blog/upload/fullfeed_truncated.jpg

    From the shortened feed we need the links to the articles. This time I decided to take them from the guid element, the link element would have worked as well. Use an extract block to get the text stored in those elements:

    /blog/upload/fullfeed_extract_link.jpg

    Next comes downloading these articles. But since we have multiple links, we need a foreach block:

    /blog/upload/fullfeed_foreach.jpg

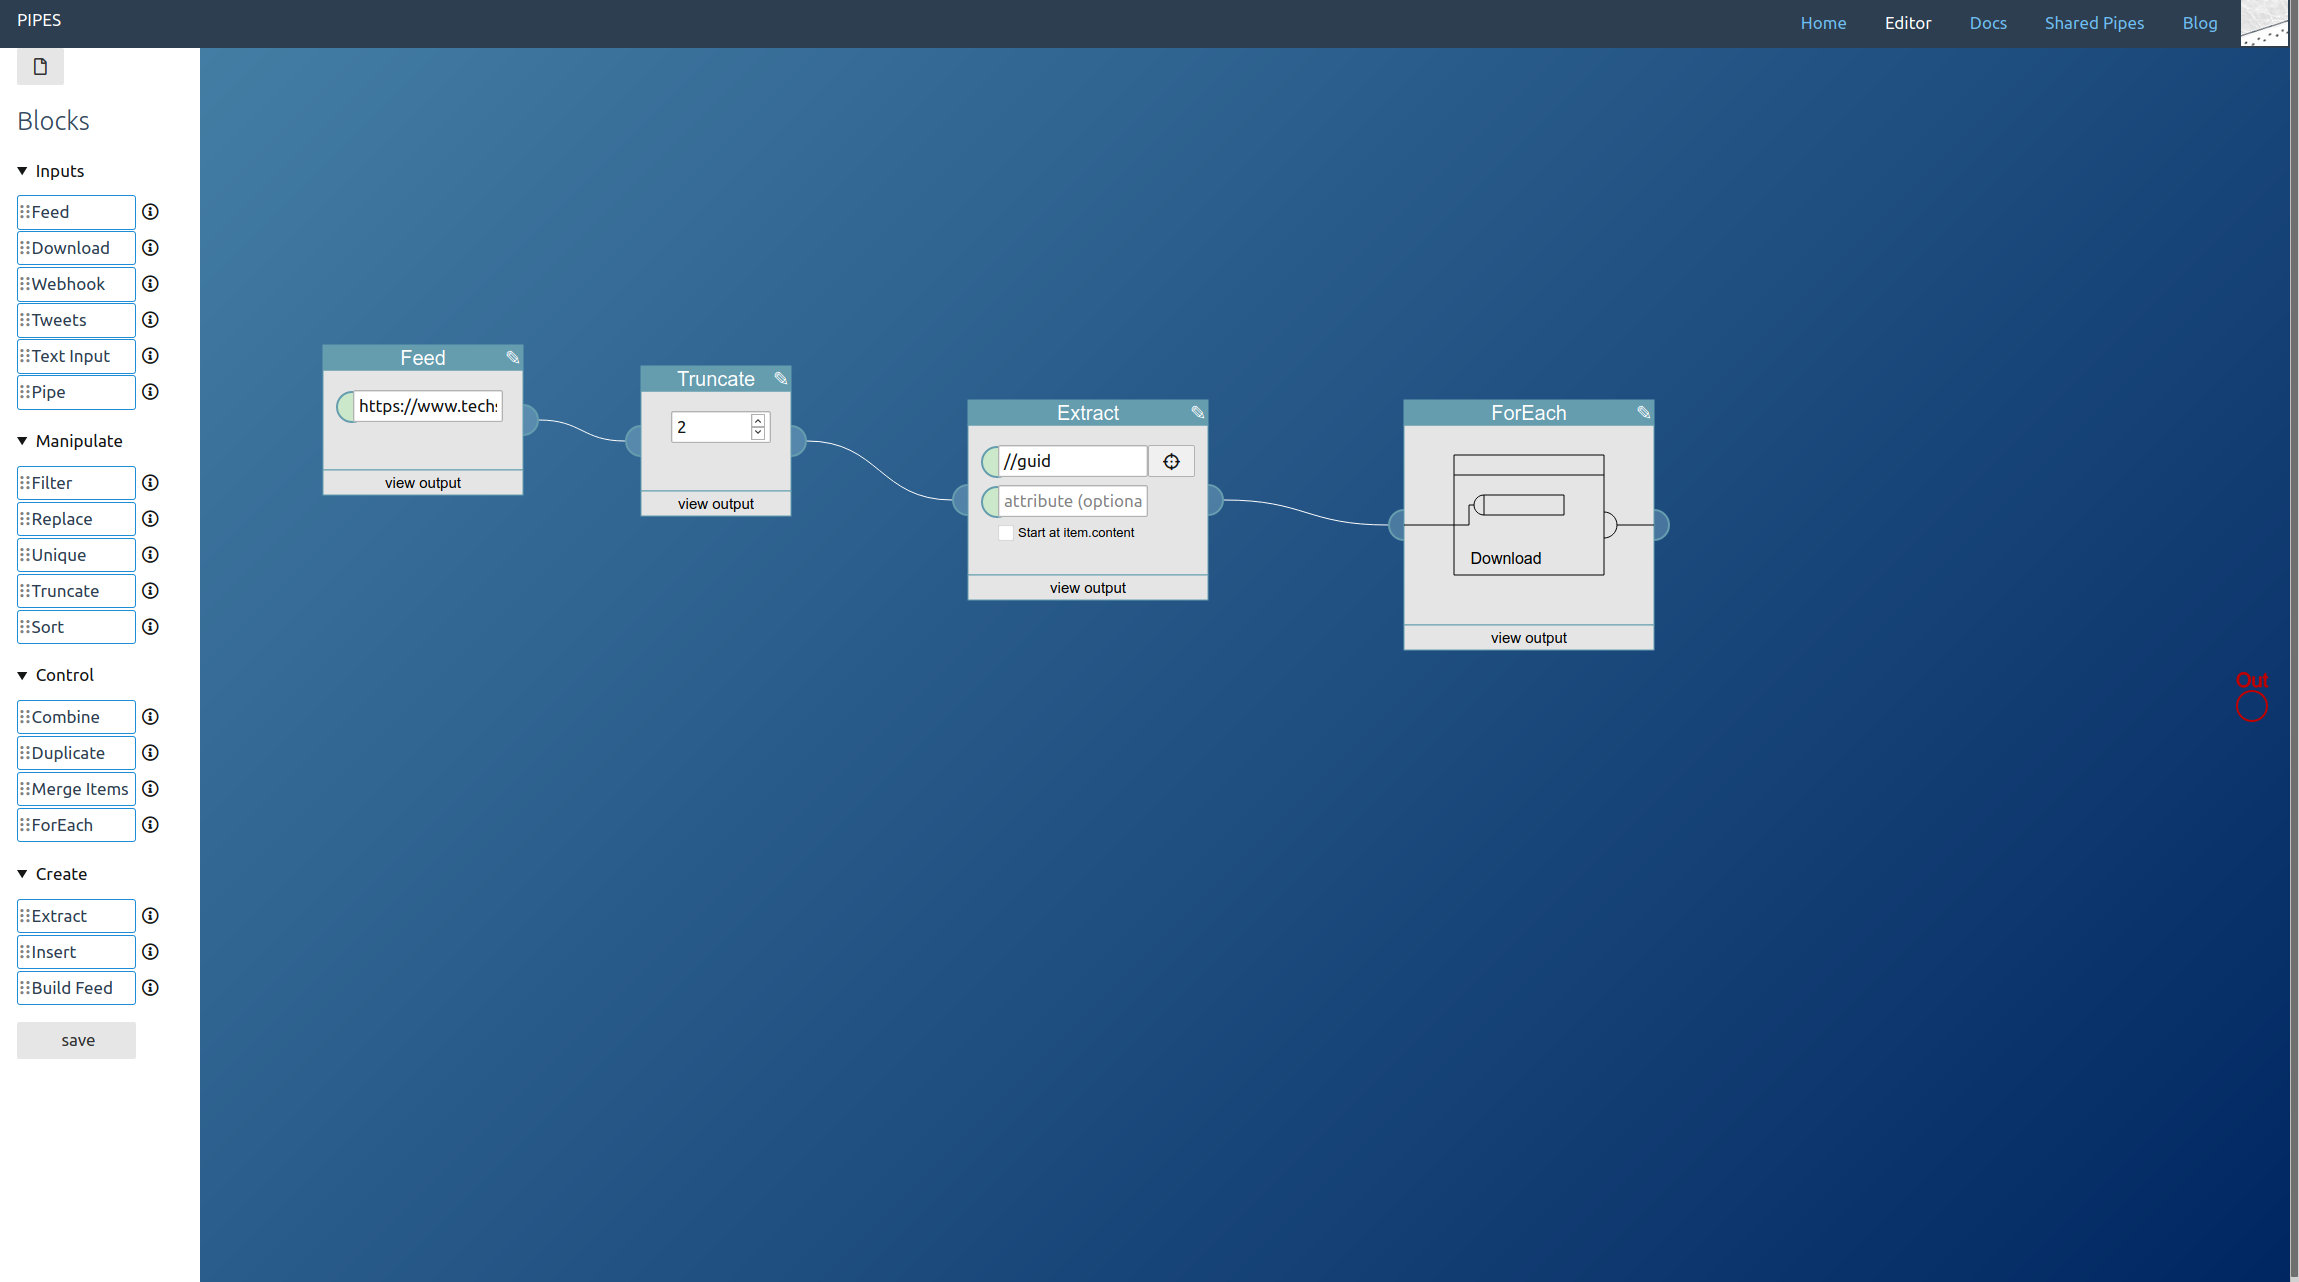
    Place it, then add a download block next to it, and then drag the download block onto the foreach block (the foreach block should turn yellow when hovering it with the download block). This means: For each url given to this block, download it:

    /blog/upload/fullfeed_foreach_download.jpg

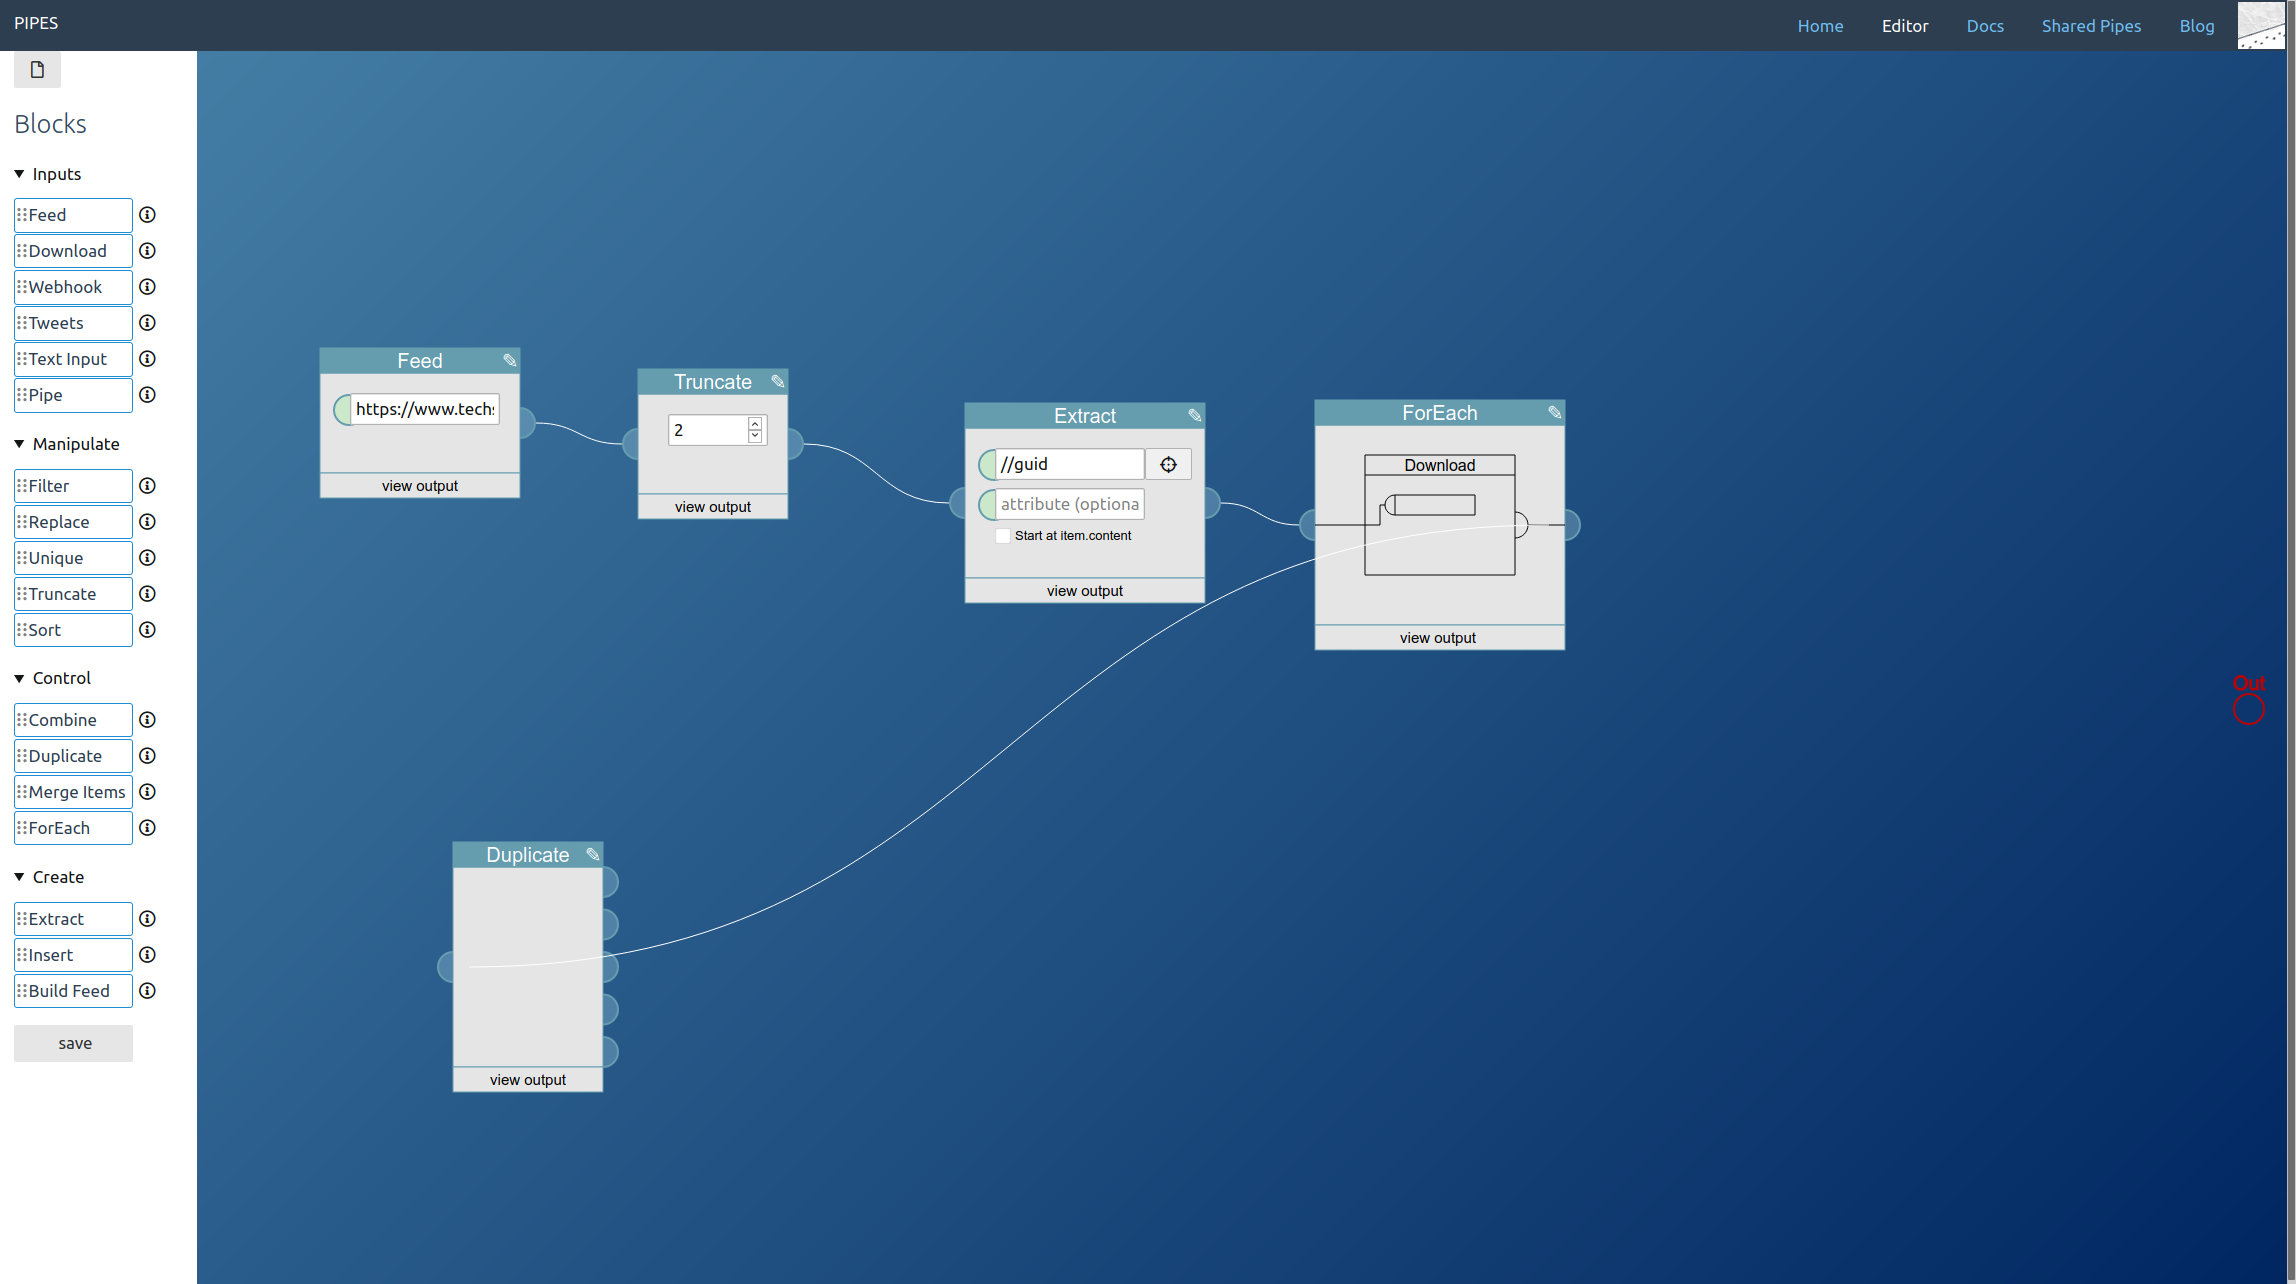
    Since we need multiple elements from the downloaded articles, at this point duplicate the output of the foreach block with a duplicate block:

    /blog/upload/fullfeed_foreach_download_duplicated.jpg

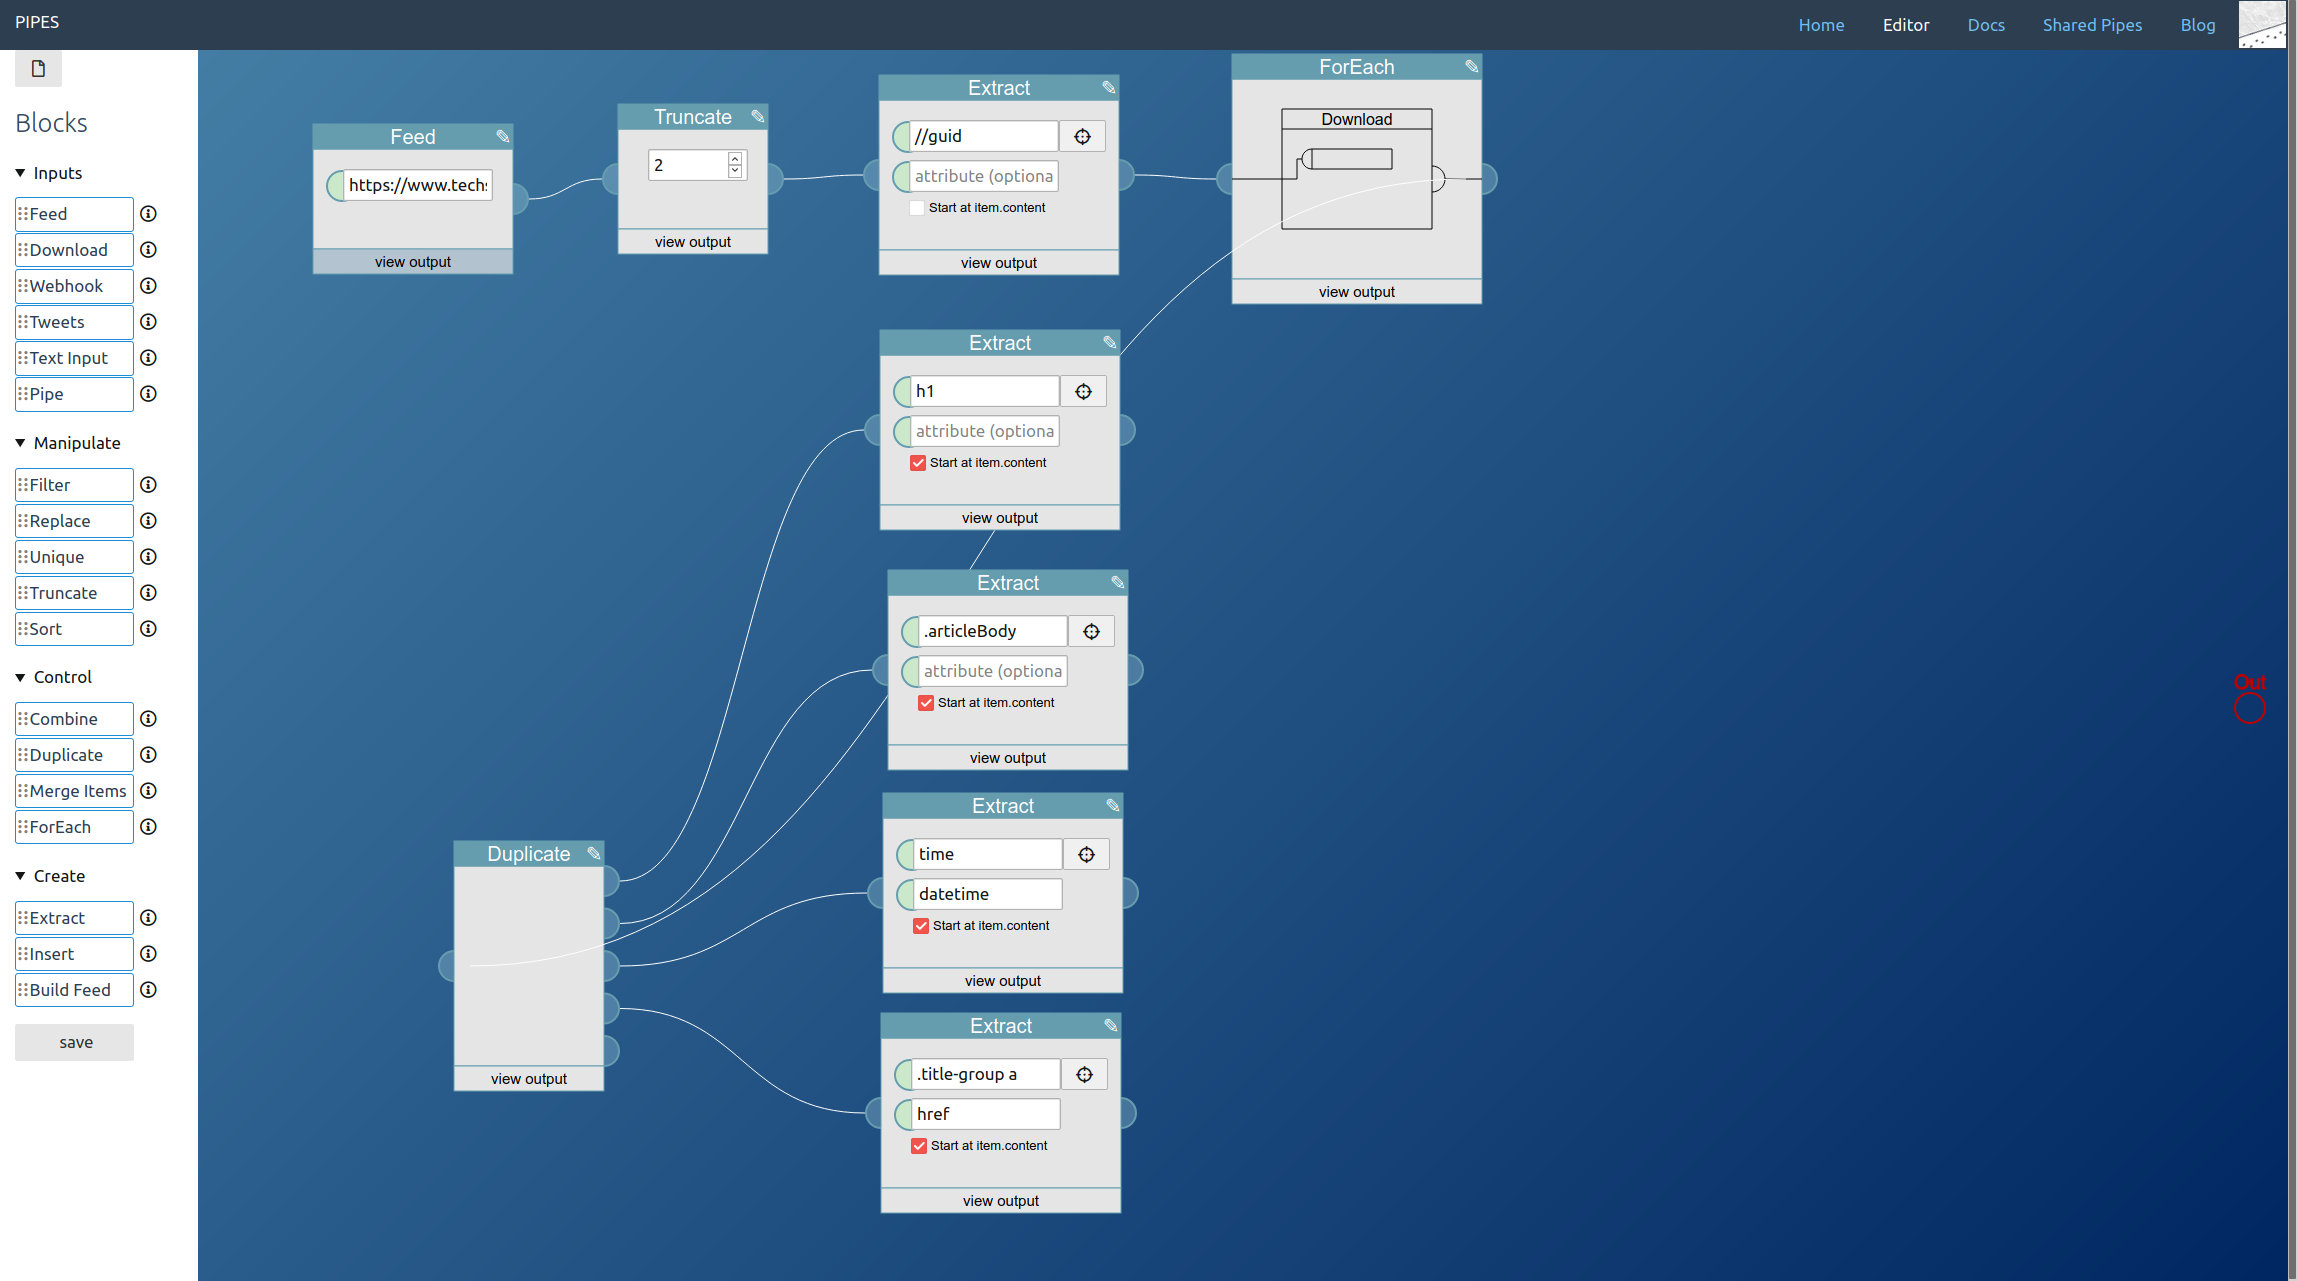
    The next step is extracting the elements we need for the full text feed from the article pages. Again it’s the extract block that does the work, and which selectors to pick depends on the HTML structure of site and will vary a lot. But this time, unlike when using a download block on its own, the downloaded site is wrapped inside items of an RSS feed, that’s the output of the foreach block. Thus activate the option Start at item.content on each extract block when entering the CSS selectors. For the example site they look like this:

    /blog/upload/fullfeed_full_extract.jpg

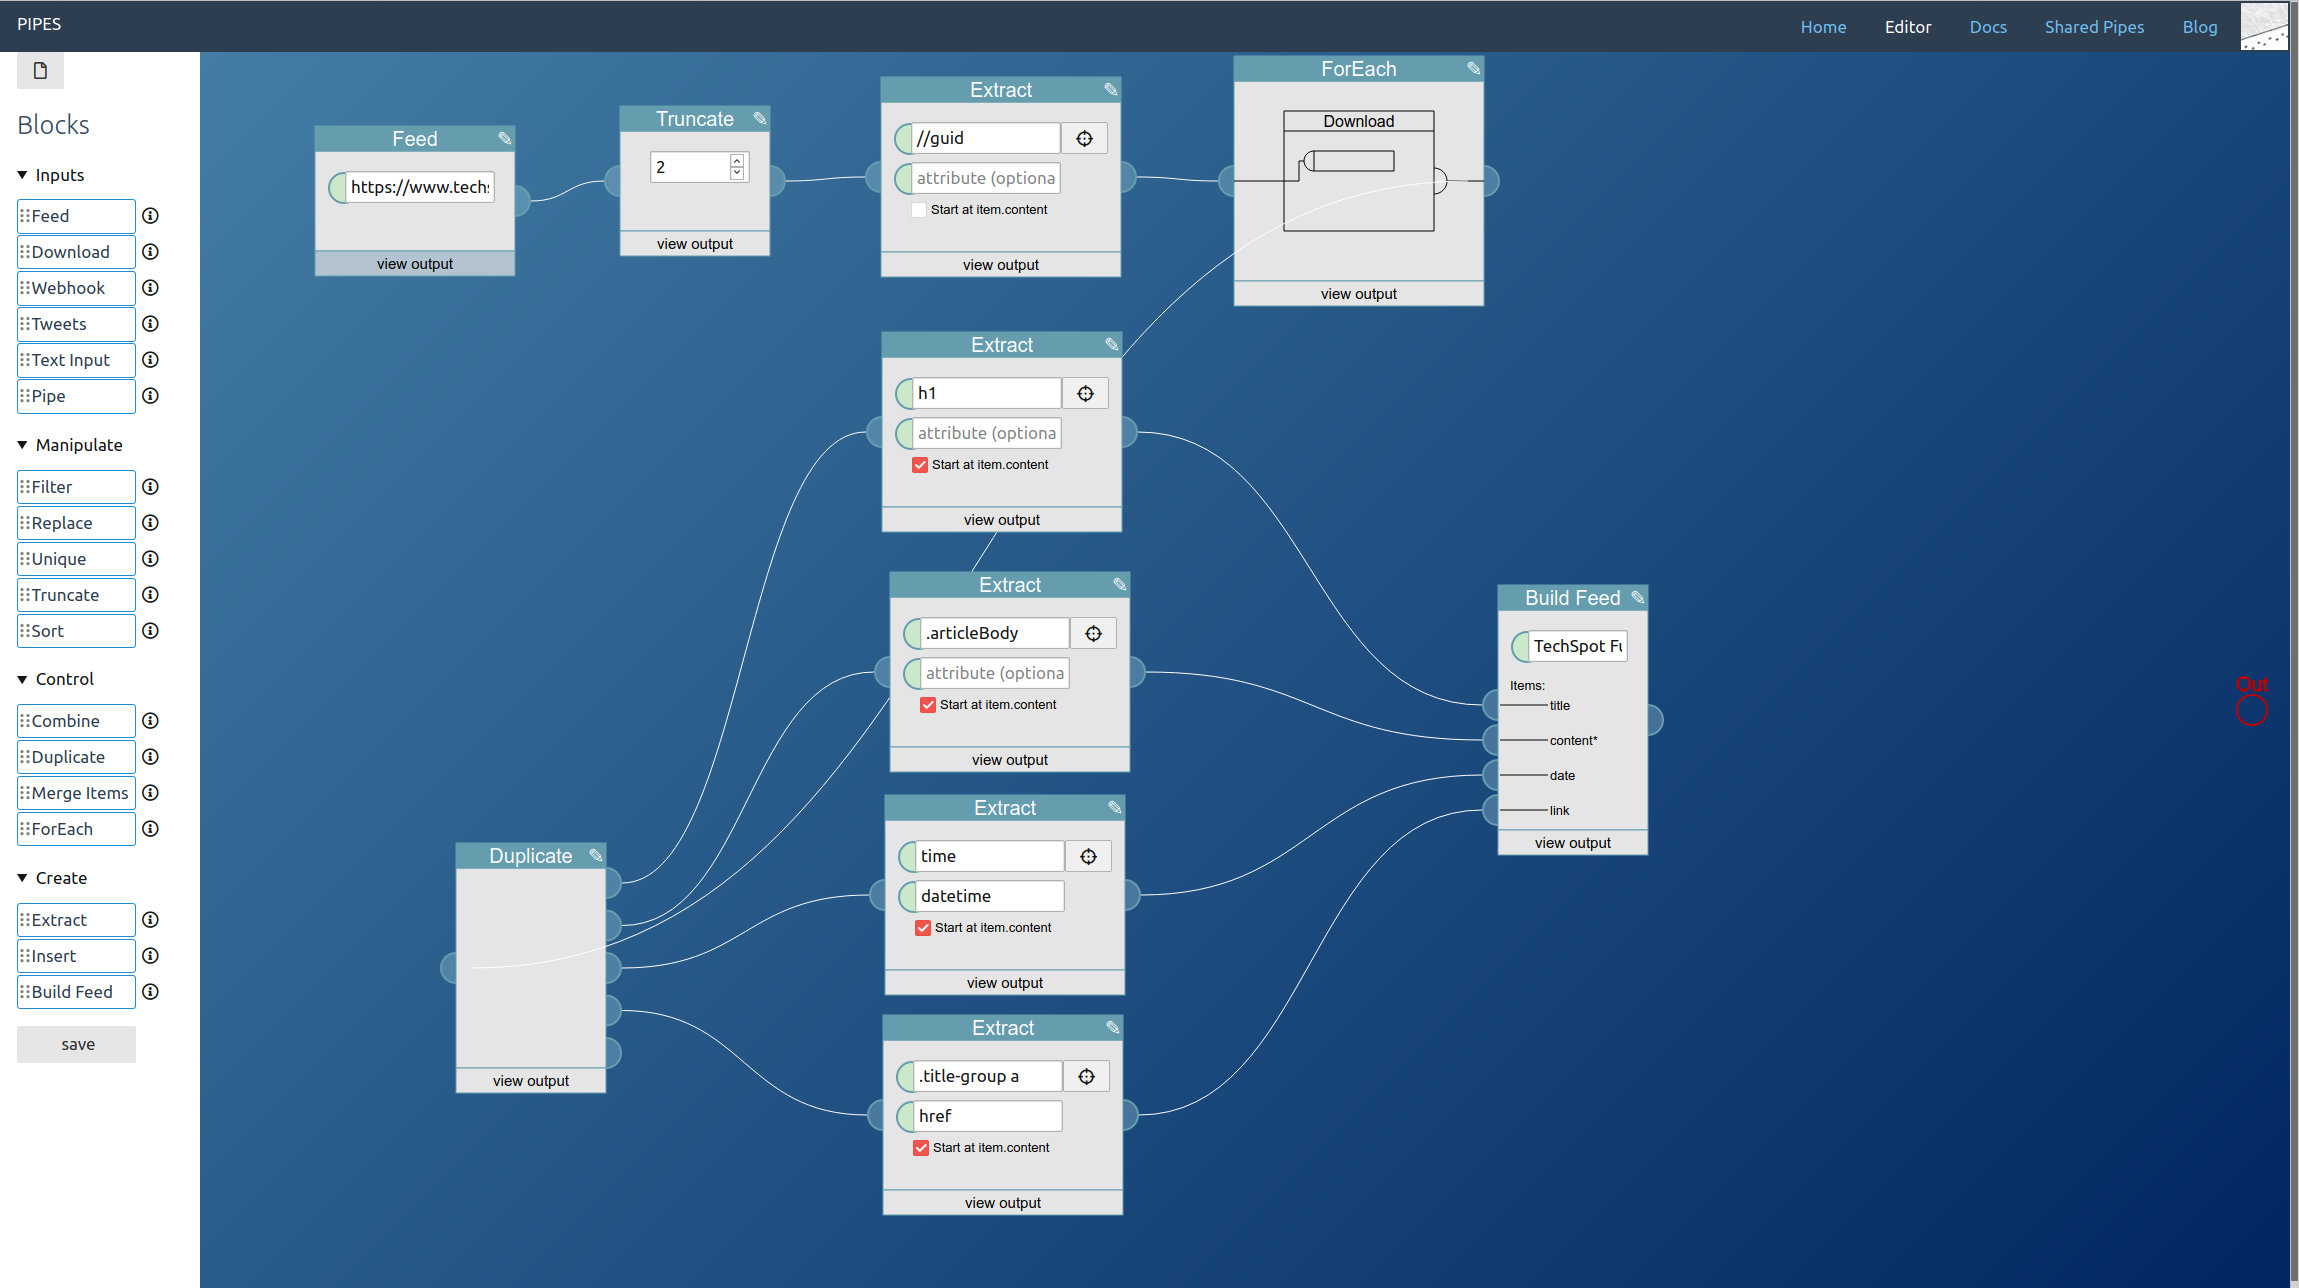
    A feed builder block is the only regular part of the pipe missing. Place it near the extract blocks and connect them together, set a title and connect its output to the pipe output at the right (which I forgot to do before taking this screenshot):

    /blog/upload/fullfeed_createfeed.jpg

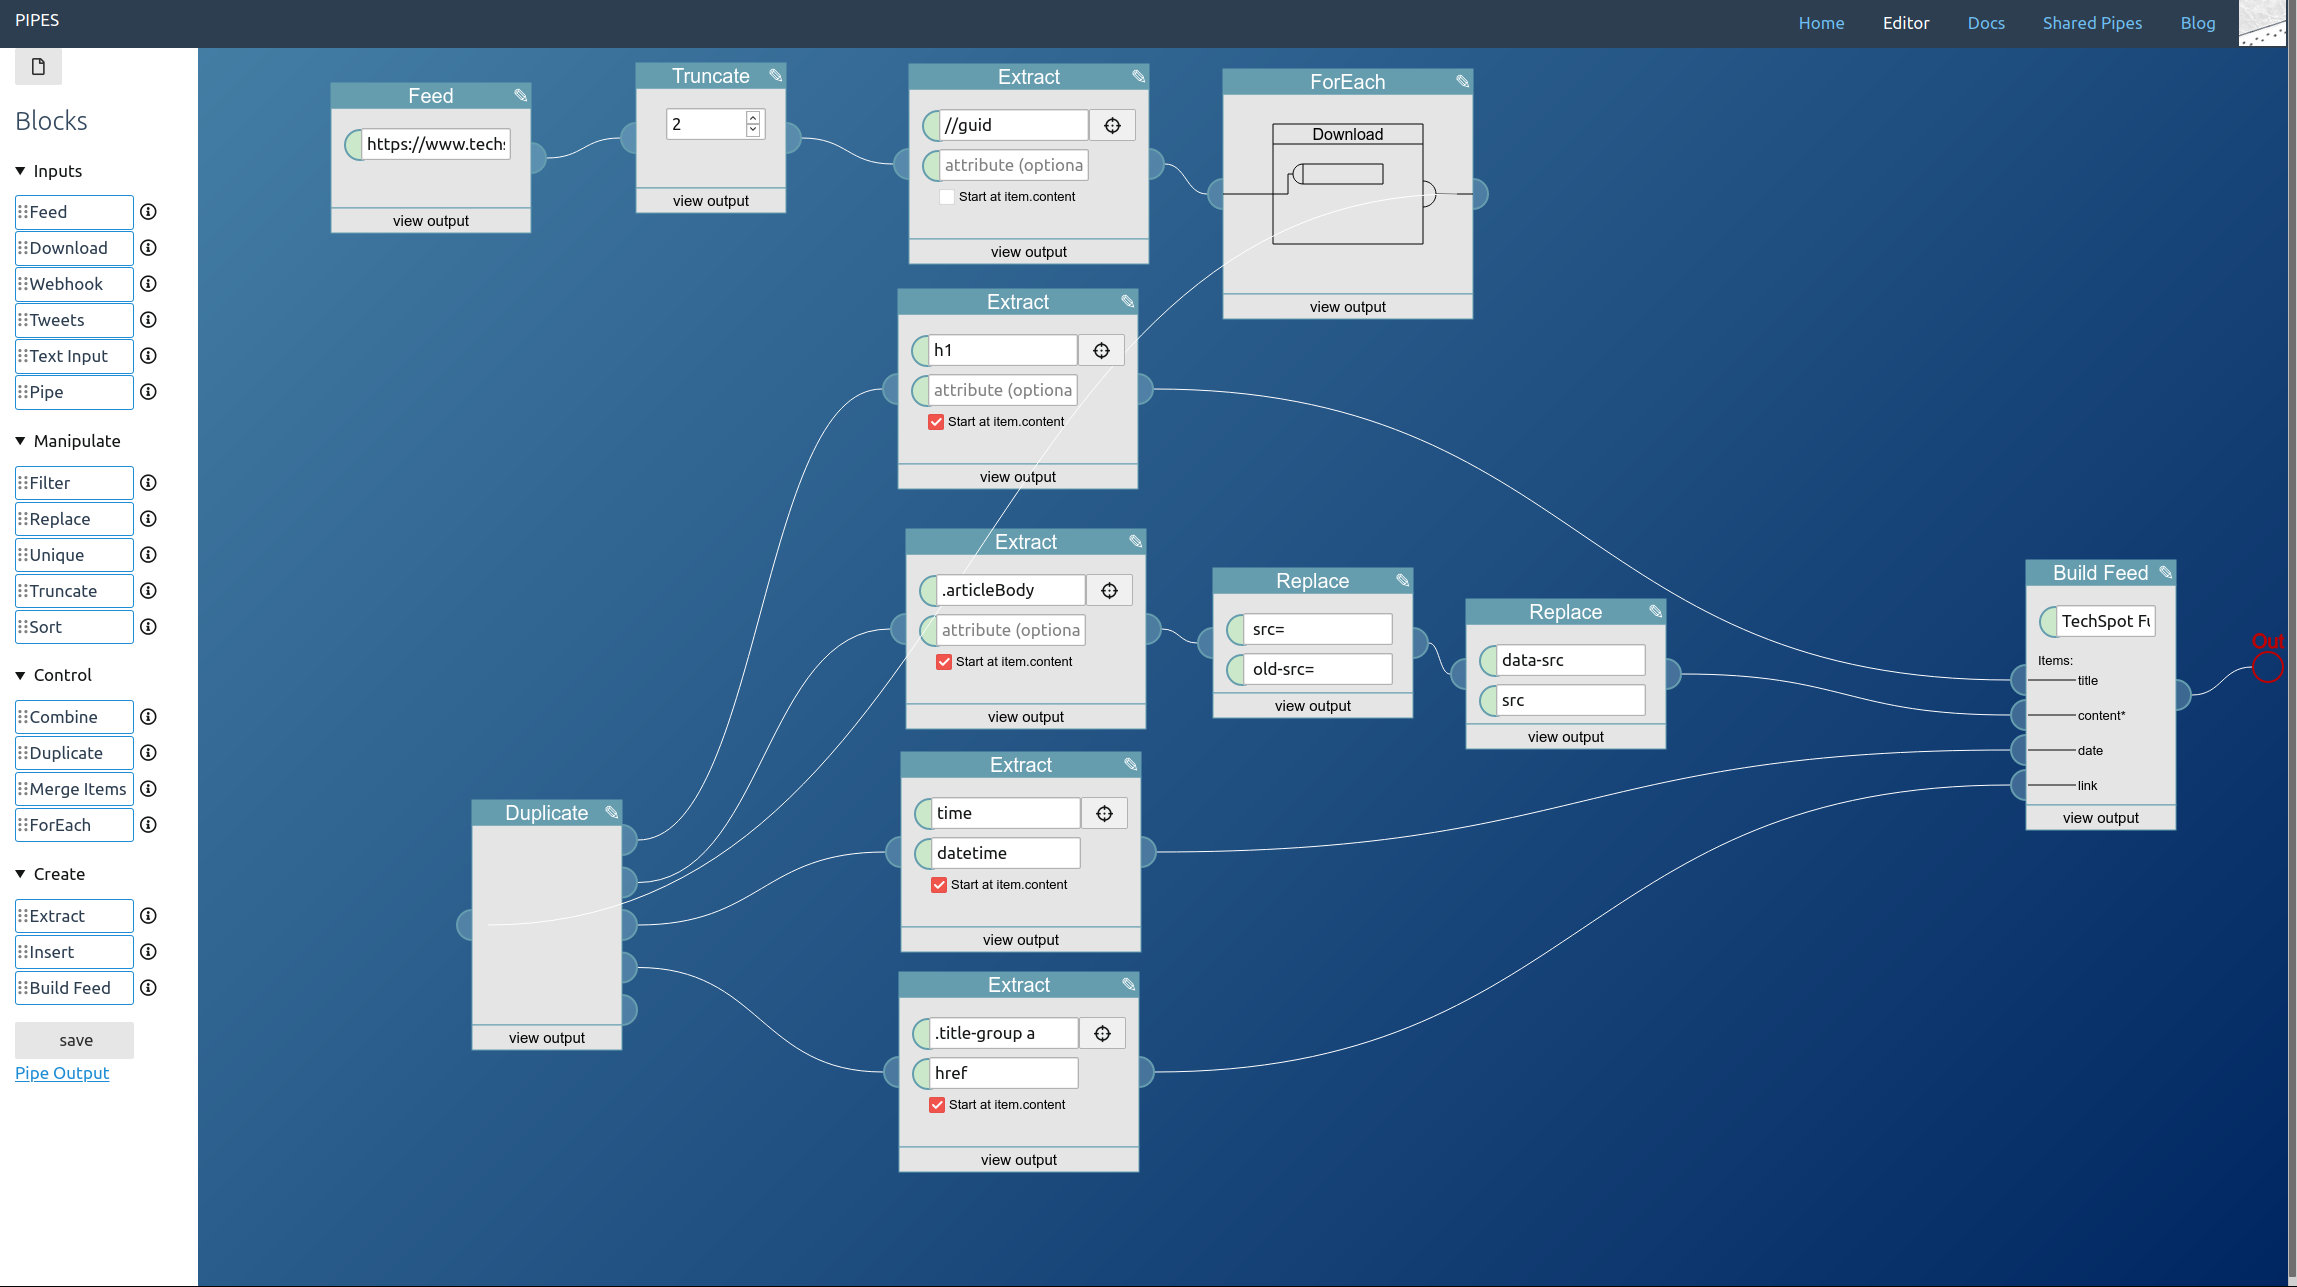
    One last thing is not perfect yet: images. Some sites like the example site load them via Javascript only when they become visible. That will not work in a feed since most readers will not execute the Javascript, even if it were inlined into the article text. But we can fix that: The real image link is normally stored in a data element, here it is data-src. With one replace block remove the current src that just has a placeholder, with a second transform data-src to src:

    /blog/upload/fullfeed_imagefix.jpg

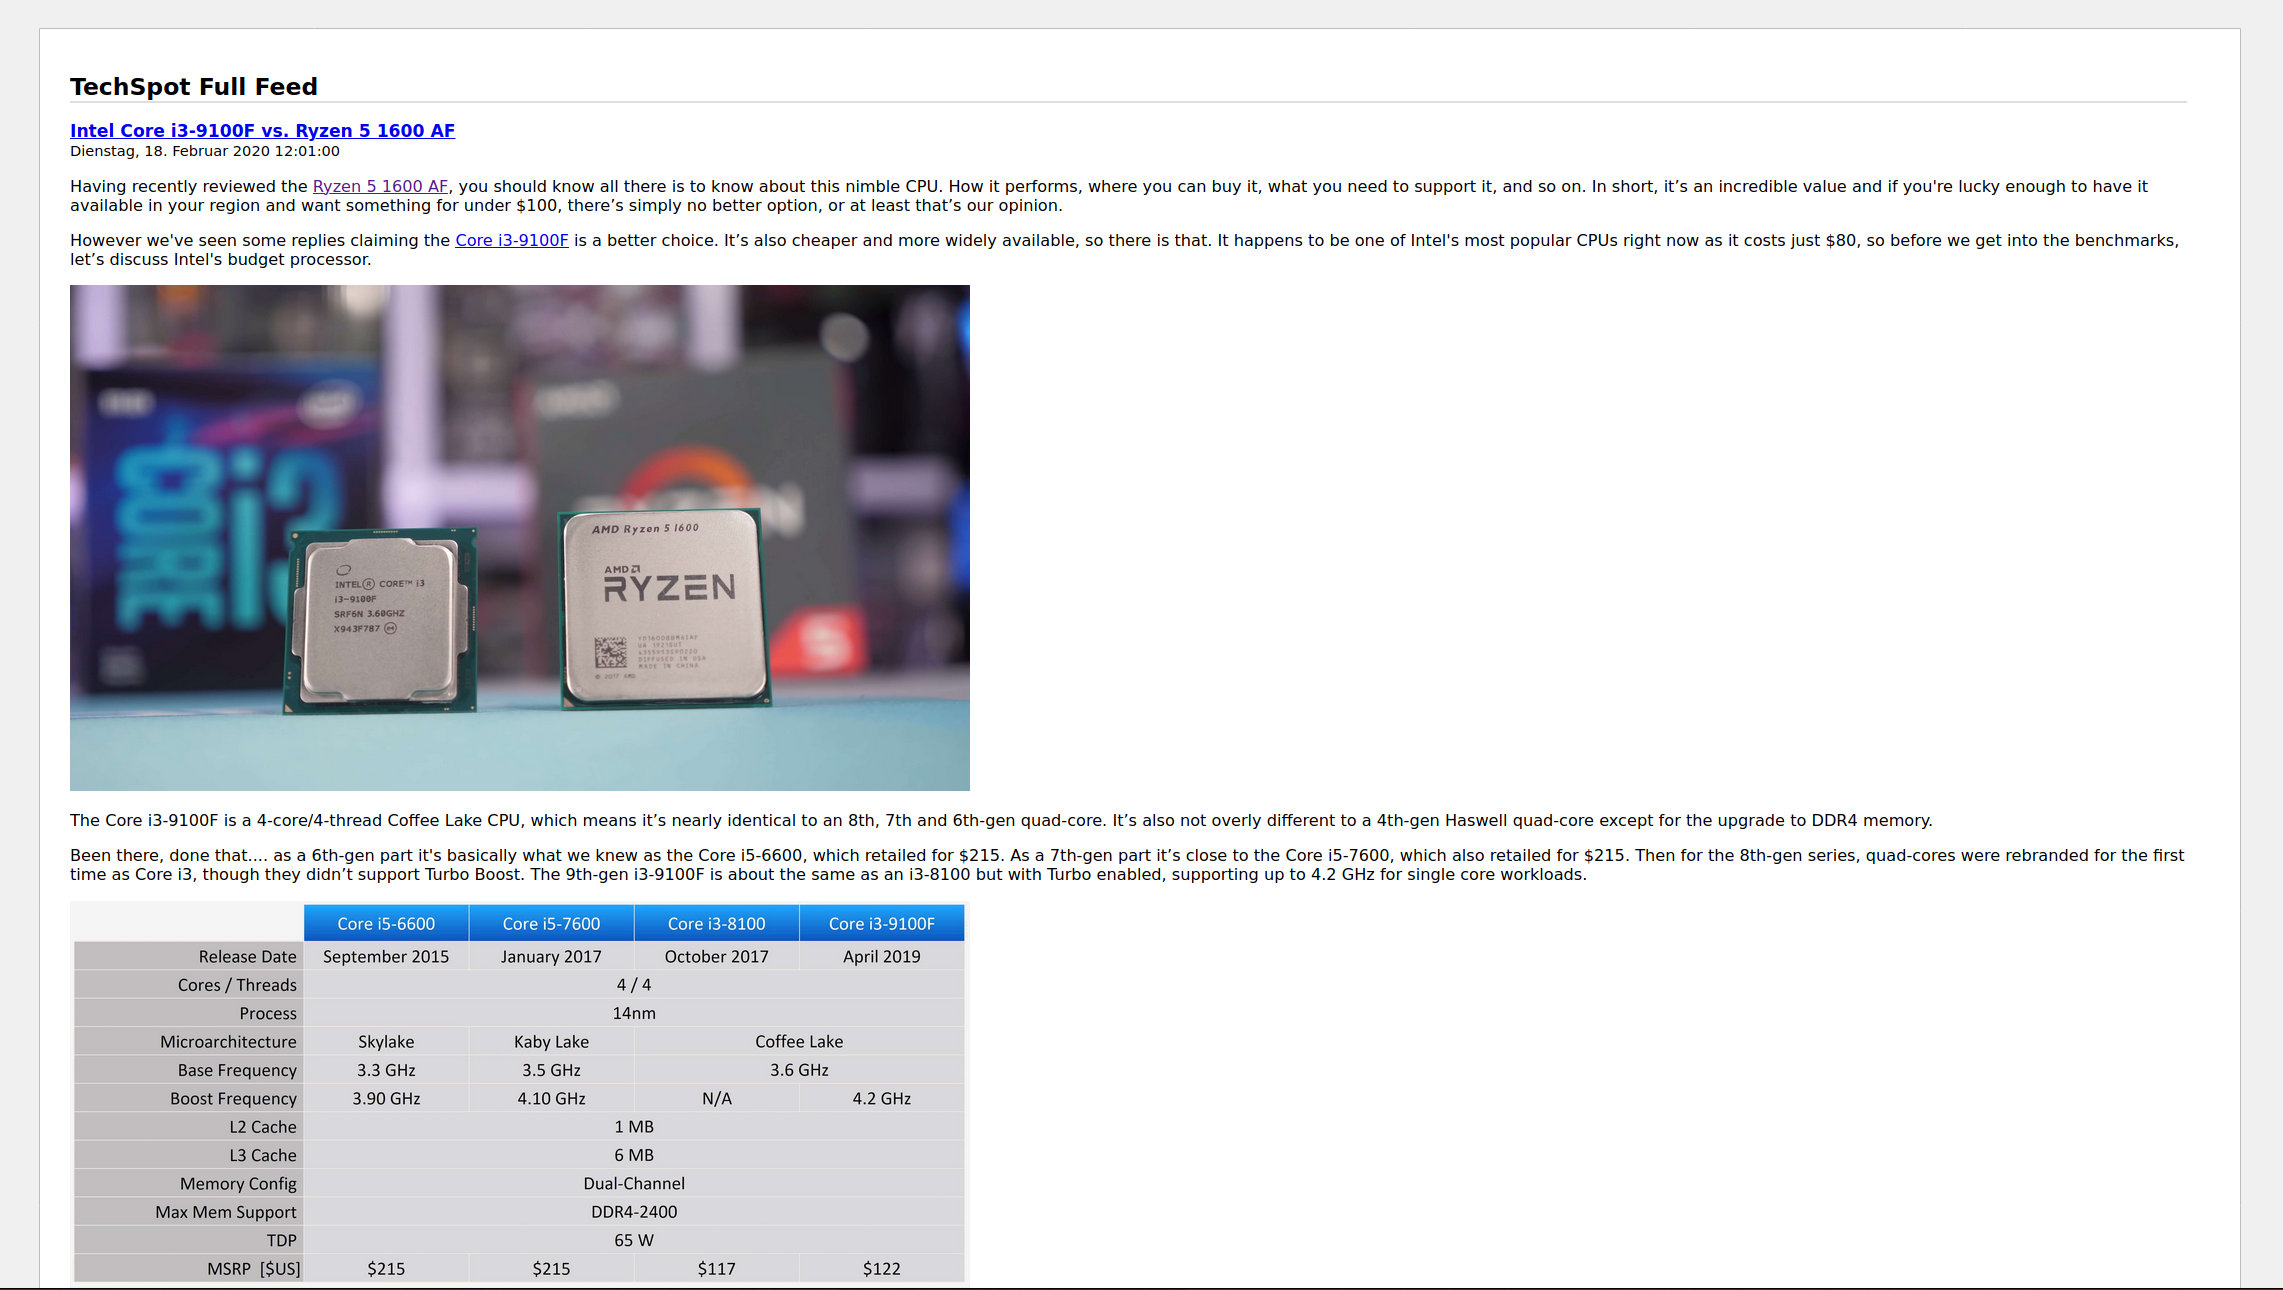
    Now the images load. The whole feed looks good:

    /blog/upload/fullfeed_preview.jpg

    And that’s everything you need to create a full text RSS feed when the site you want to follow just delivers a shortened RSS feed.

    You can see the pipe I created for this article here. You can fork it to use it as a starting point to transform the shortened feed of your favorite site into a full text feed.

  3. How to create RSS feeds for sites that have none

    This is part 3 in a series explaining how pipes works and what you can do with it. Read part 1 to learn how to filter feeds and part 2 to see how to combine feeds.

    Now that we saw how to filter and combine feeds, what to do about sites that don’t provide an RSS feed? Is there no way to work with them in Pipes? There is, if it’s a HTML site. Pipes can download the site and extract the elements needed to create a proper RSS feed.

    Let’s start by creating a new pipe.

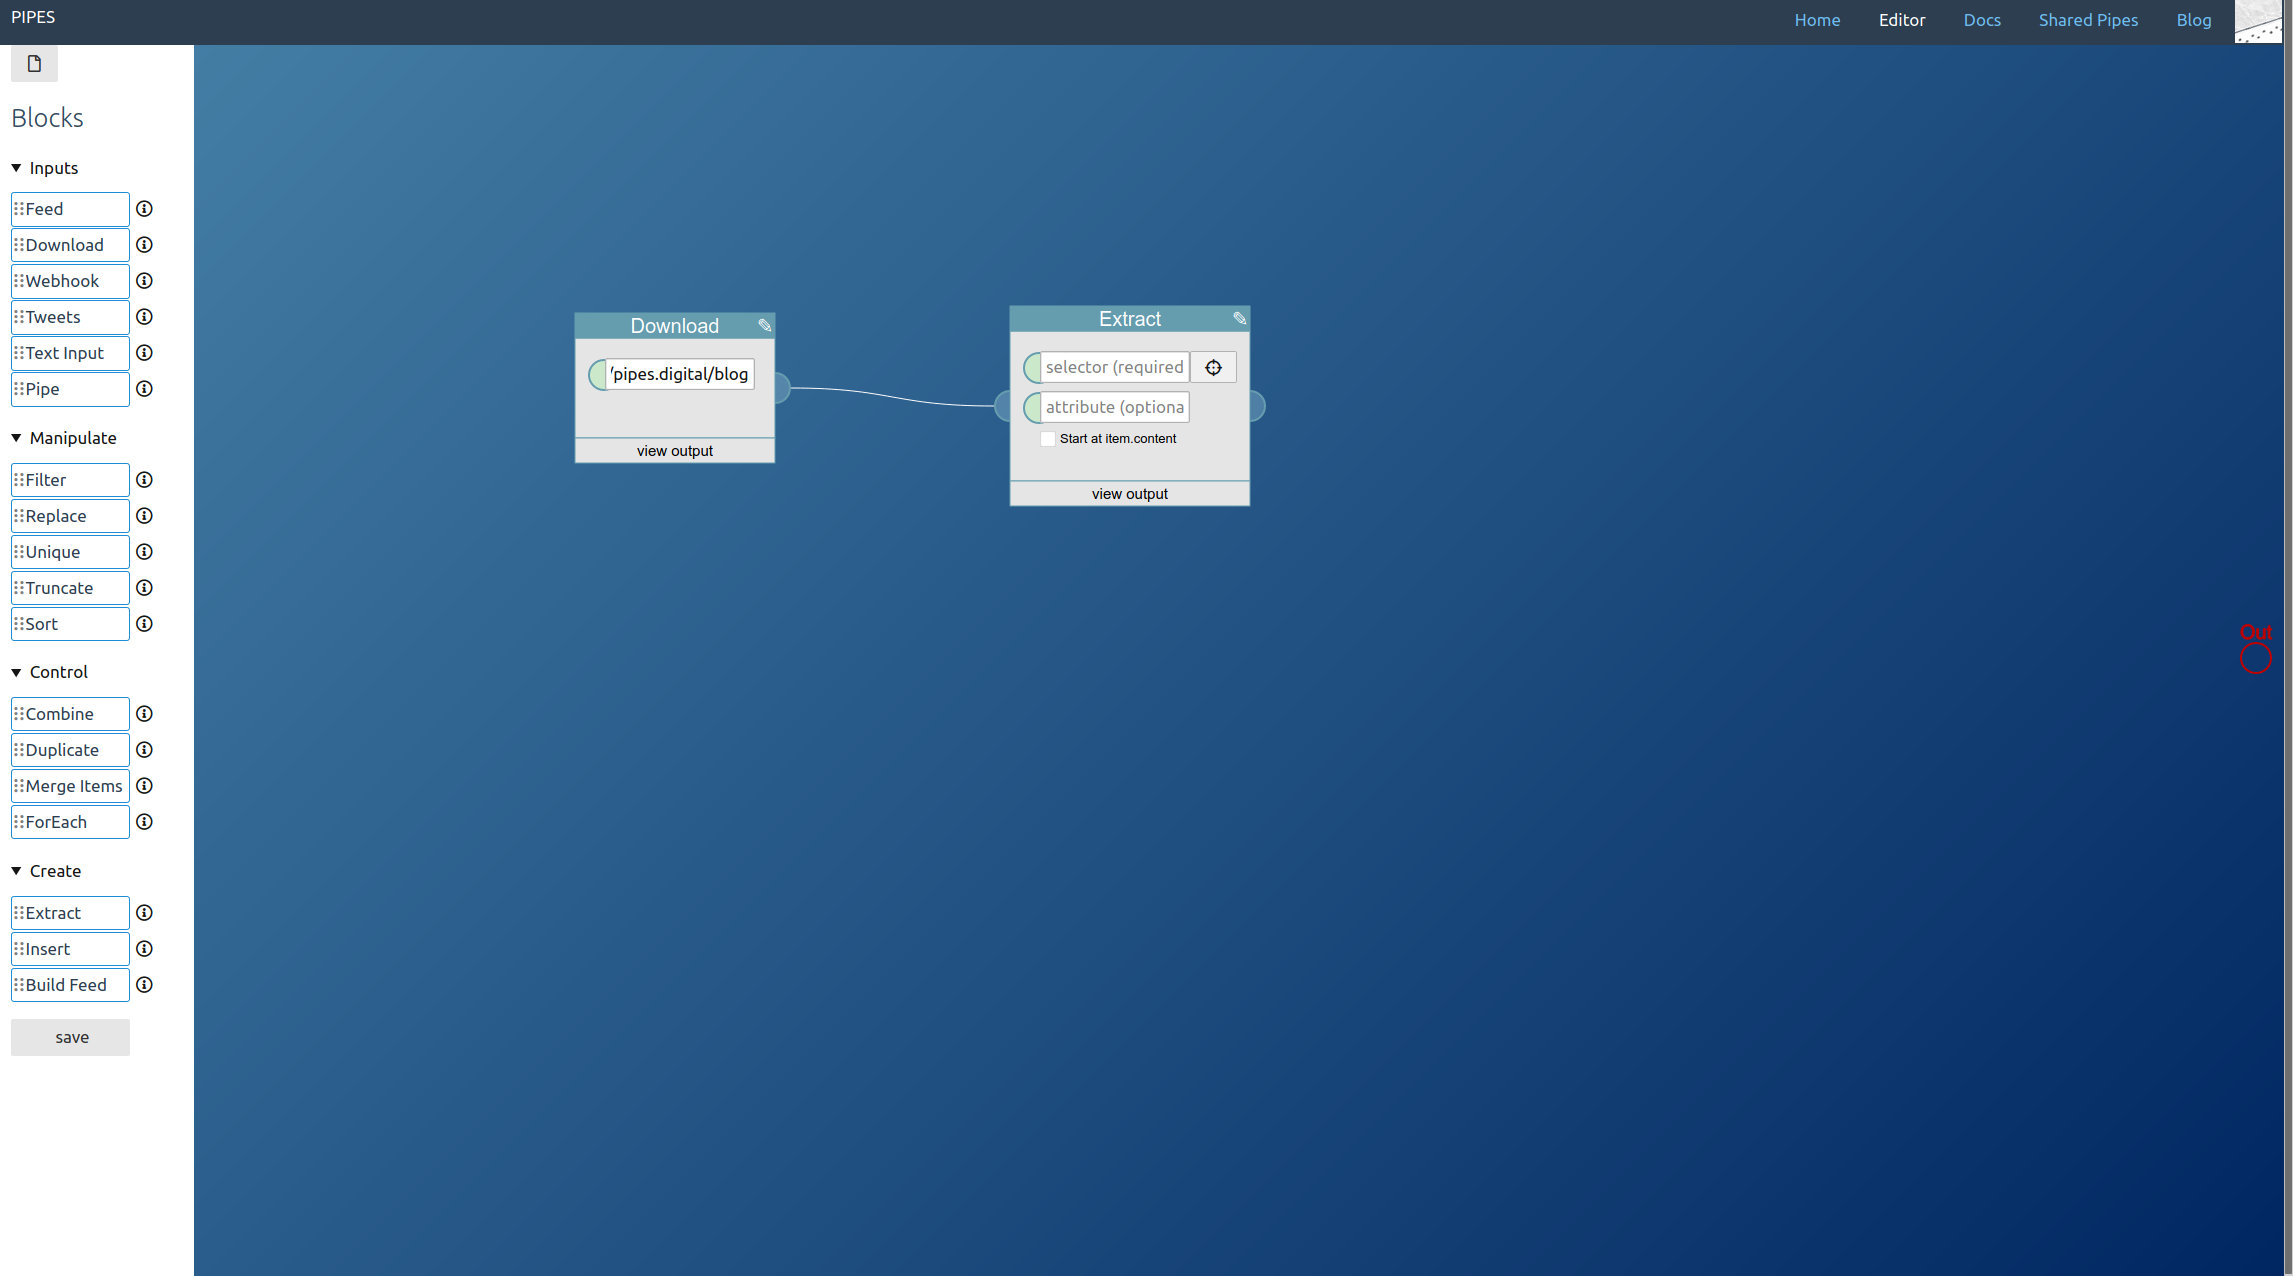
    First, drag a download block from the toolbar in the left in the editor area:

    /blog/upload/create_start.jpg

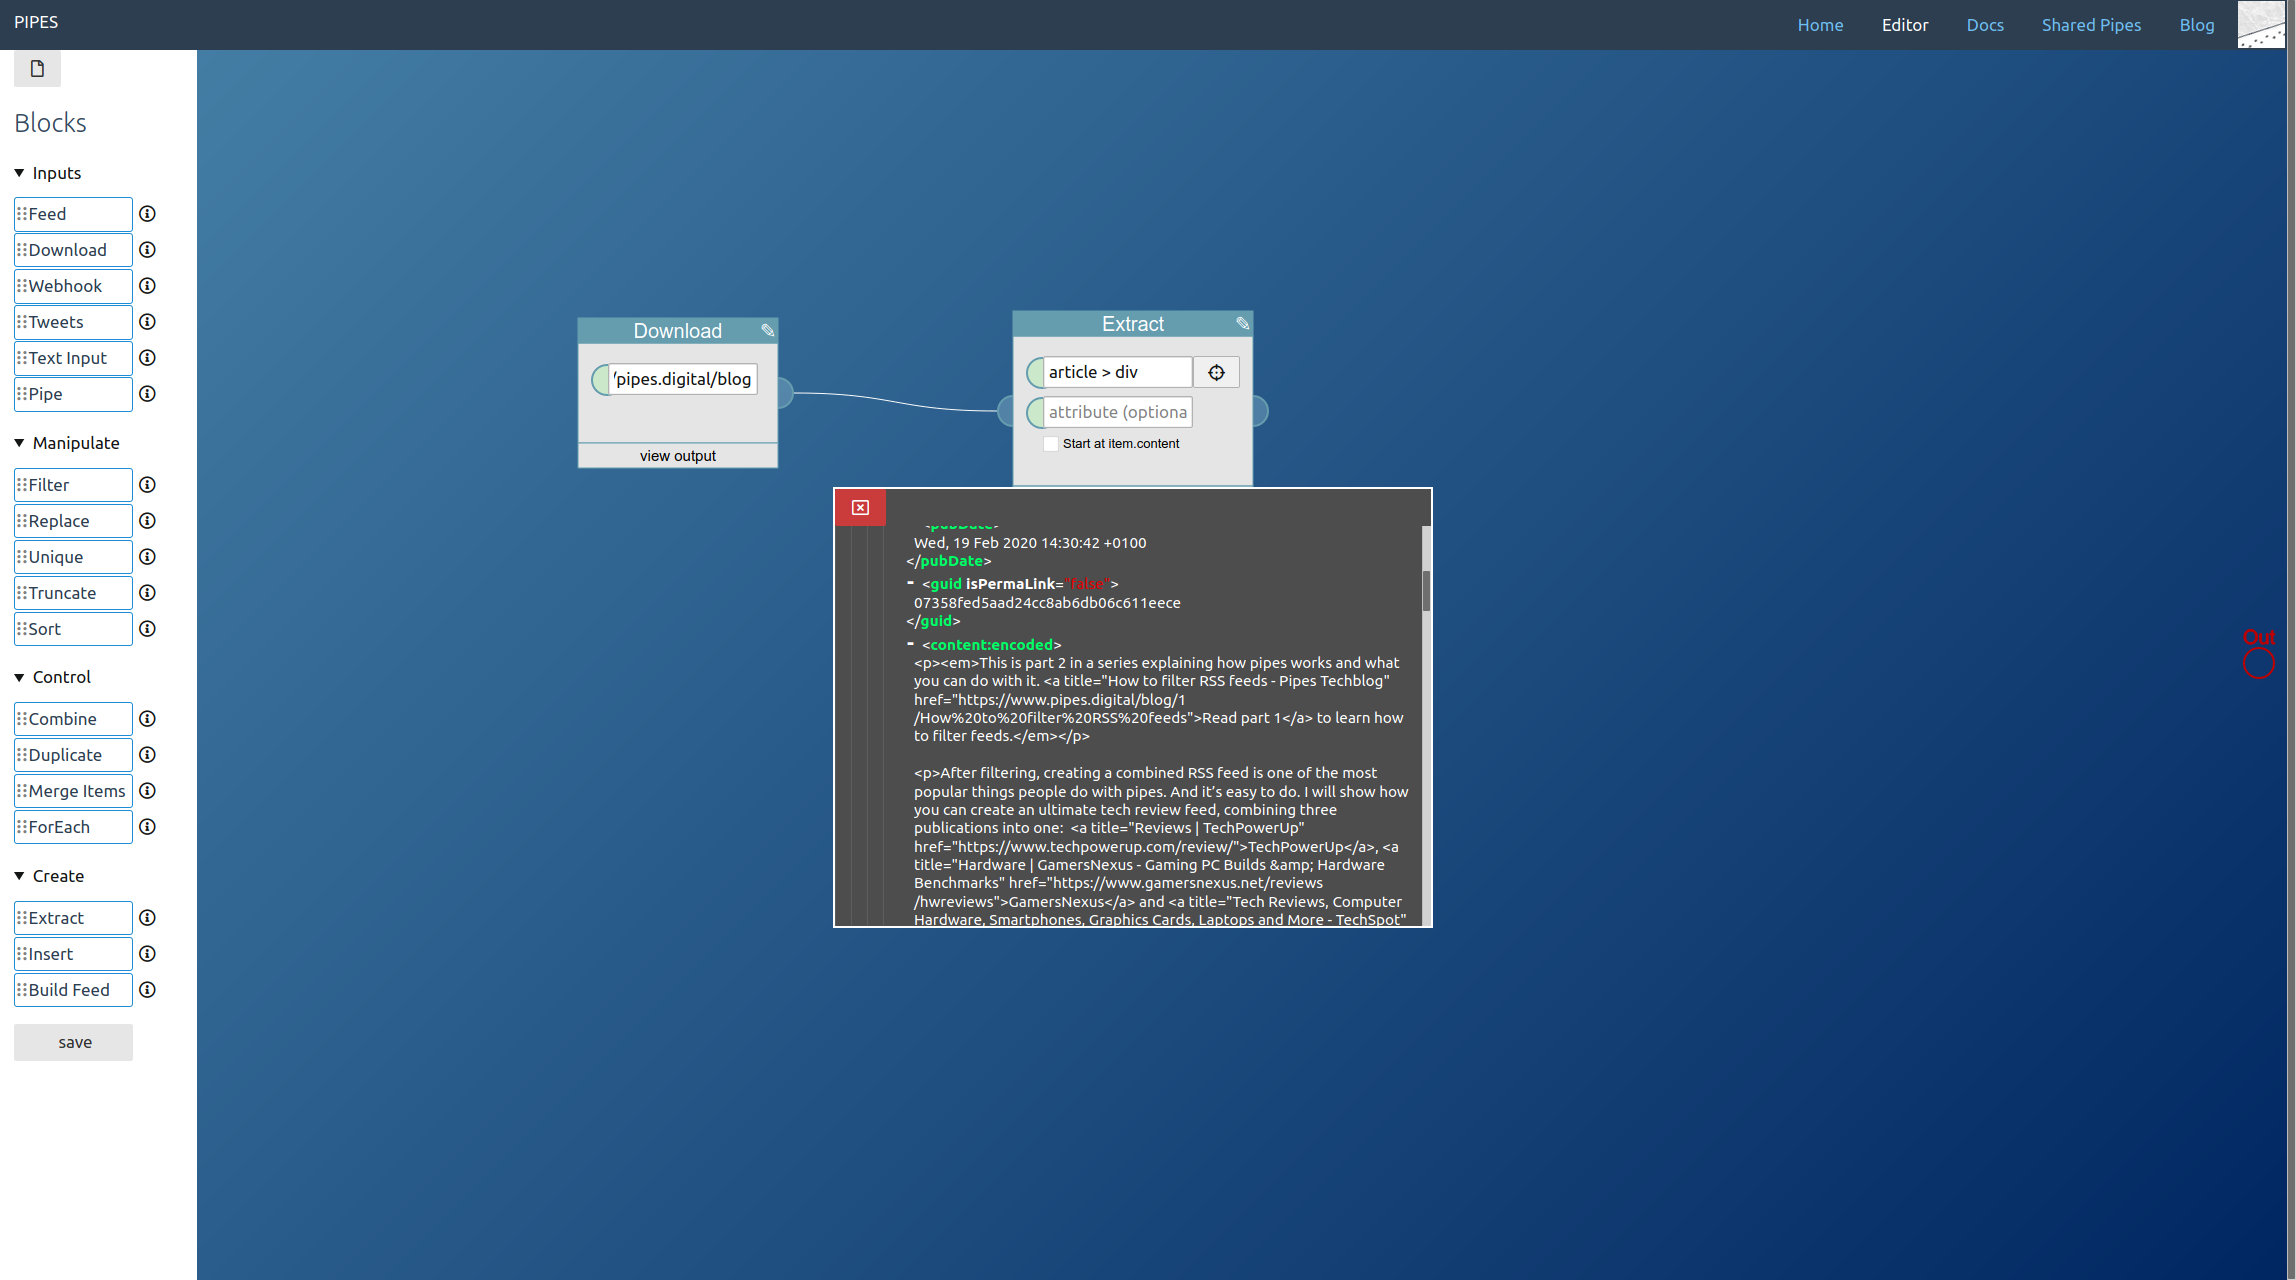
    The example here will be this blog, so enter its url https://www.pipes.digital/blog/. Now add an extractor bock, and connect it to the download block:

    /blog/upload/create_extract.jpg

    You see that it asks for a selector, and CSS selectors work best for HTML pages. The correct selectors will vary for every site. There is a helper tool, but we can also enter the selector manually and should start with that.

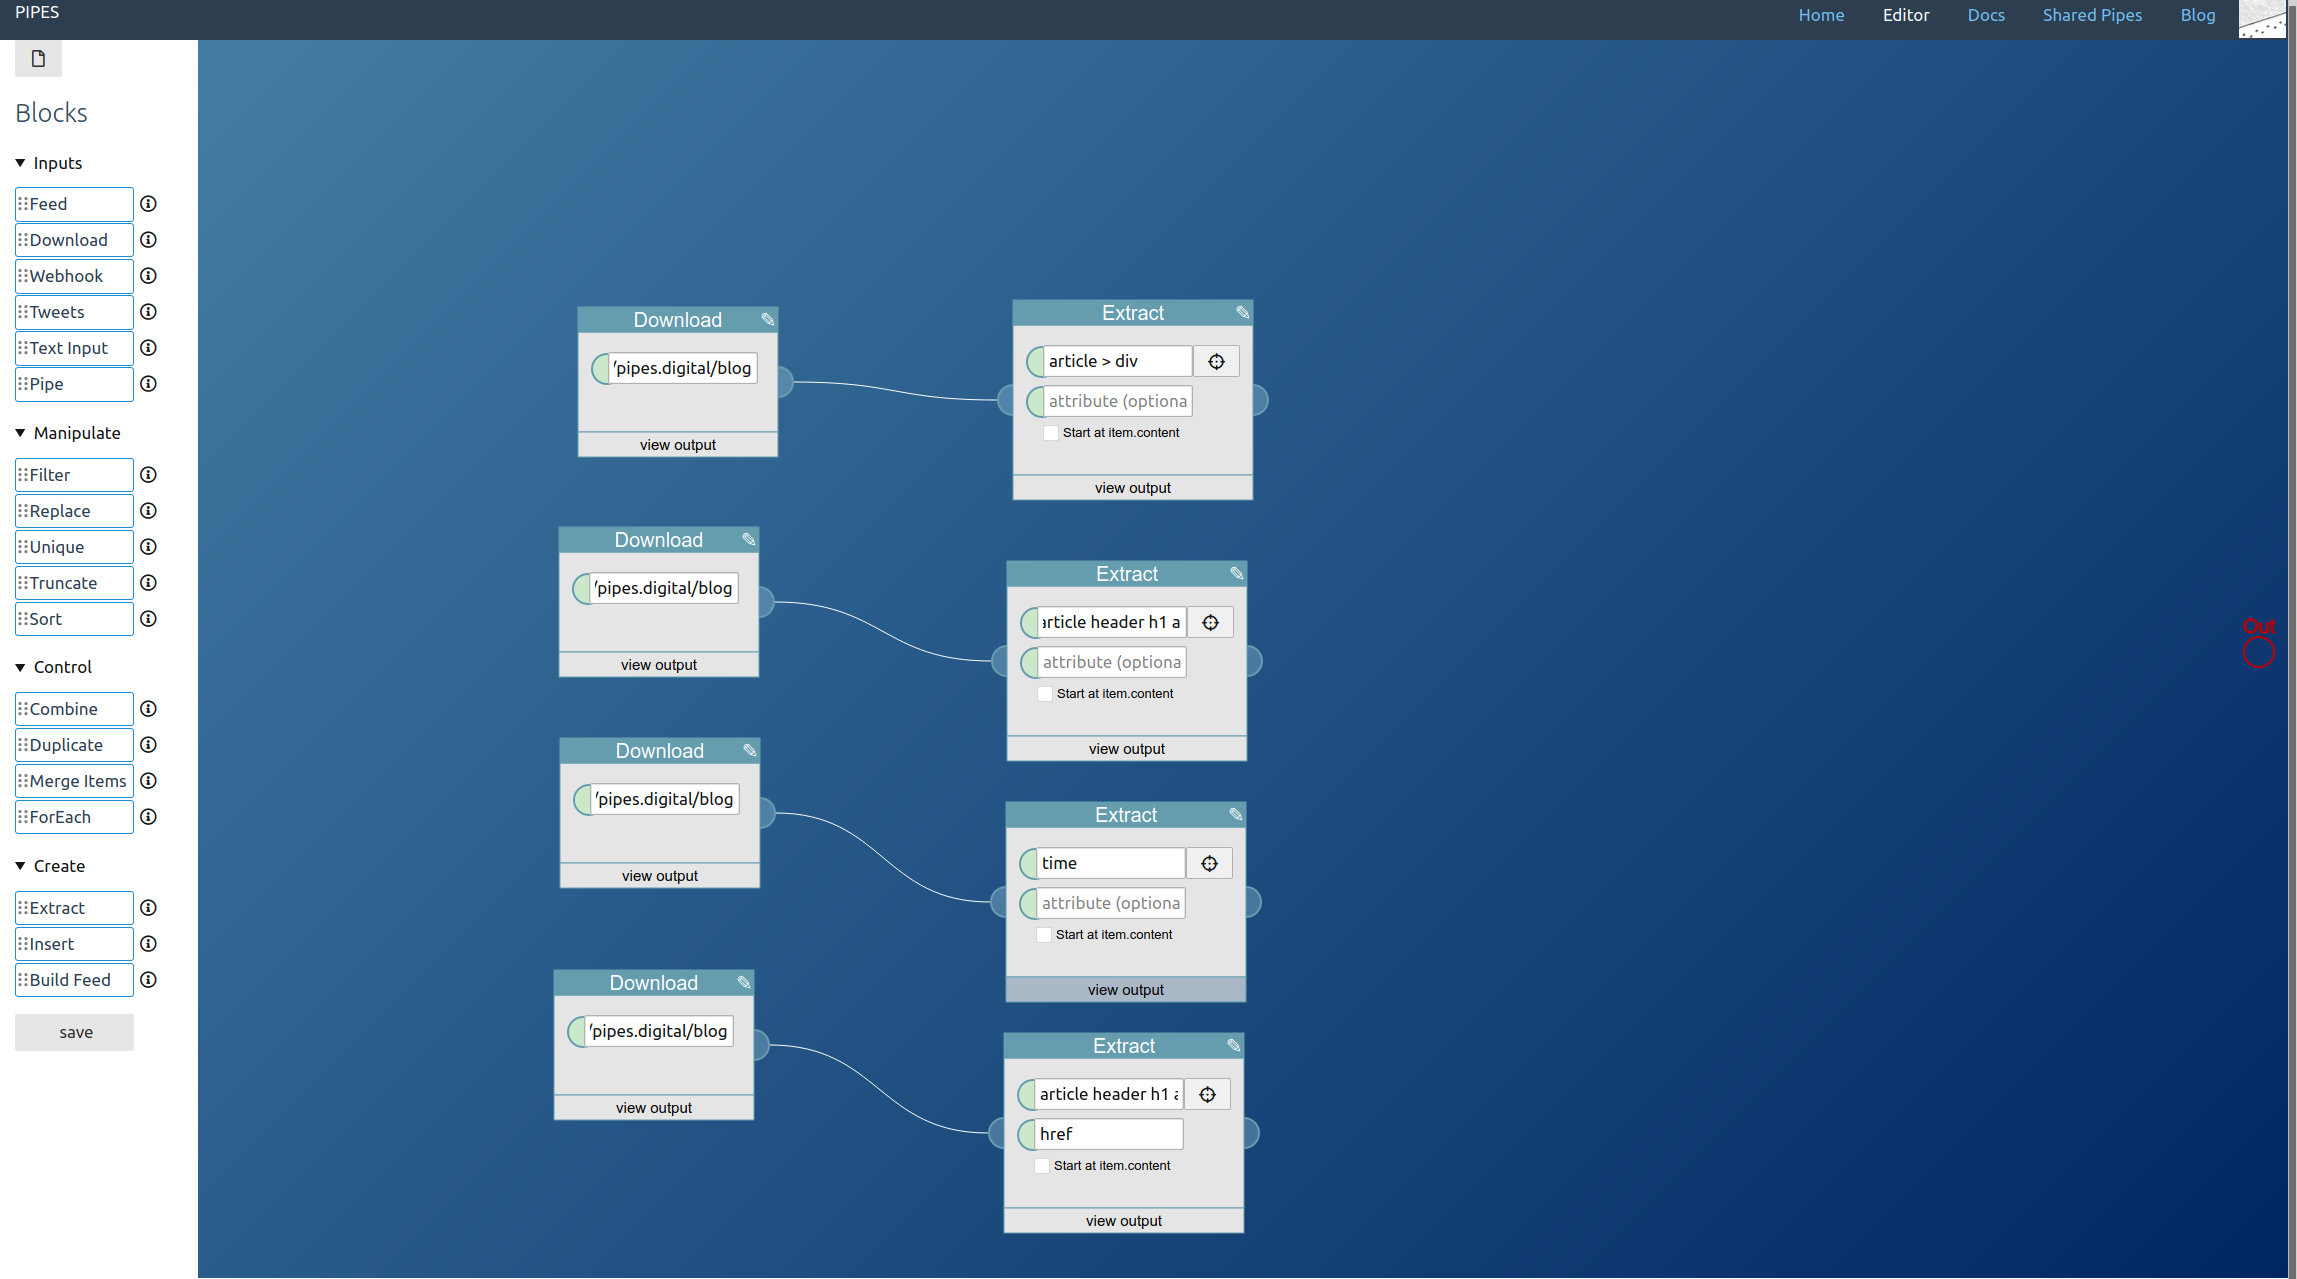
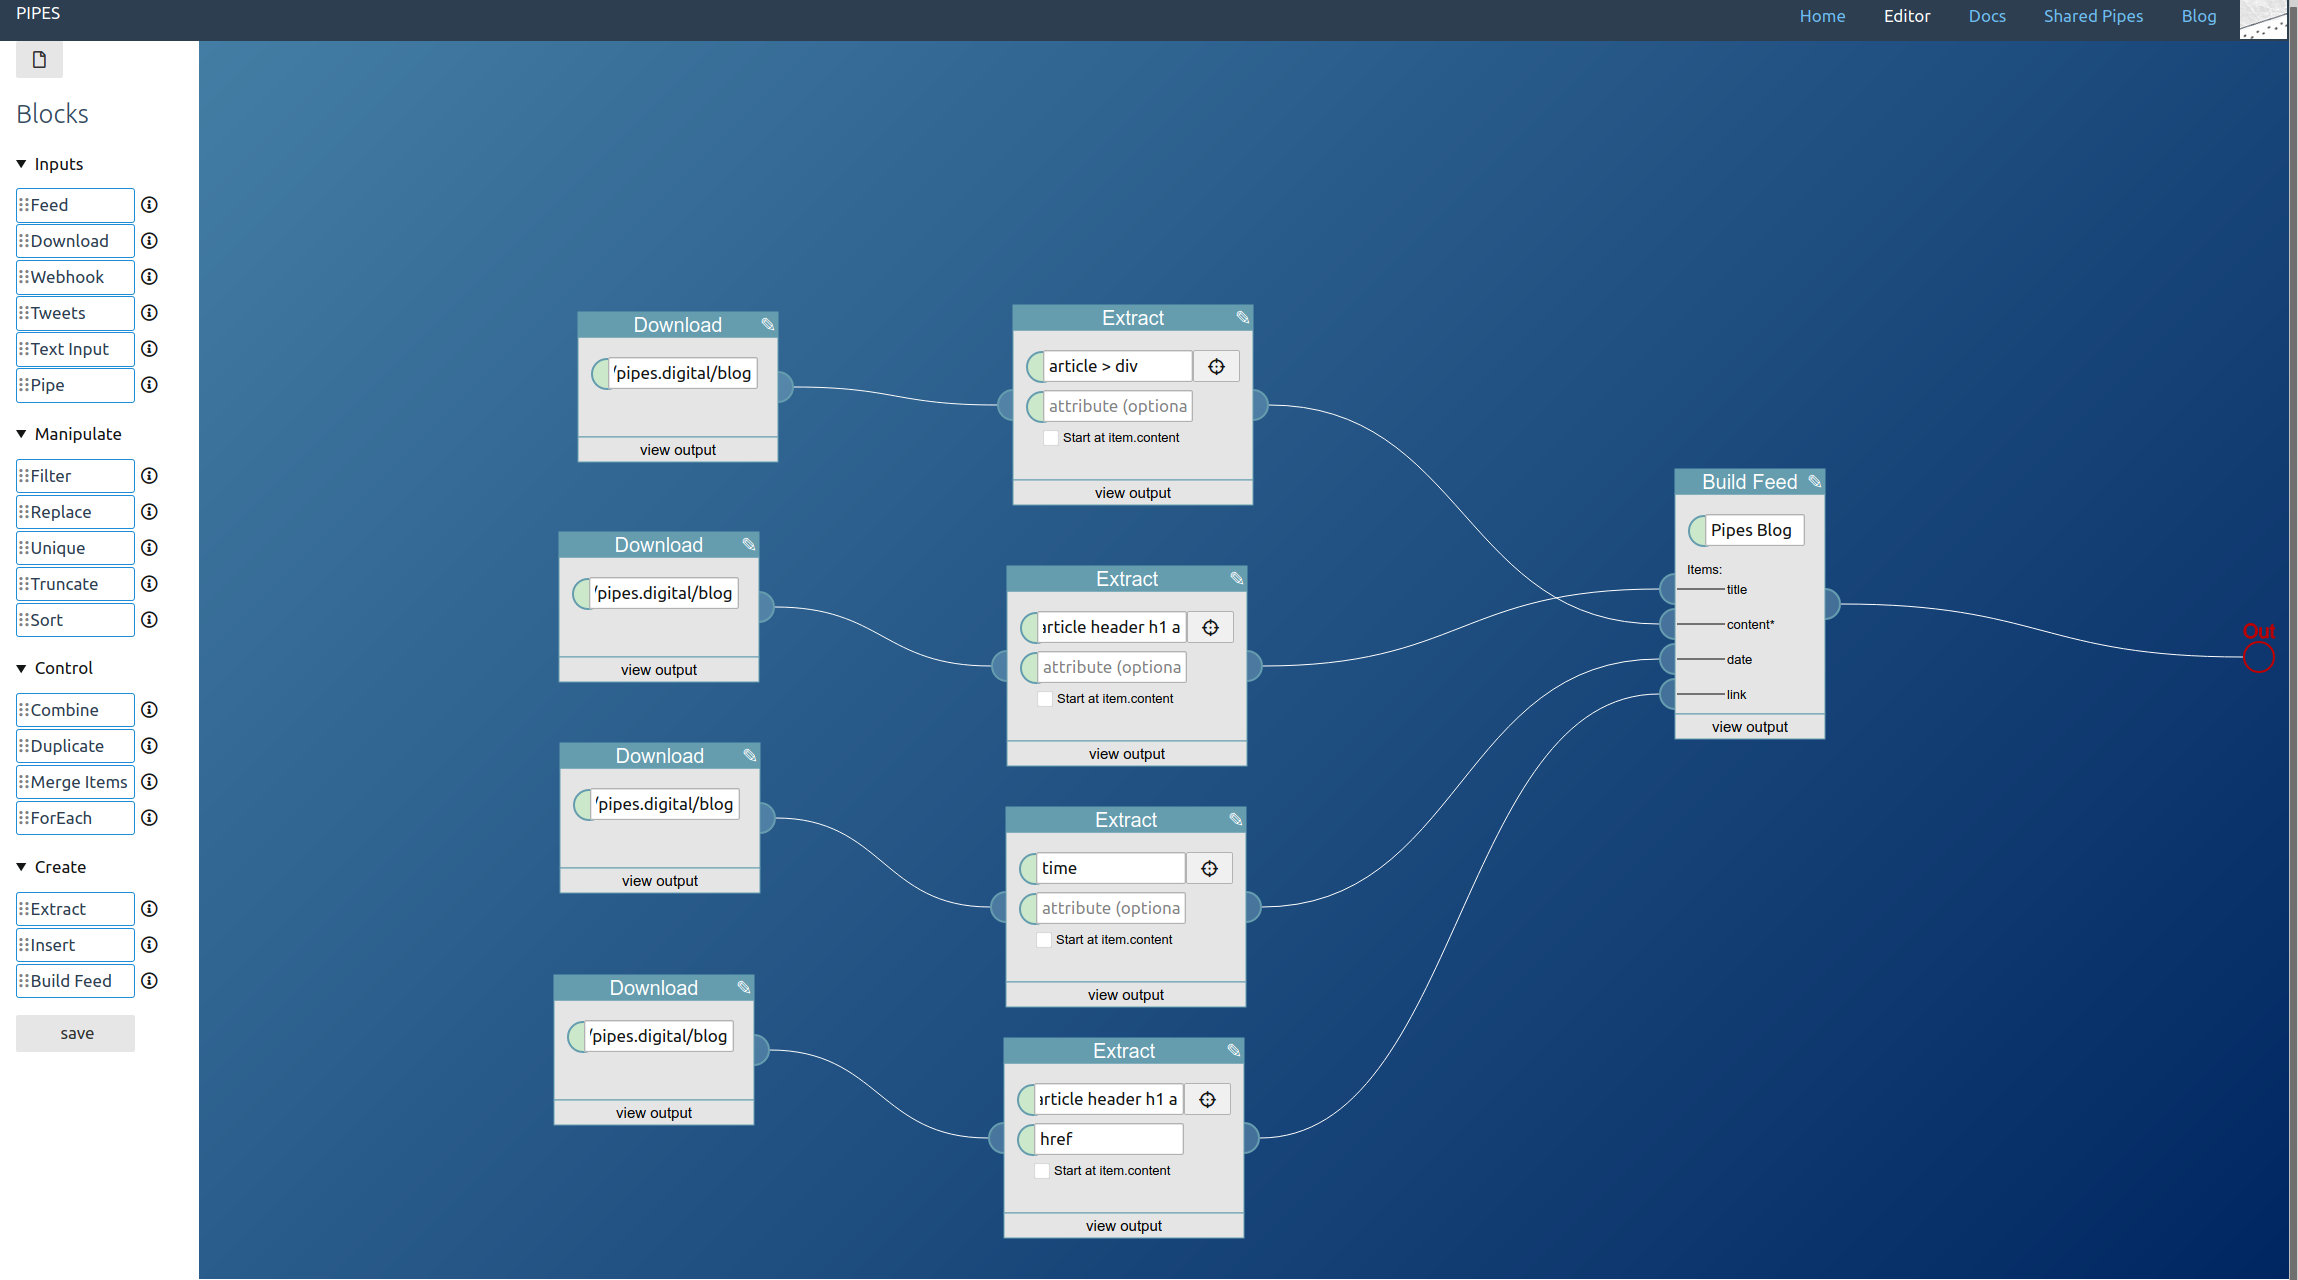
    To find the selector, I think it’s easiest to inspect the target site with your browser to find those (In Firefox: Right click on something on a page and click on Inspect Element). Then you can look at the HTML and create a selector based on the structure, ids and classes. For example here in this blog, to get the article text I’d use the selector article > div:

    /blog/upload/create_extract_content.jpg

    But we need three more things: The article titles, dates and links.

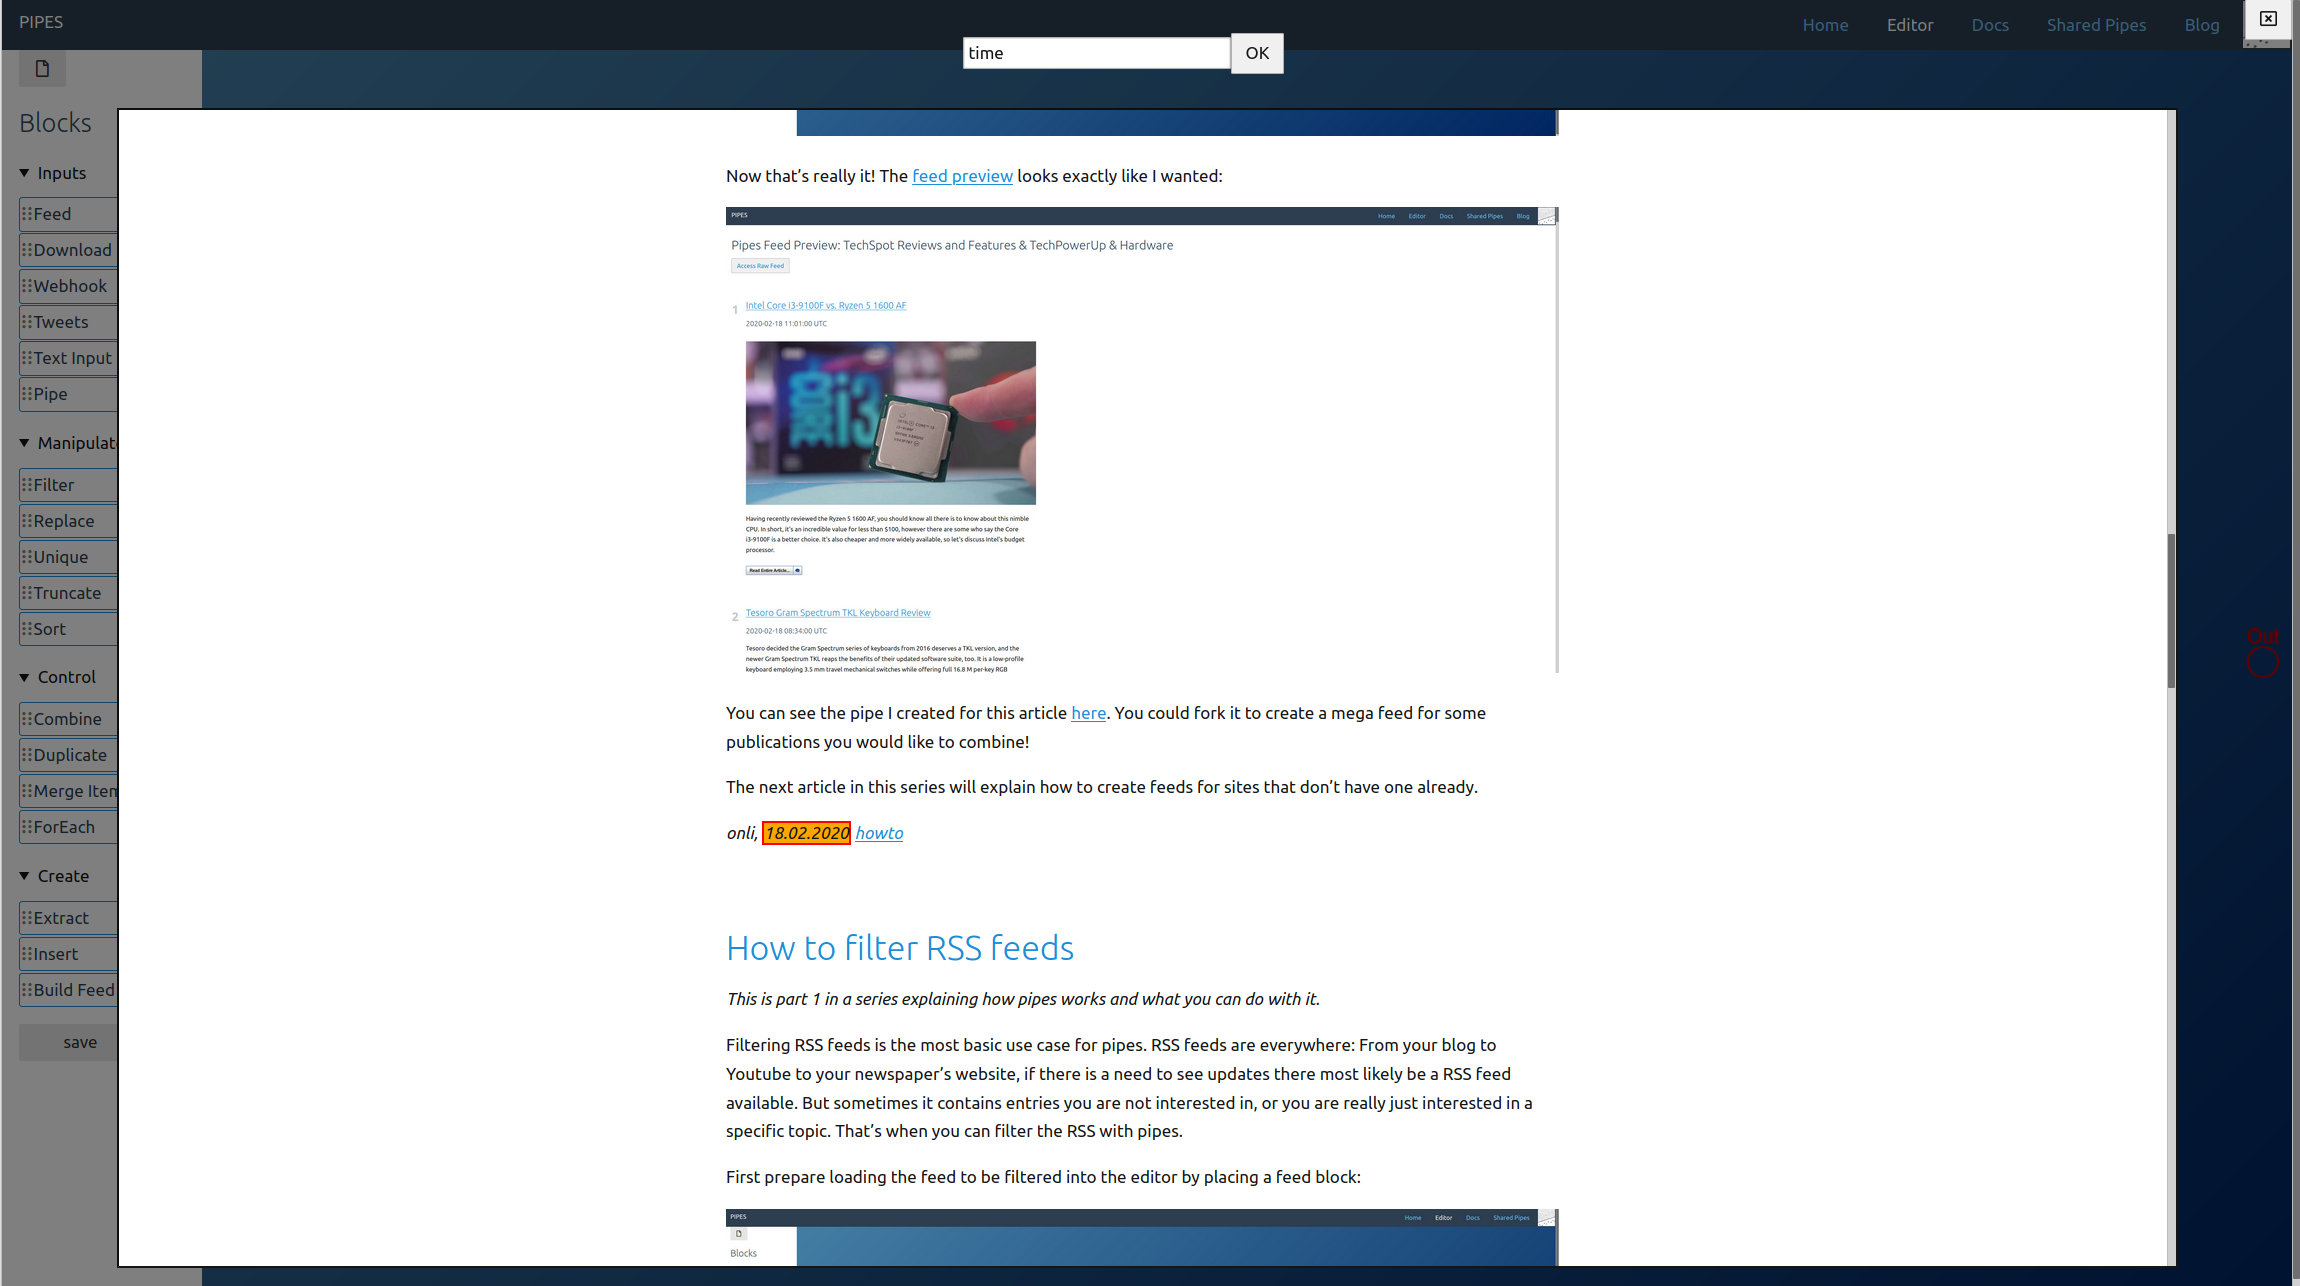
    For the date we can try the selector that comes with the extractor button right next to the selector. An overlay opens:

    /blog/upload/create_extract_extractor.jpg

    In this overlay, if you click on an element it tries to find a selector for it. If you click on a second element, the tool will try to extend the selector to also match it. If you click twice on an element that marks it as a non-target. In this example a simple click on the date is enough to get the correct selector, time. Click on OK at the top to use the found selector and close the overlay.

    Article title and link both come from the title of the entries here, and that’s the same selector article header h1 a. For the link, the difference is that we grab the content of the href attribute:

    /blog/upload/create_extract_linkandtitle.jpg

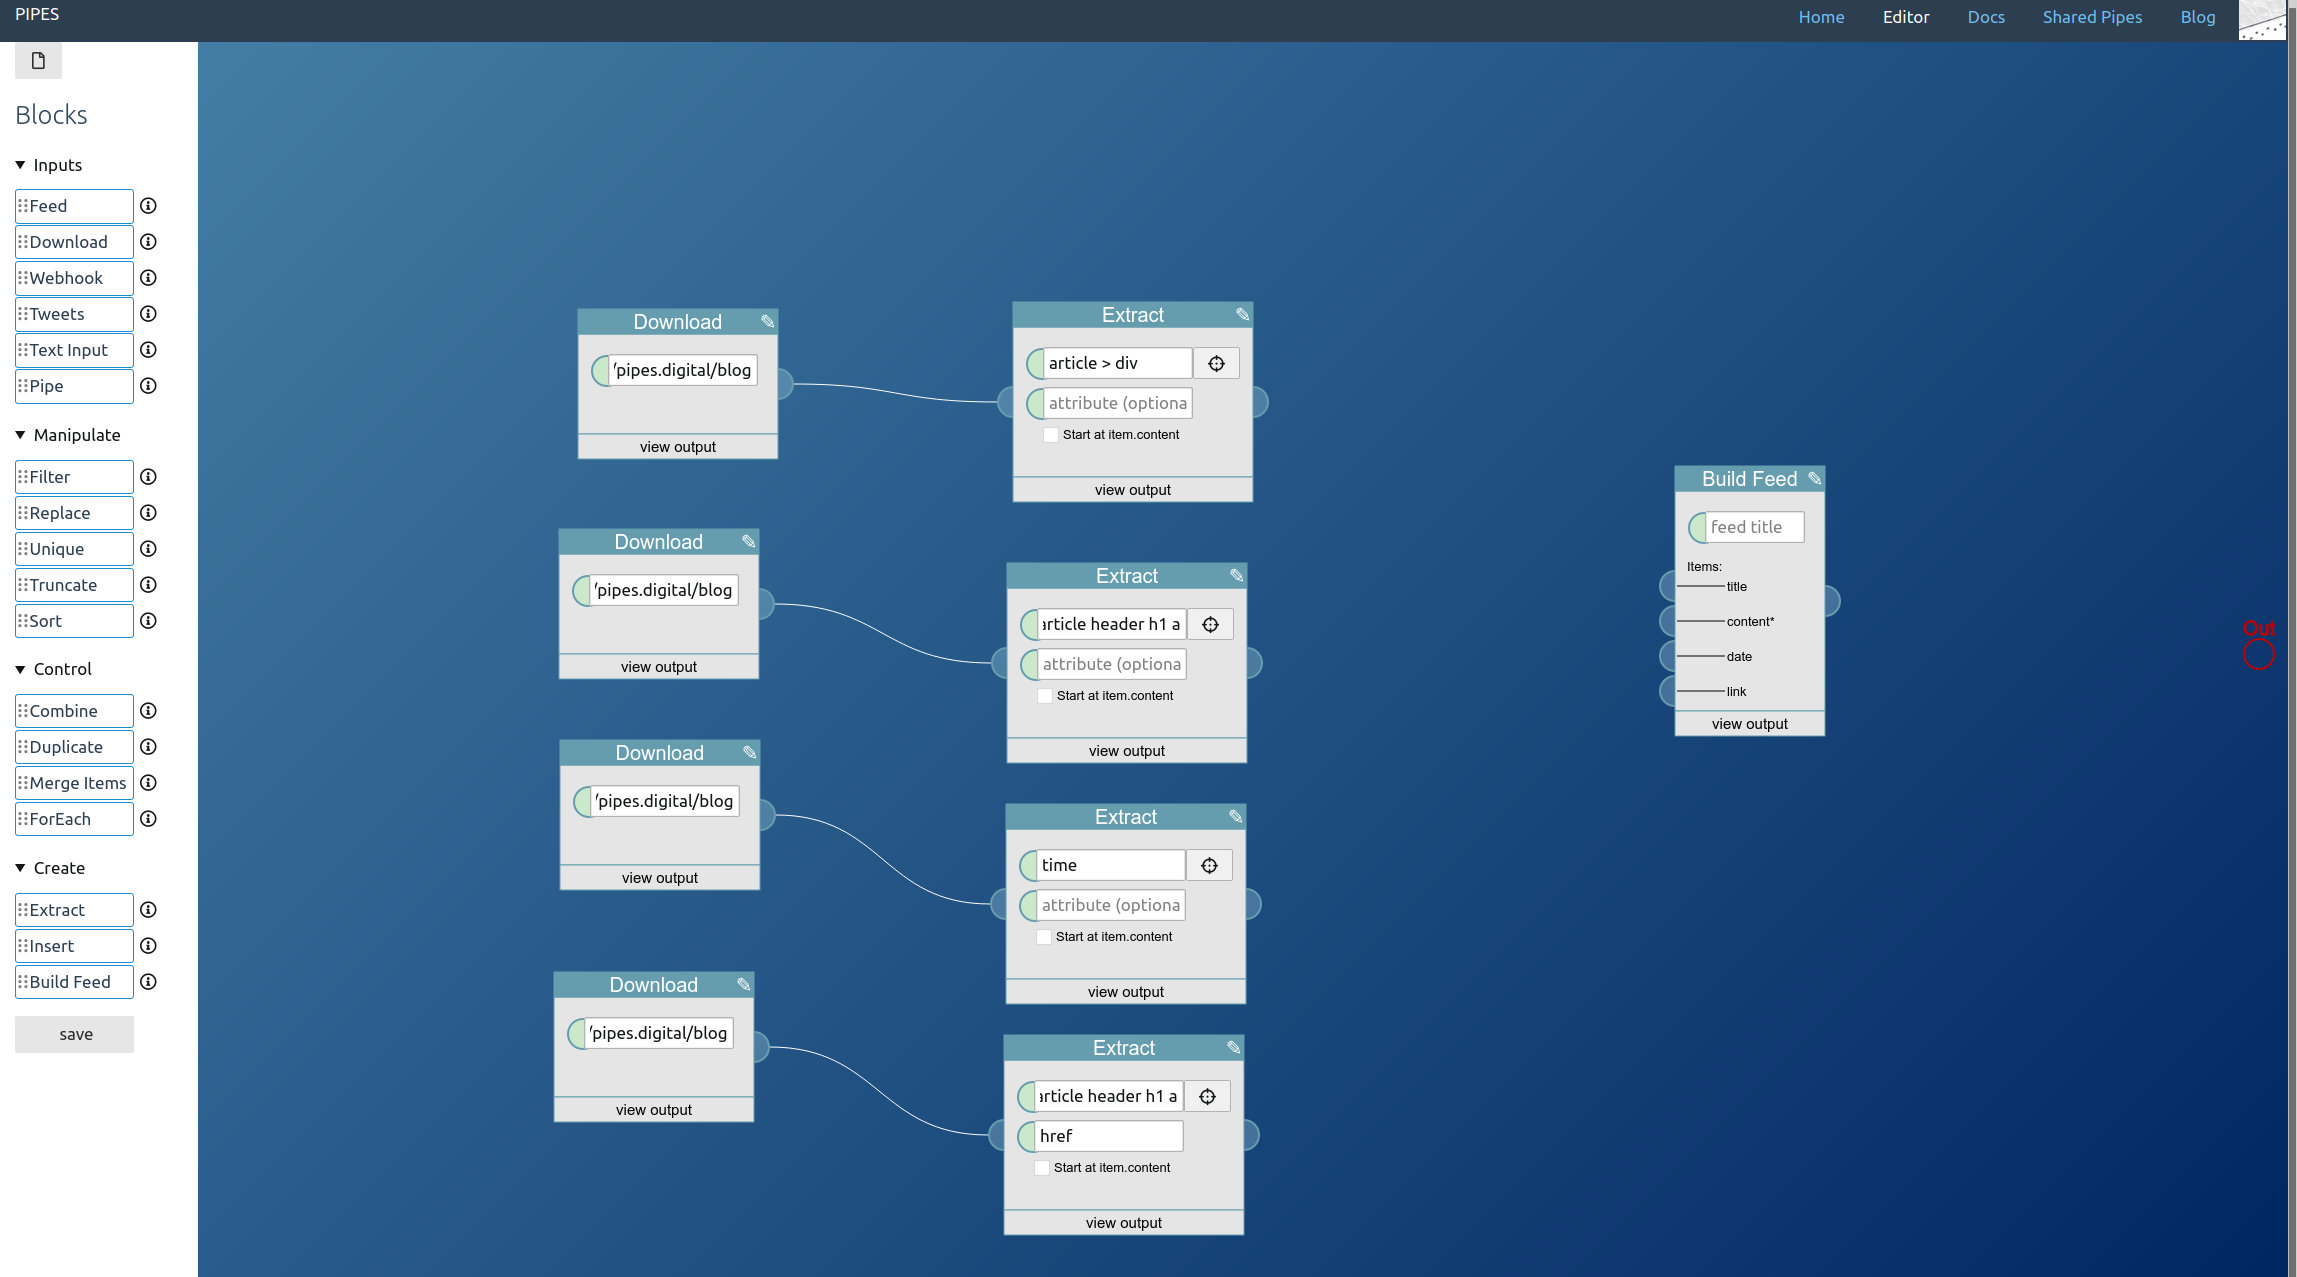
    Now we have everything we need to construct the feed. Place a Build Feed block:

    /blog/upload/create_build.jpg

    It gets a title (for the whole feed) and takes 4 inputs, for the items content, title, date and link. Just connect the extractor blocks. And don’t forget to connect the feed builder block to the pipe output!

    /blog/upload/create_build_connected.jpg

    Now we can look at the preview:

    /blog/upload/create_preview.jpg

    Perfect. If the blog didn’t have a feed already, with this newly created feed it could be read with an RSS reader anyway.

    The pipe I created for this article is here, you can fork it to use it as a starting point for your own custom feed.

  4. How to combine RSS feeds

    This is part 2 in a series explaining how pipes works and what you can do with it. Read part 1 to learn how to filter feeds.

    After filtering, creating a combined RSS feed is one of the most popular things people do with pipes. And it’s easy to do. I will show how you can create an ultimate tech review feed, combining three publications into one: TechPowerUp, GamersNexus and TechSpot.

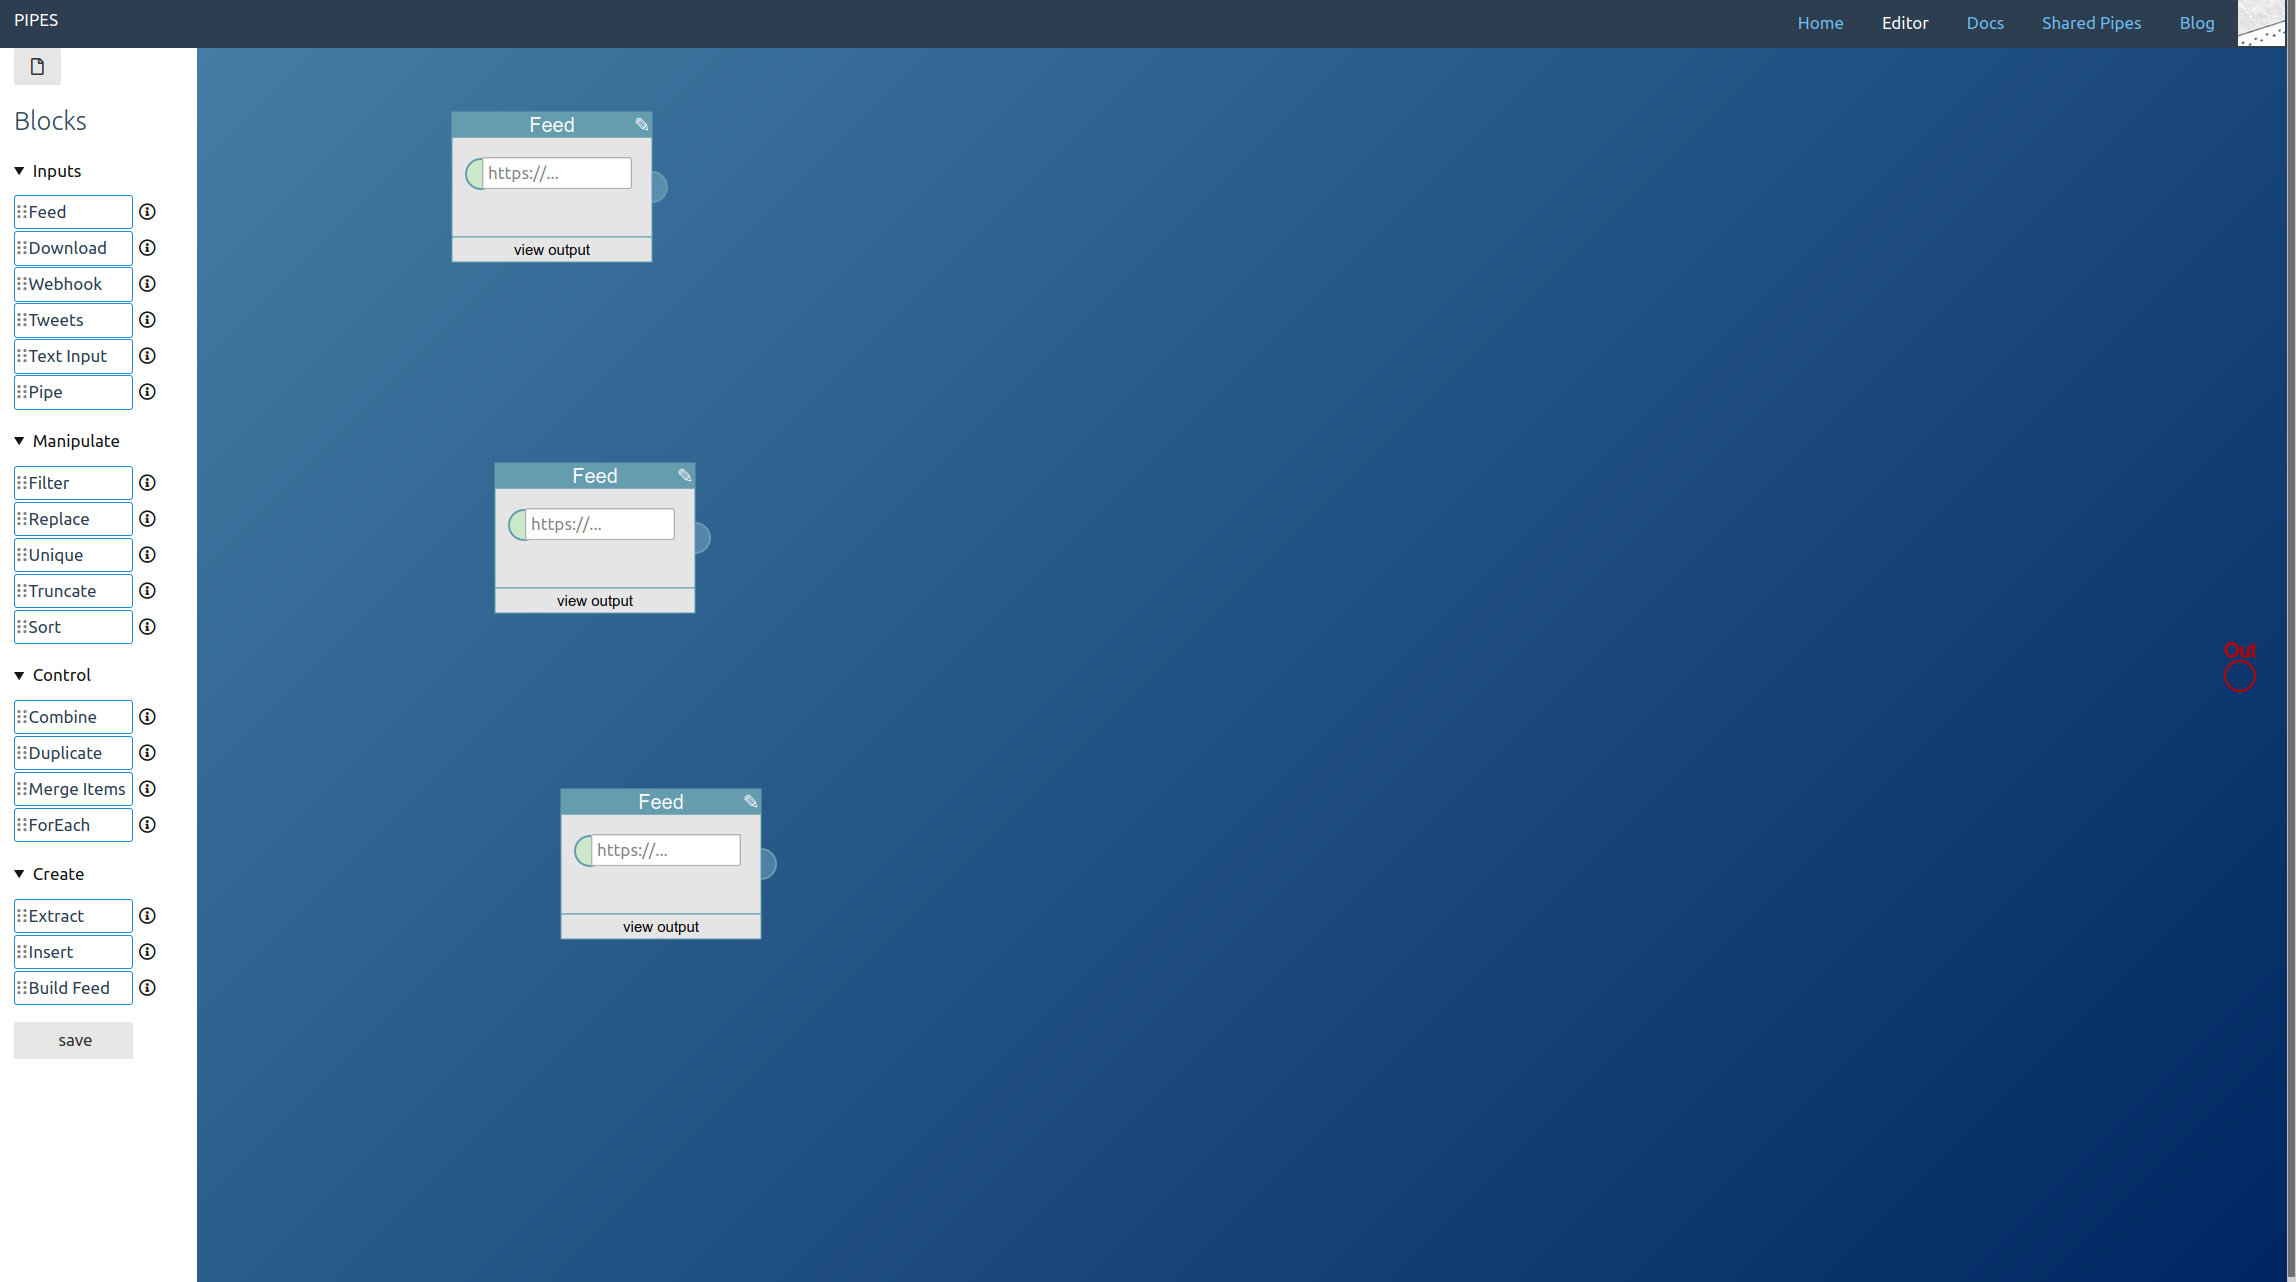
    First, place three feed blocks into your pipe by dragging them from the toolbar at the left into the editor area:

    /blog/upload/combine_start.jpg

    And now enter the feeds you want to combine. It’s not always easy to find the right one if the autodetection fails, especially if you just want the feed for a specific subcategory. If you don’t want to search through the source code of the site you can use a browser extension like Awesome RSS to see all linked RSS feeds. In this case, our source feeds are these three:

    1. https://www.techspot.com/reviews.xml
    2. https://www.techpowerup.com/rss/reviews
    3. https://www.gamersnexus.net/reviews/hwreviews/feed?type=rss

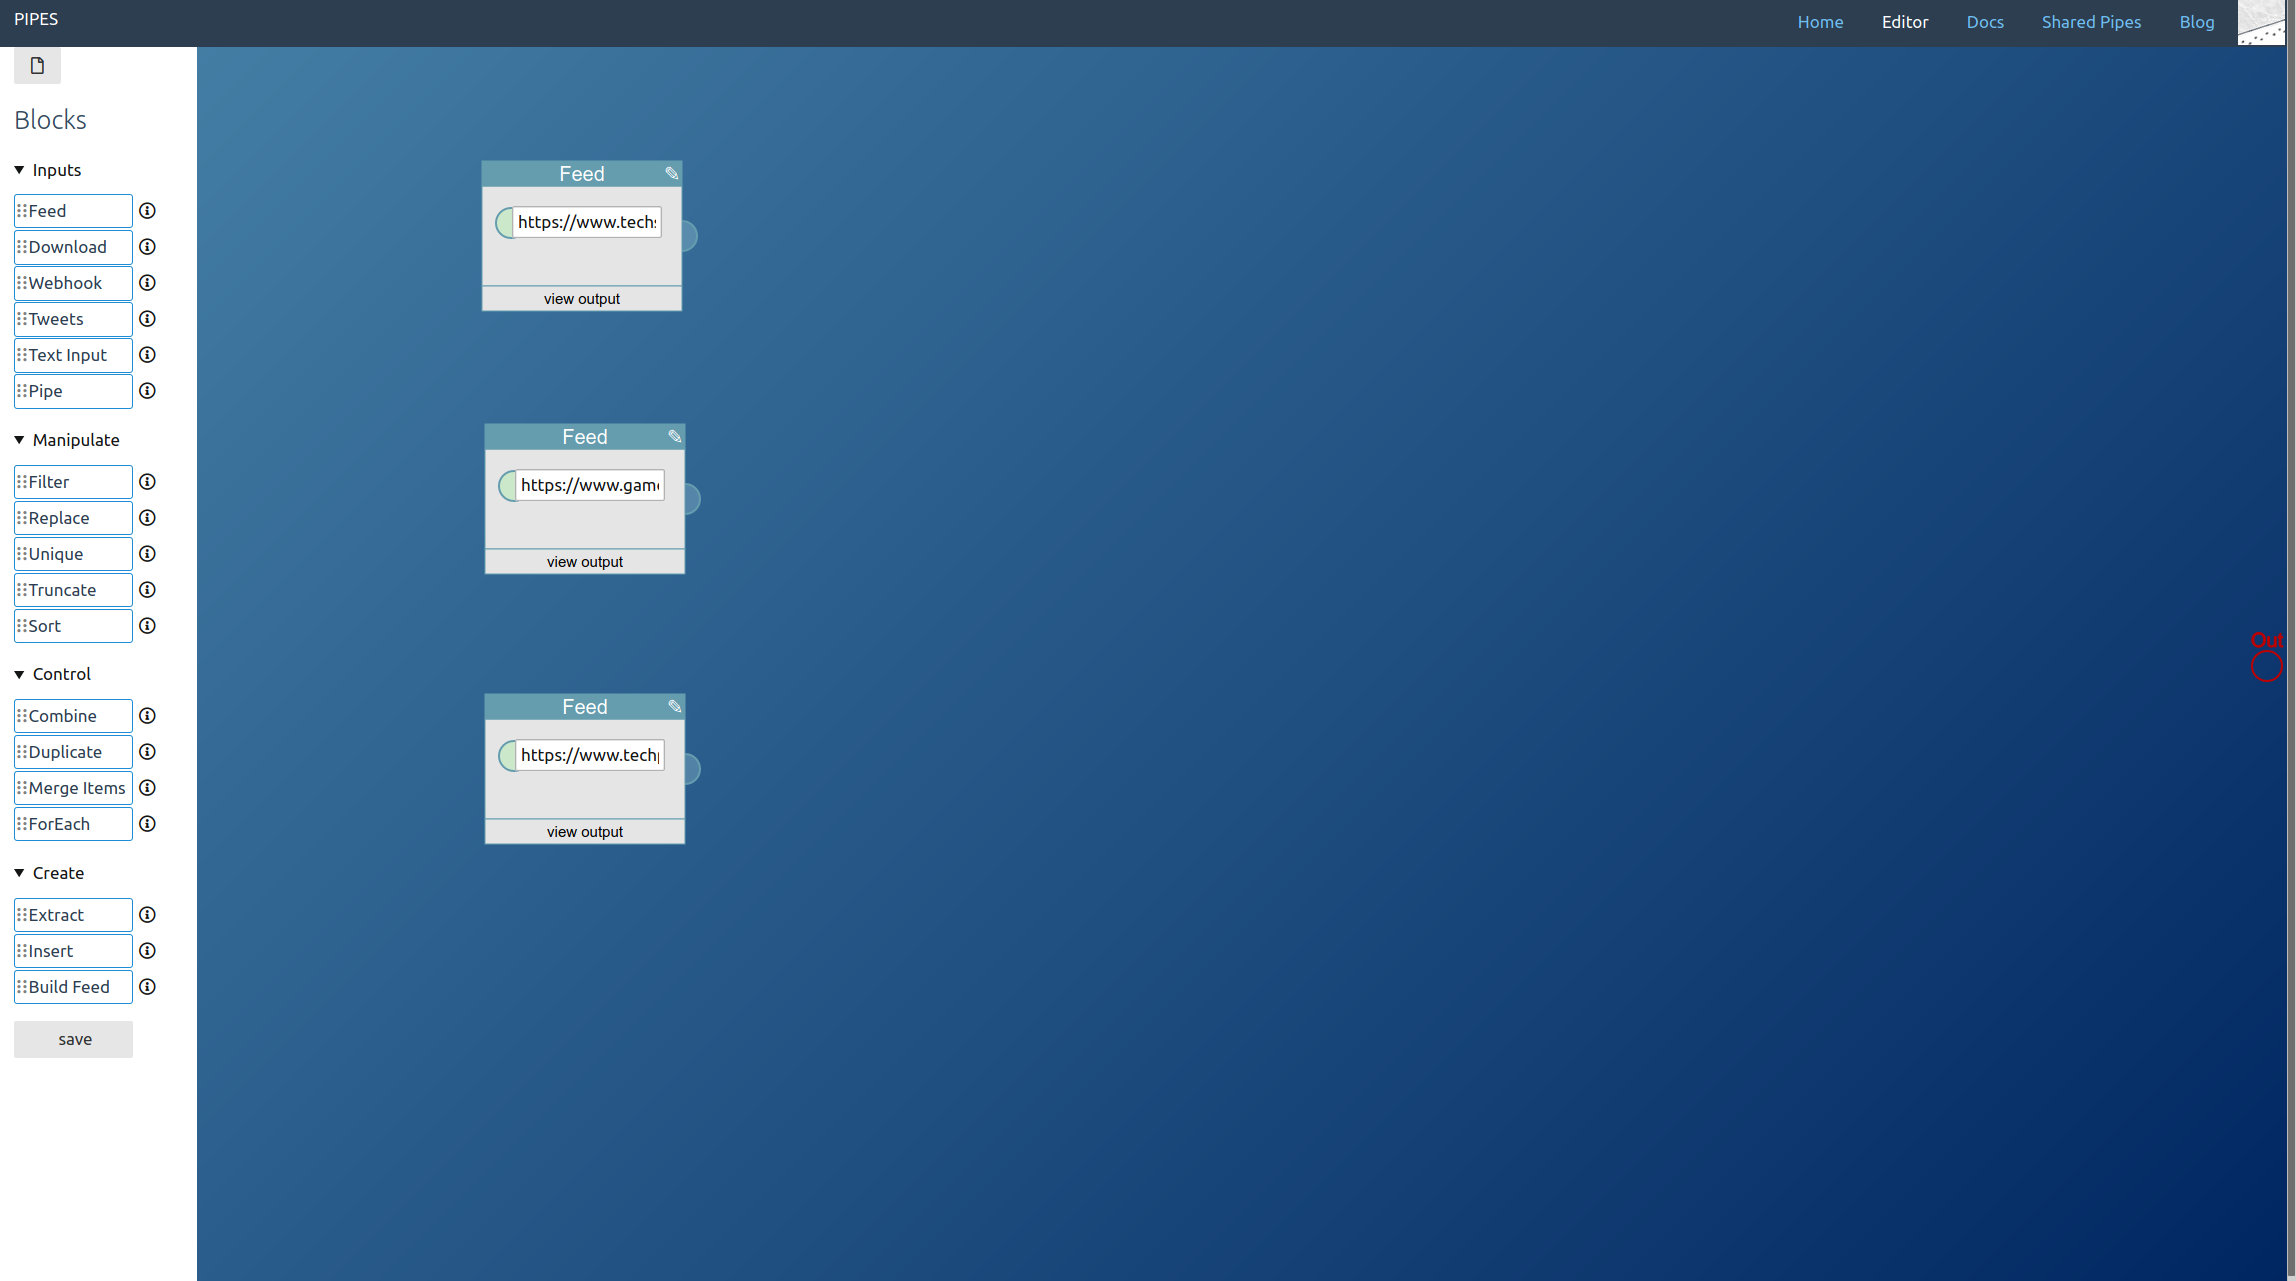
    With the feeds found, enter them into the feed blocks:

    /blog/upload/combine_feeds.jpg

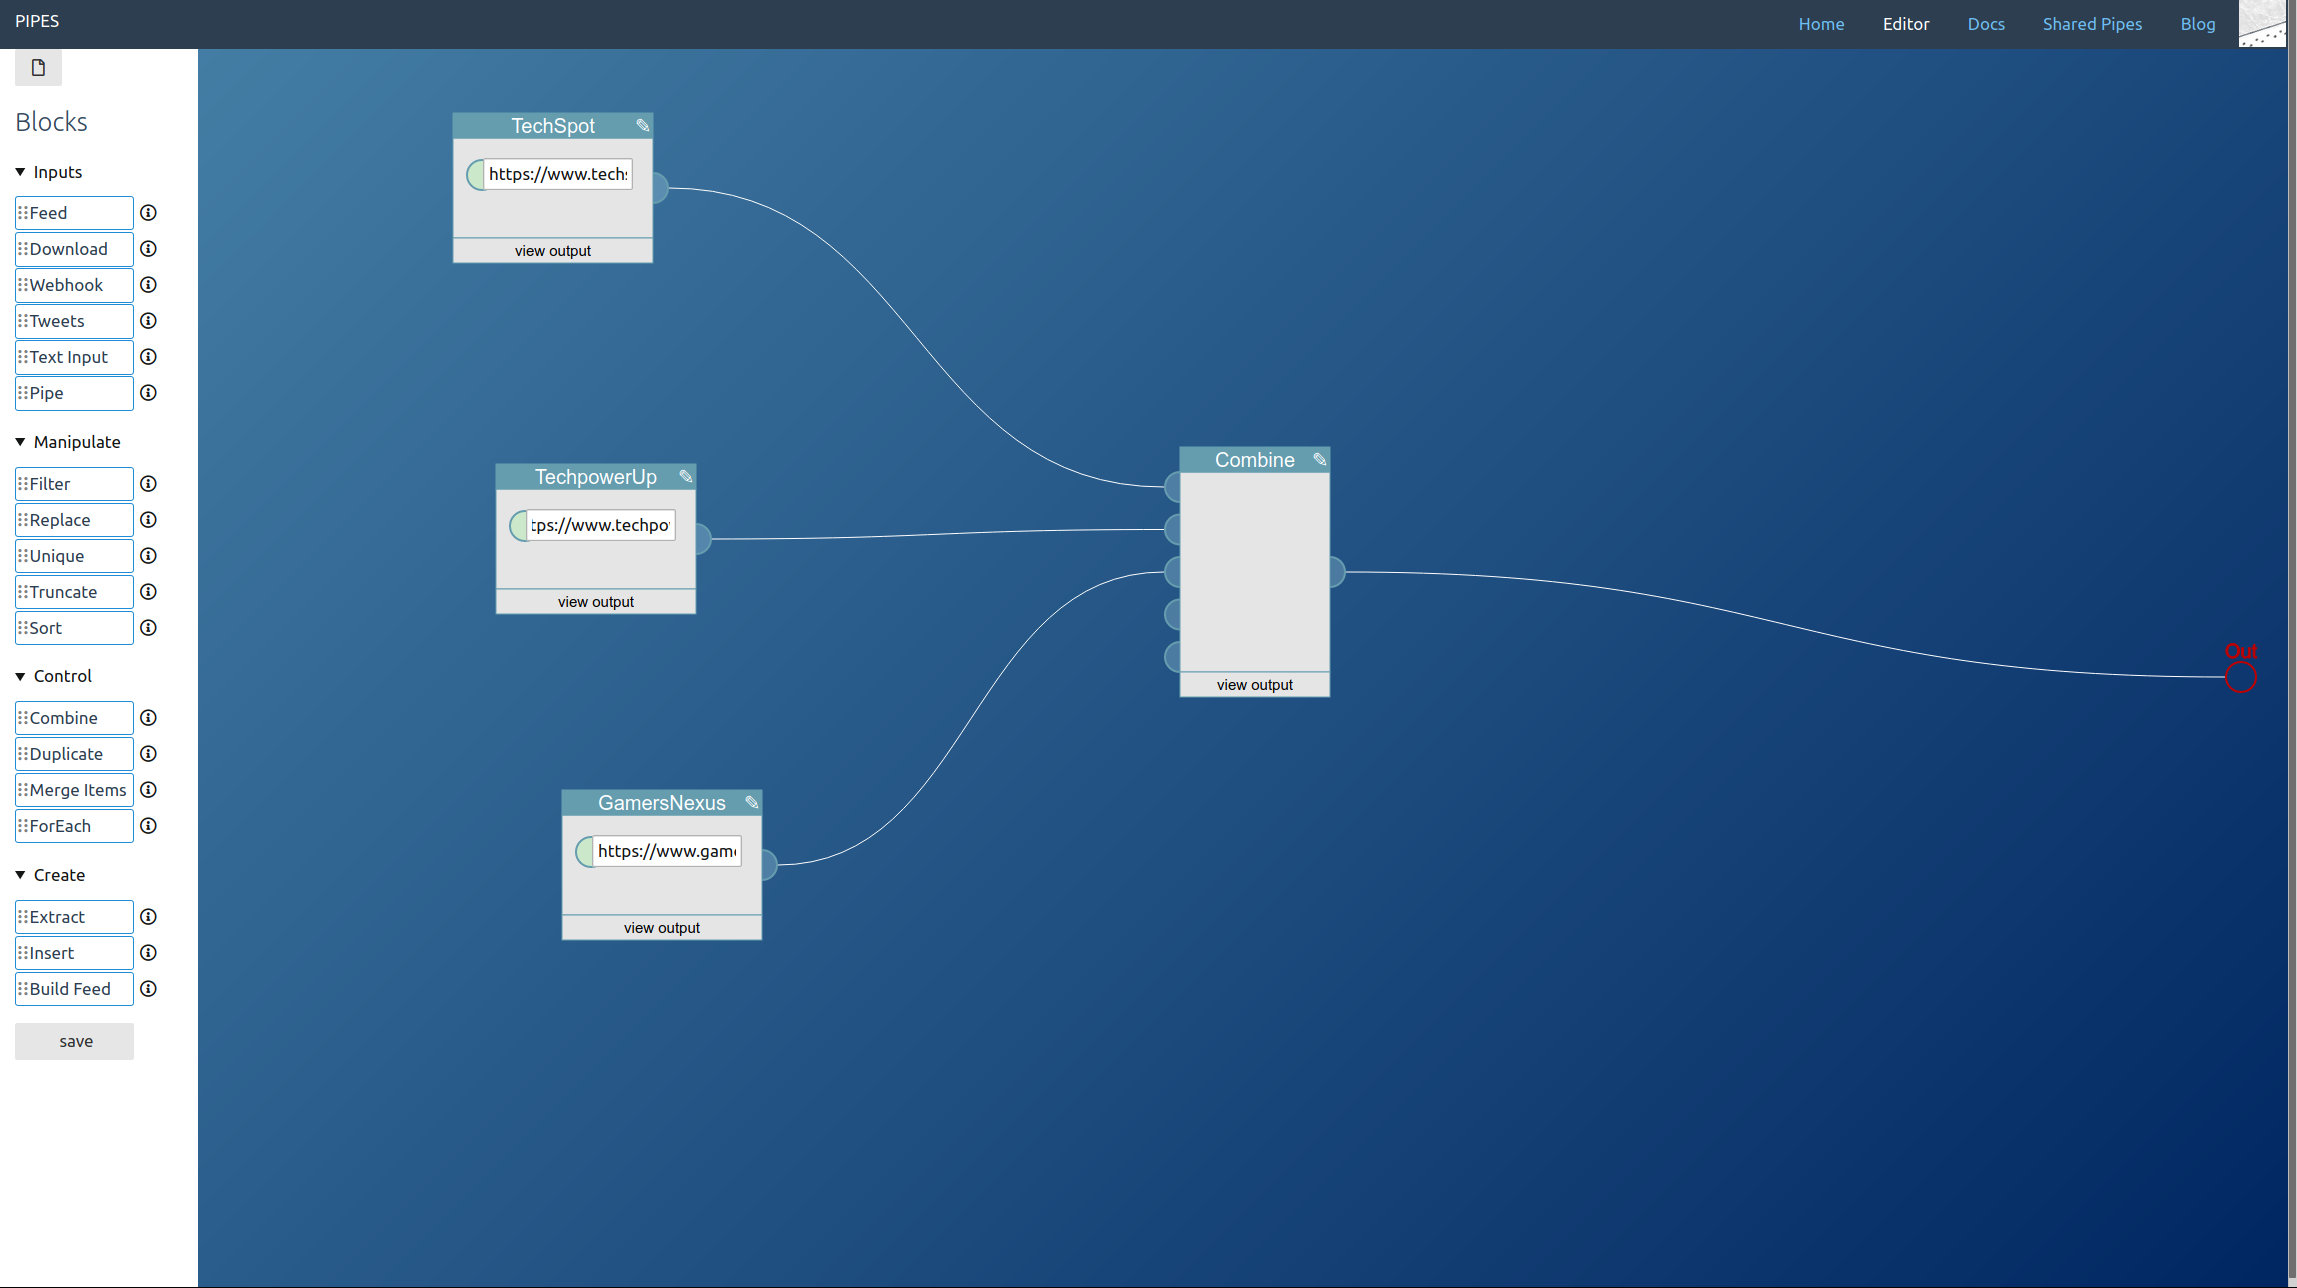
    Now to combine the three feeds add a combine block and connect it to the feed blocks. In this example I also named the feed blocks to make it easier to know which one is which:

    /blog/upload/combine_combined.jpg

    And they are combined!

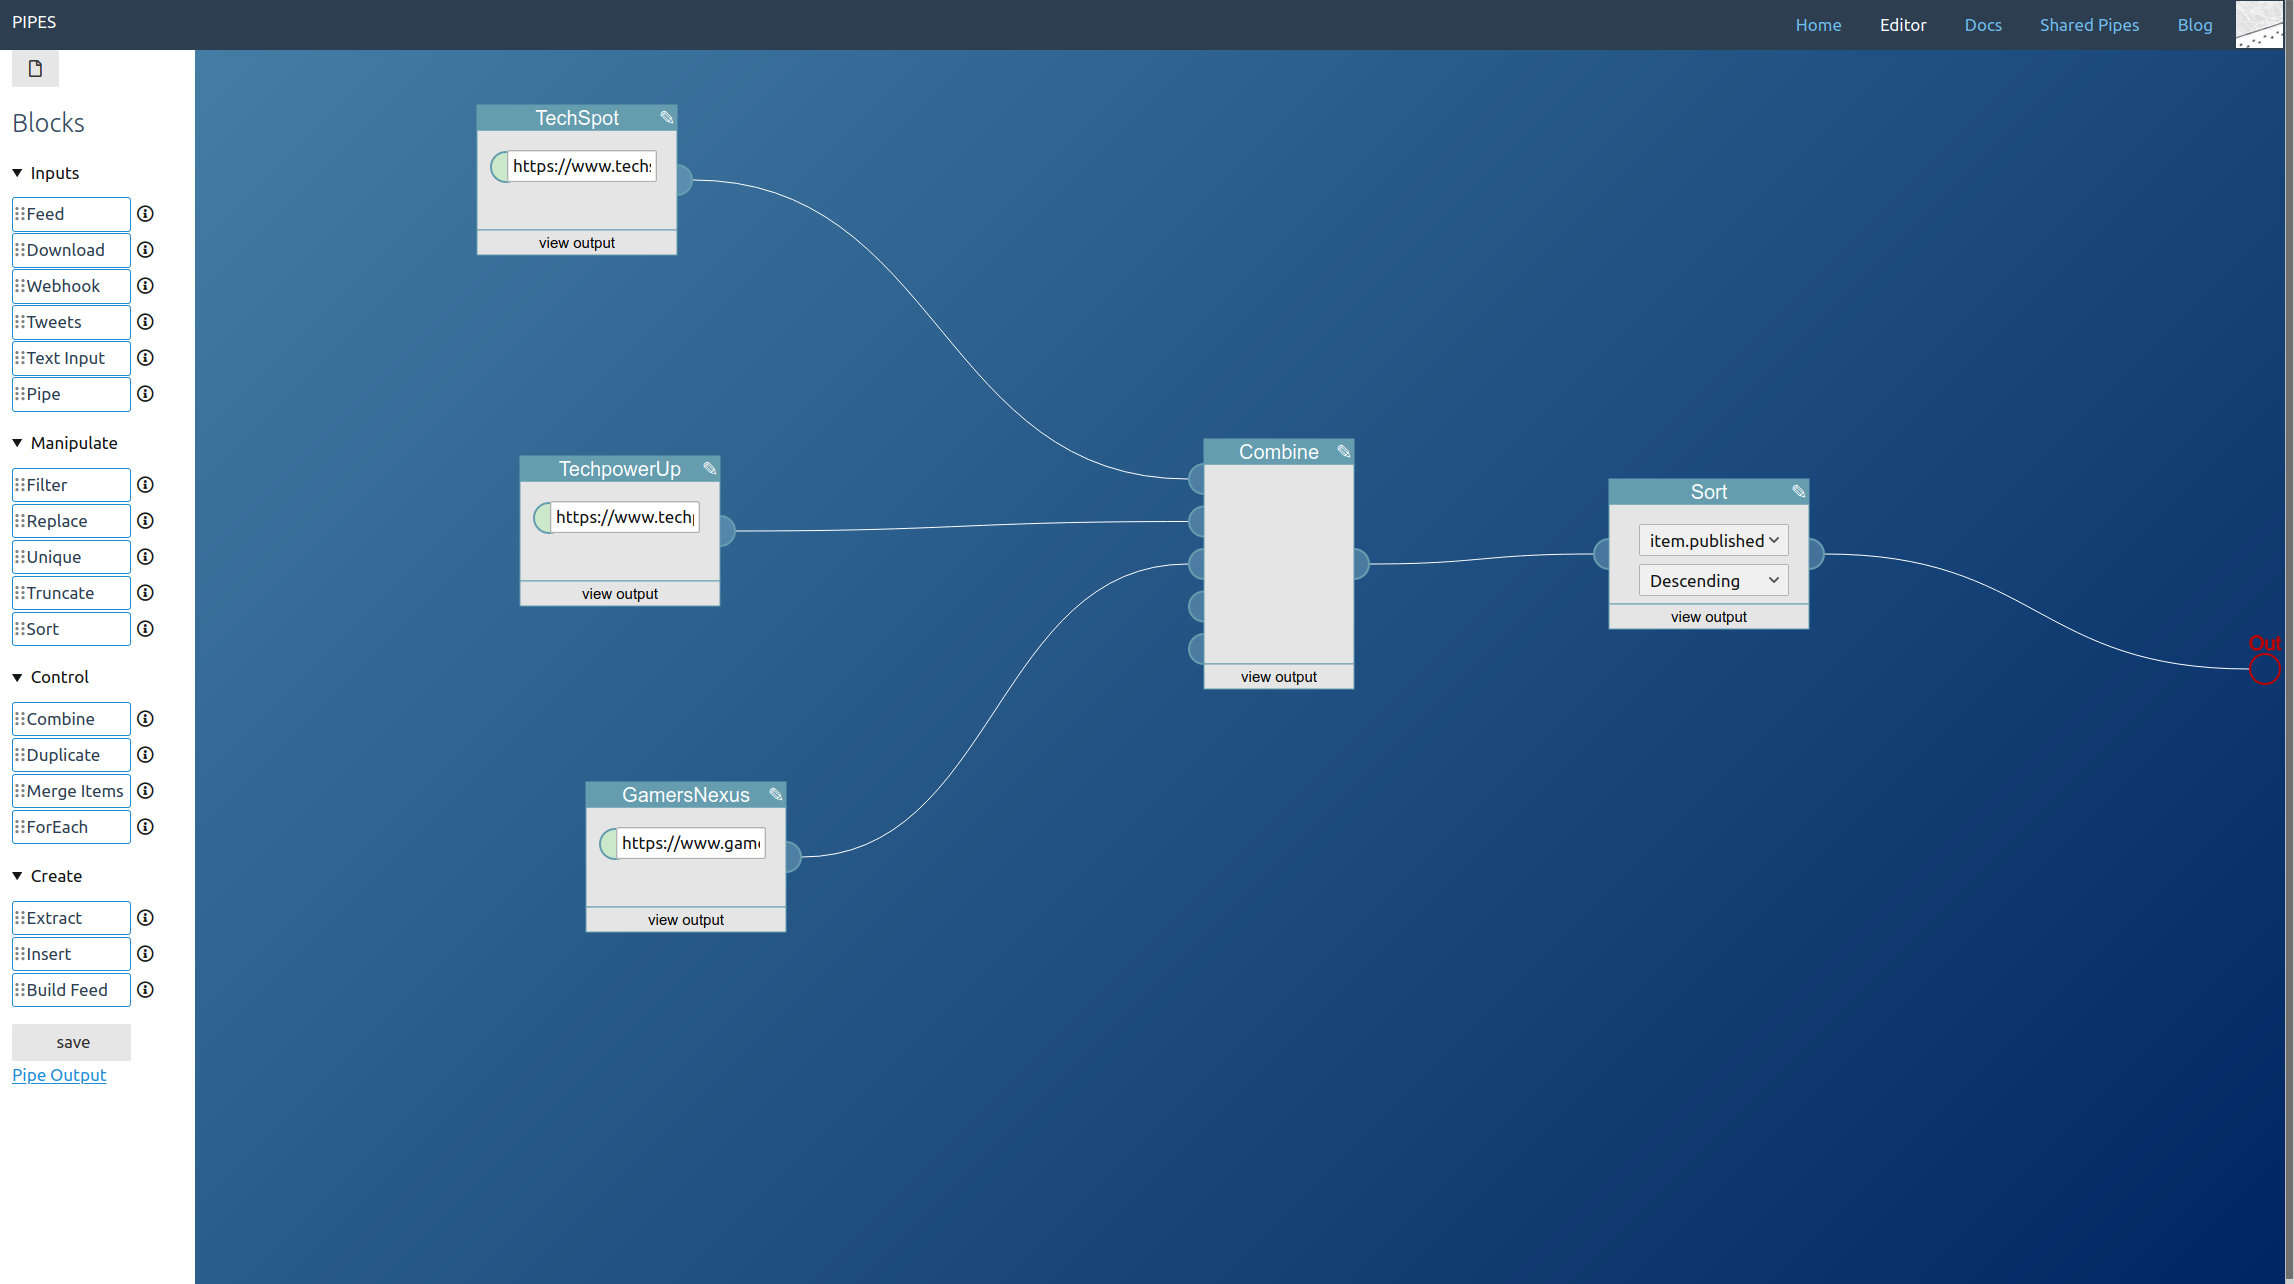
    If you check the feed preview now you might find the result not perfect. The combine block combines the feeds, but it does so one feed at a time. So first are all the articles of the first feed, then the ones of the second, then those of the third. To change that, let’s add a sort block and sort by item.published, the date of the publication:

    /blog/upload/combine_sorted.jpg

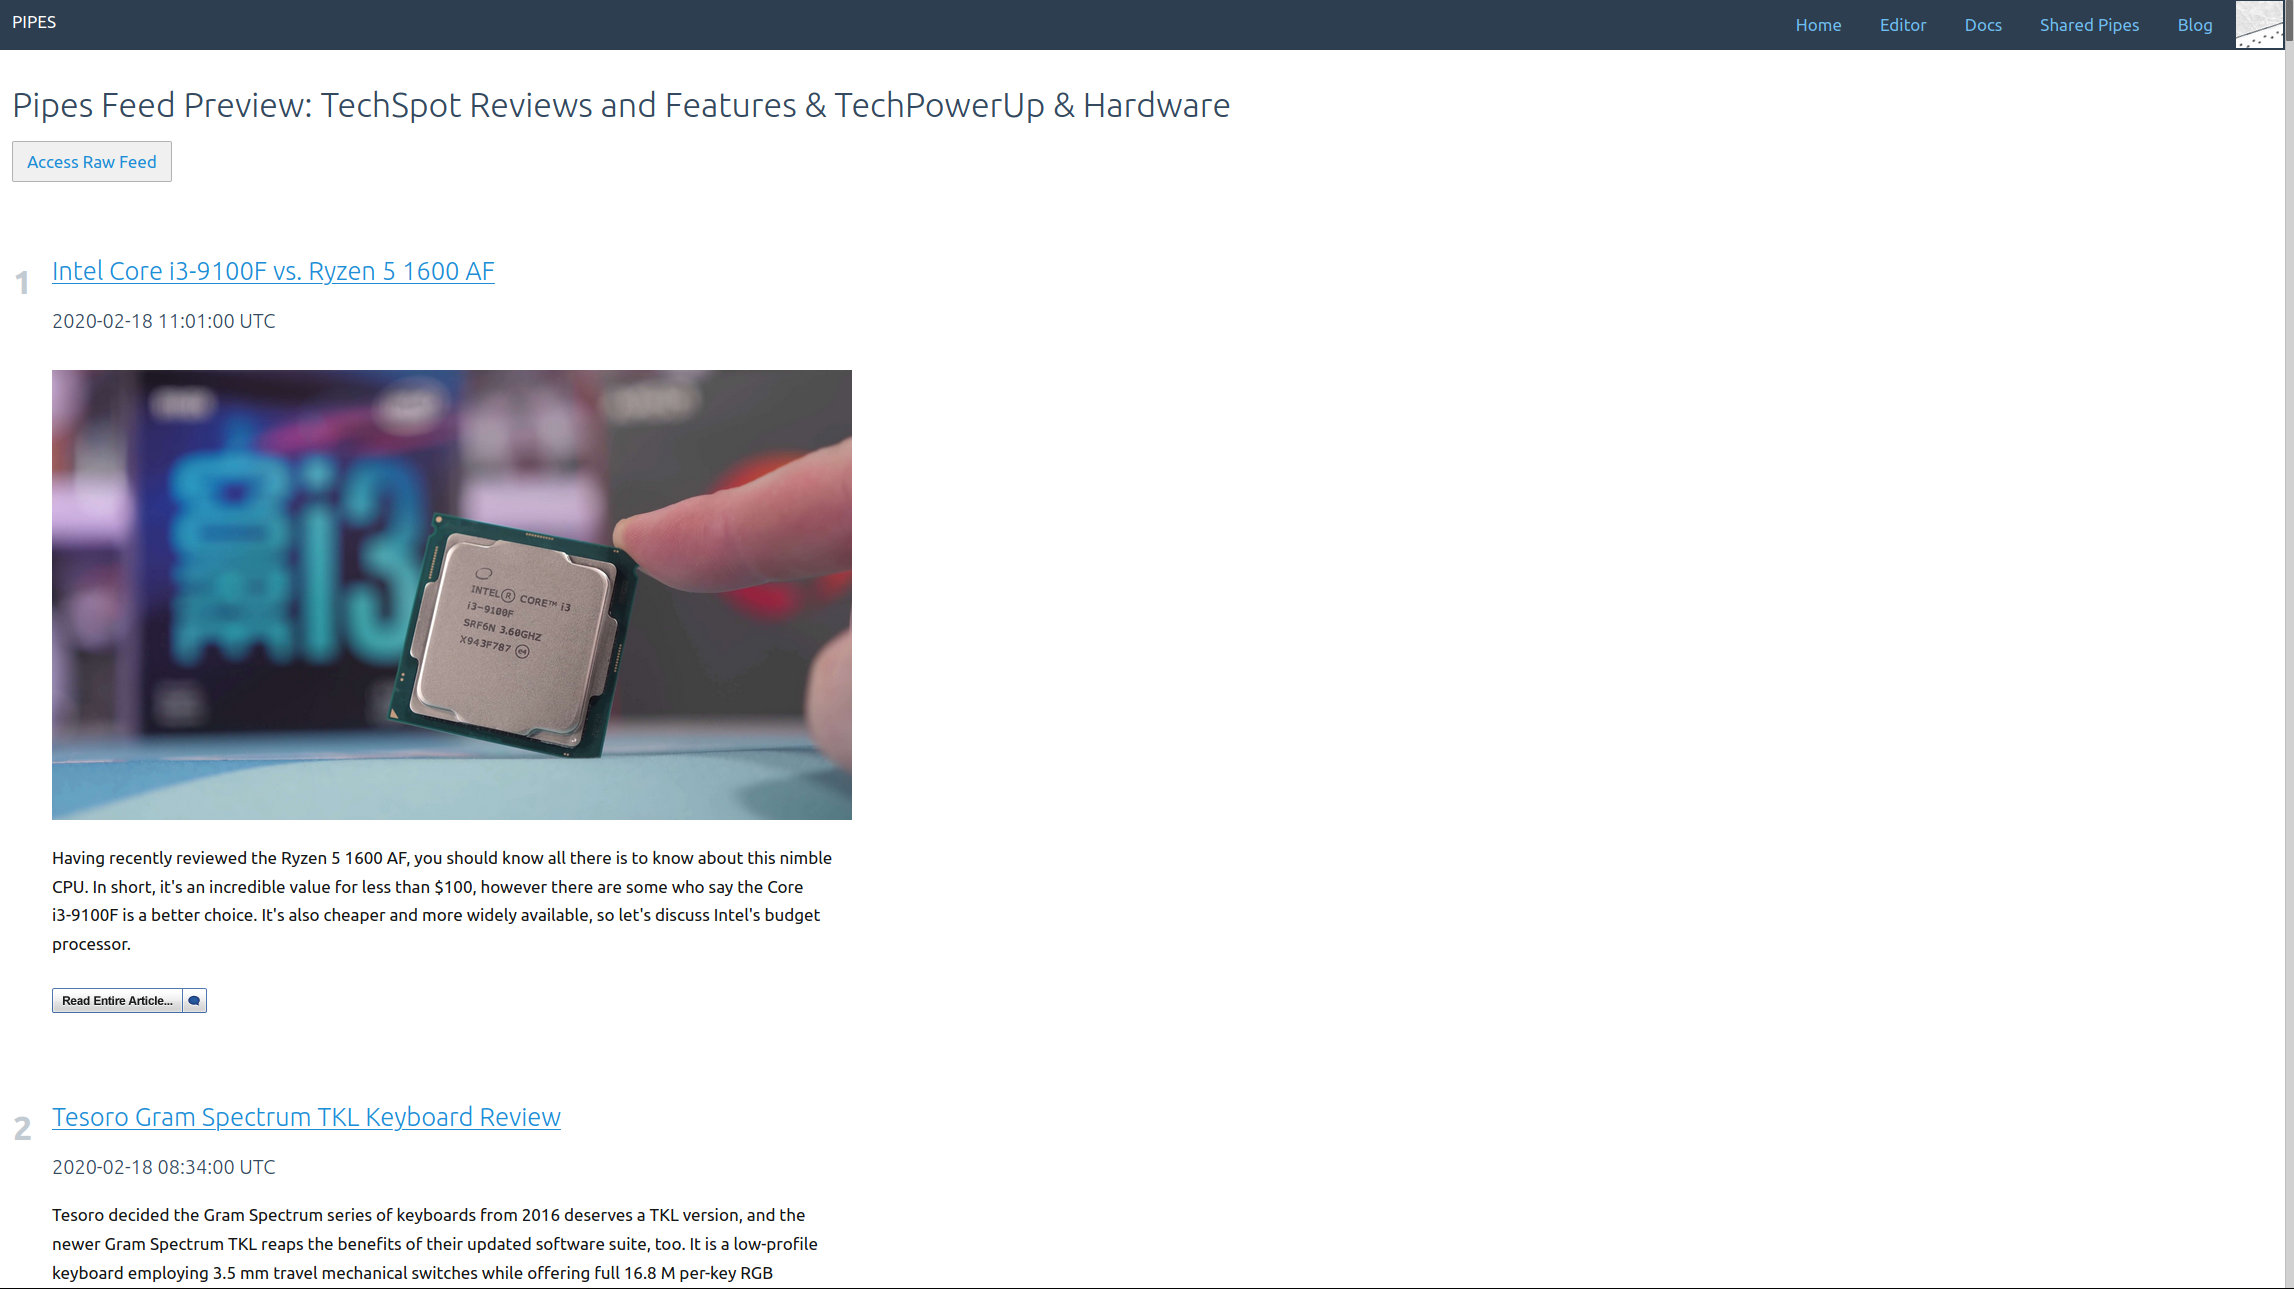
    Now that’s really it! The feed preview looks exactly like I wanted:

    /blog/upload/combine_preview.jpg

    You can see the pipe I created for this article here. You could fork it to create a mega feed for some publications you would like to combine!

    The next article in this series will explain how to create feeds for sites that don’t have one already.

  5. How to filter RSS feeds

    This is part 1 in a series explaining how pipes works and what you can do with it.

    Filtering RSS feeds is the most basic use case for pipes. RSS feeds are everywhere: From your blog to Youtube to your newspaper’s website, if there is a need to see updates there most likely be a RSS feed available. But sometimes it contains entries you are not interested in, or you are really just interested in a specific topic. That’s when you can filter the RSS with pipes.

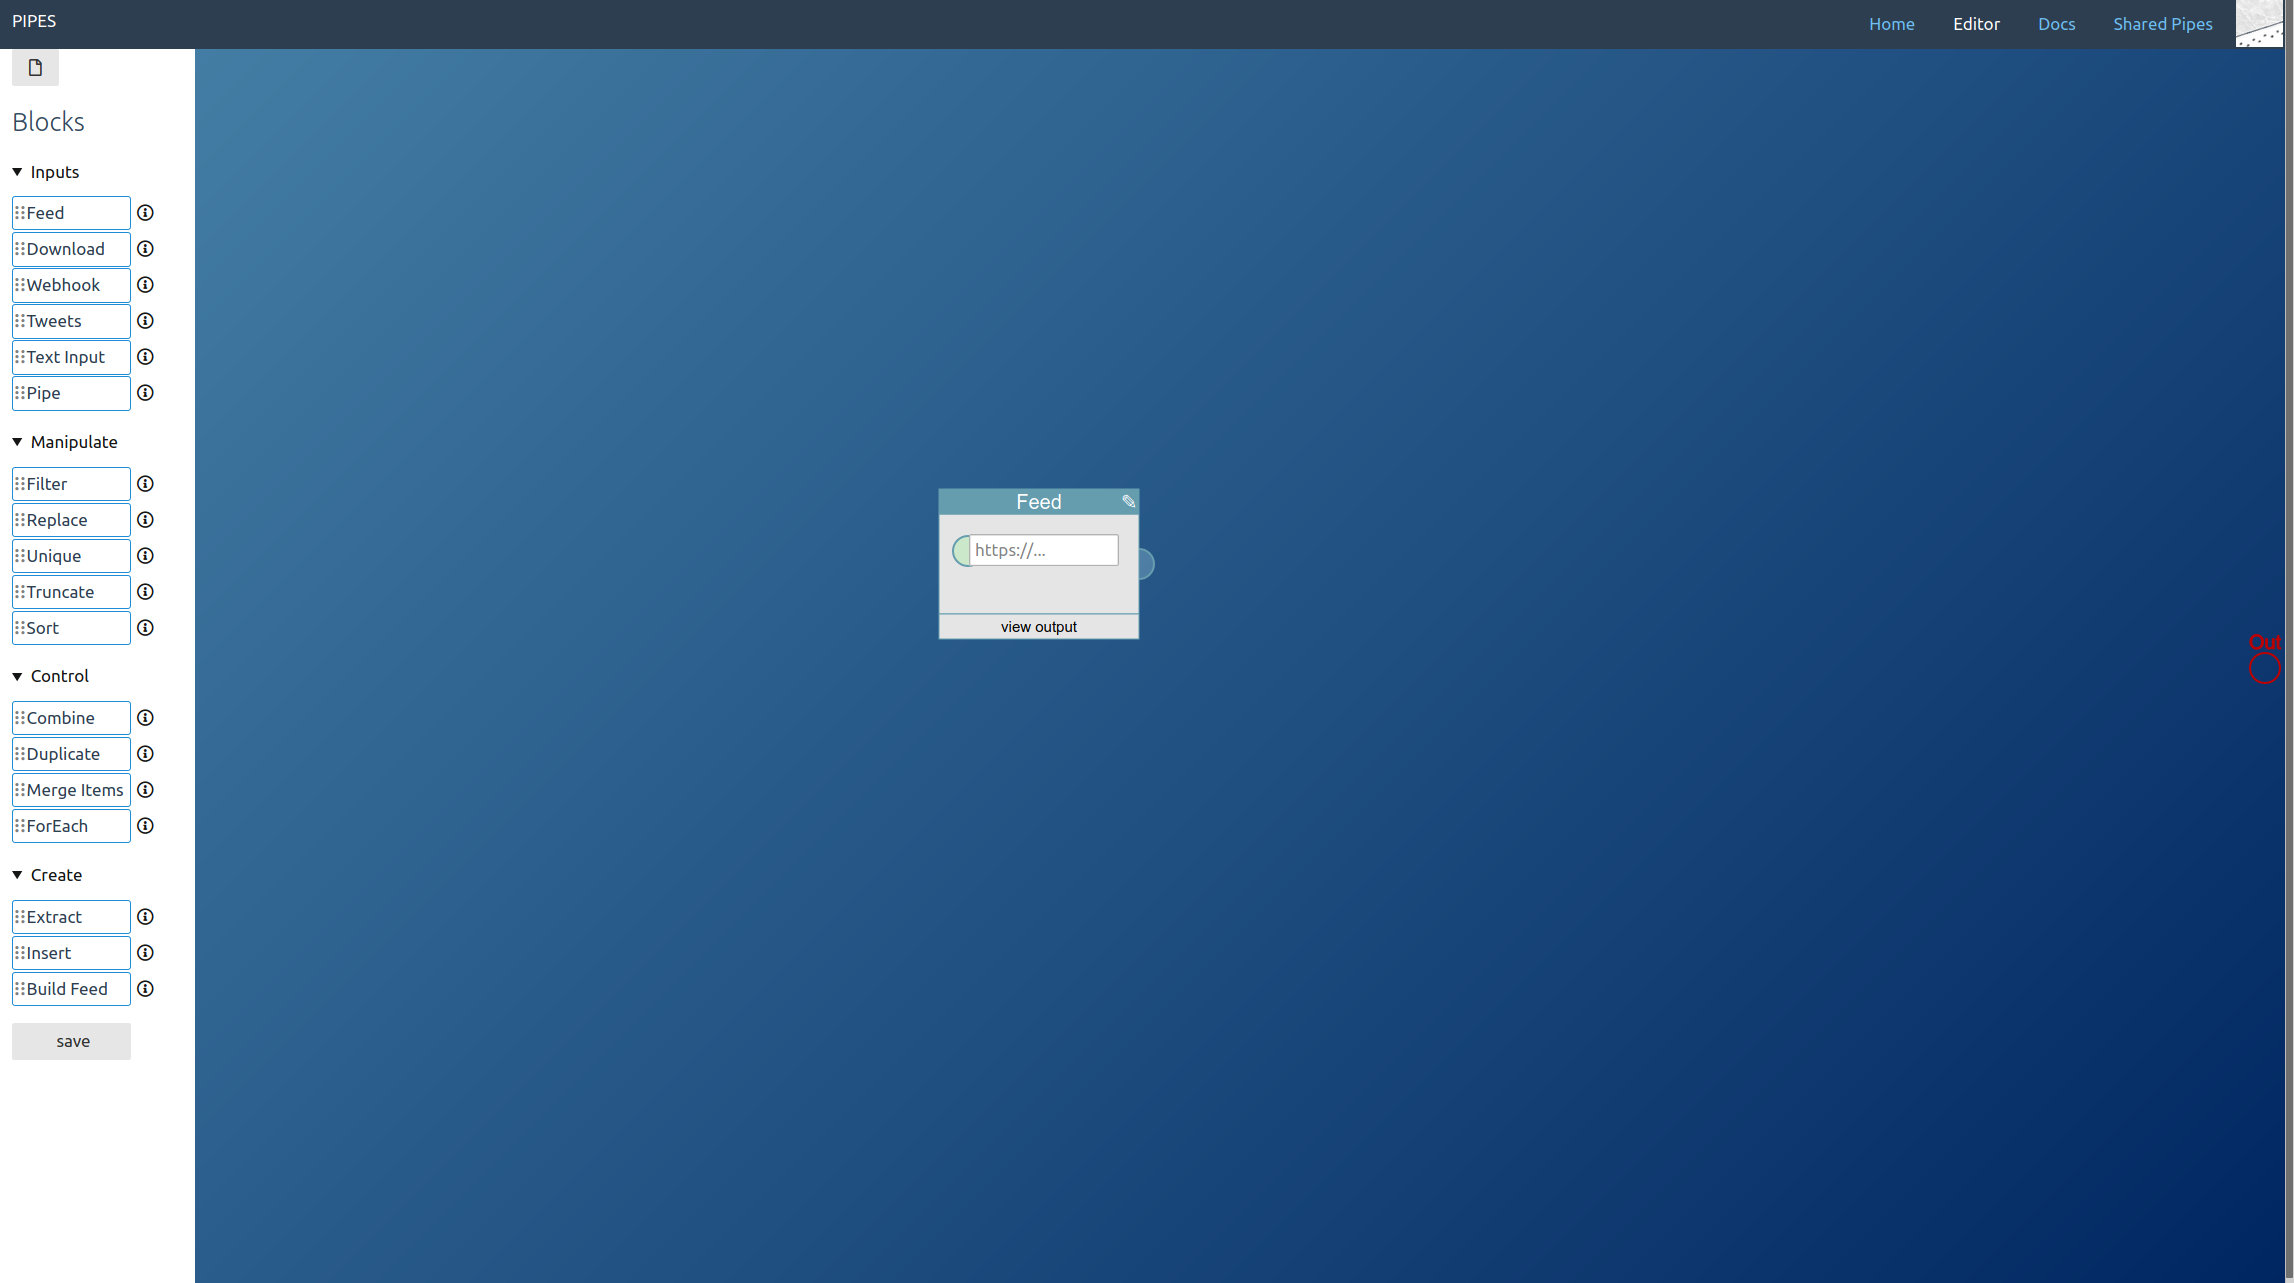
    First prepare loading the feed to be filtered into the editor by placing a feed block:

    /blog/upload/filter_feed_start.jpg

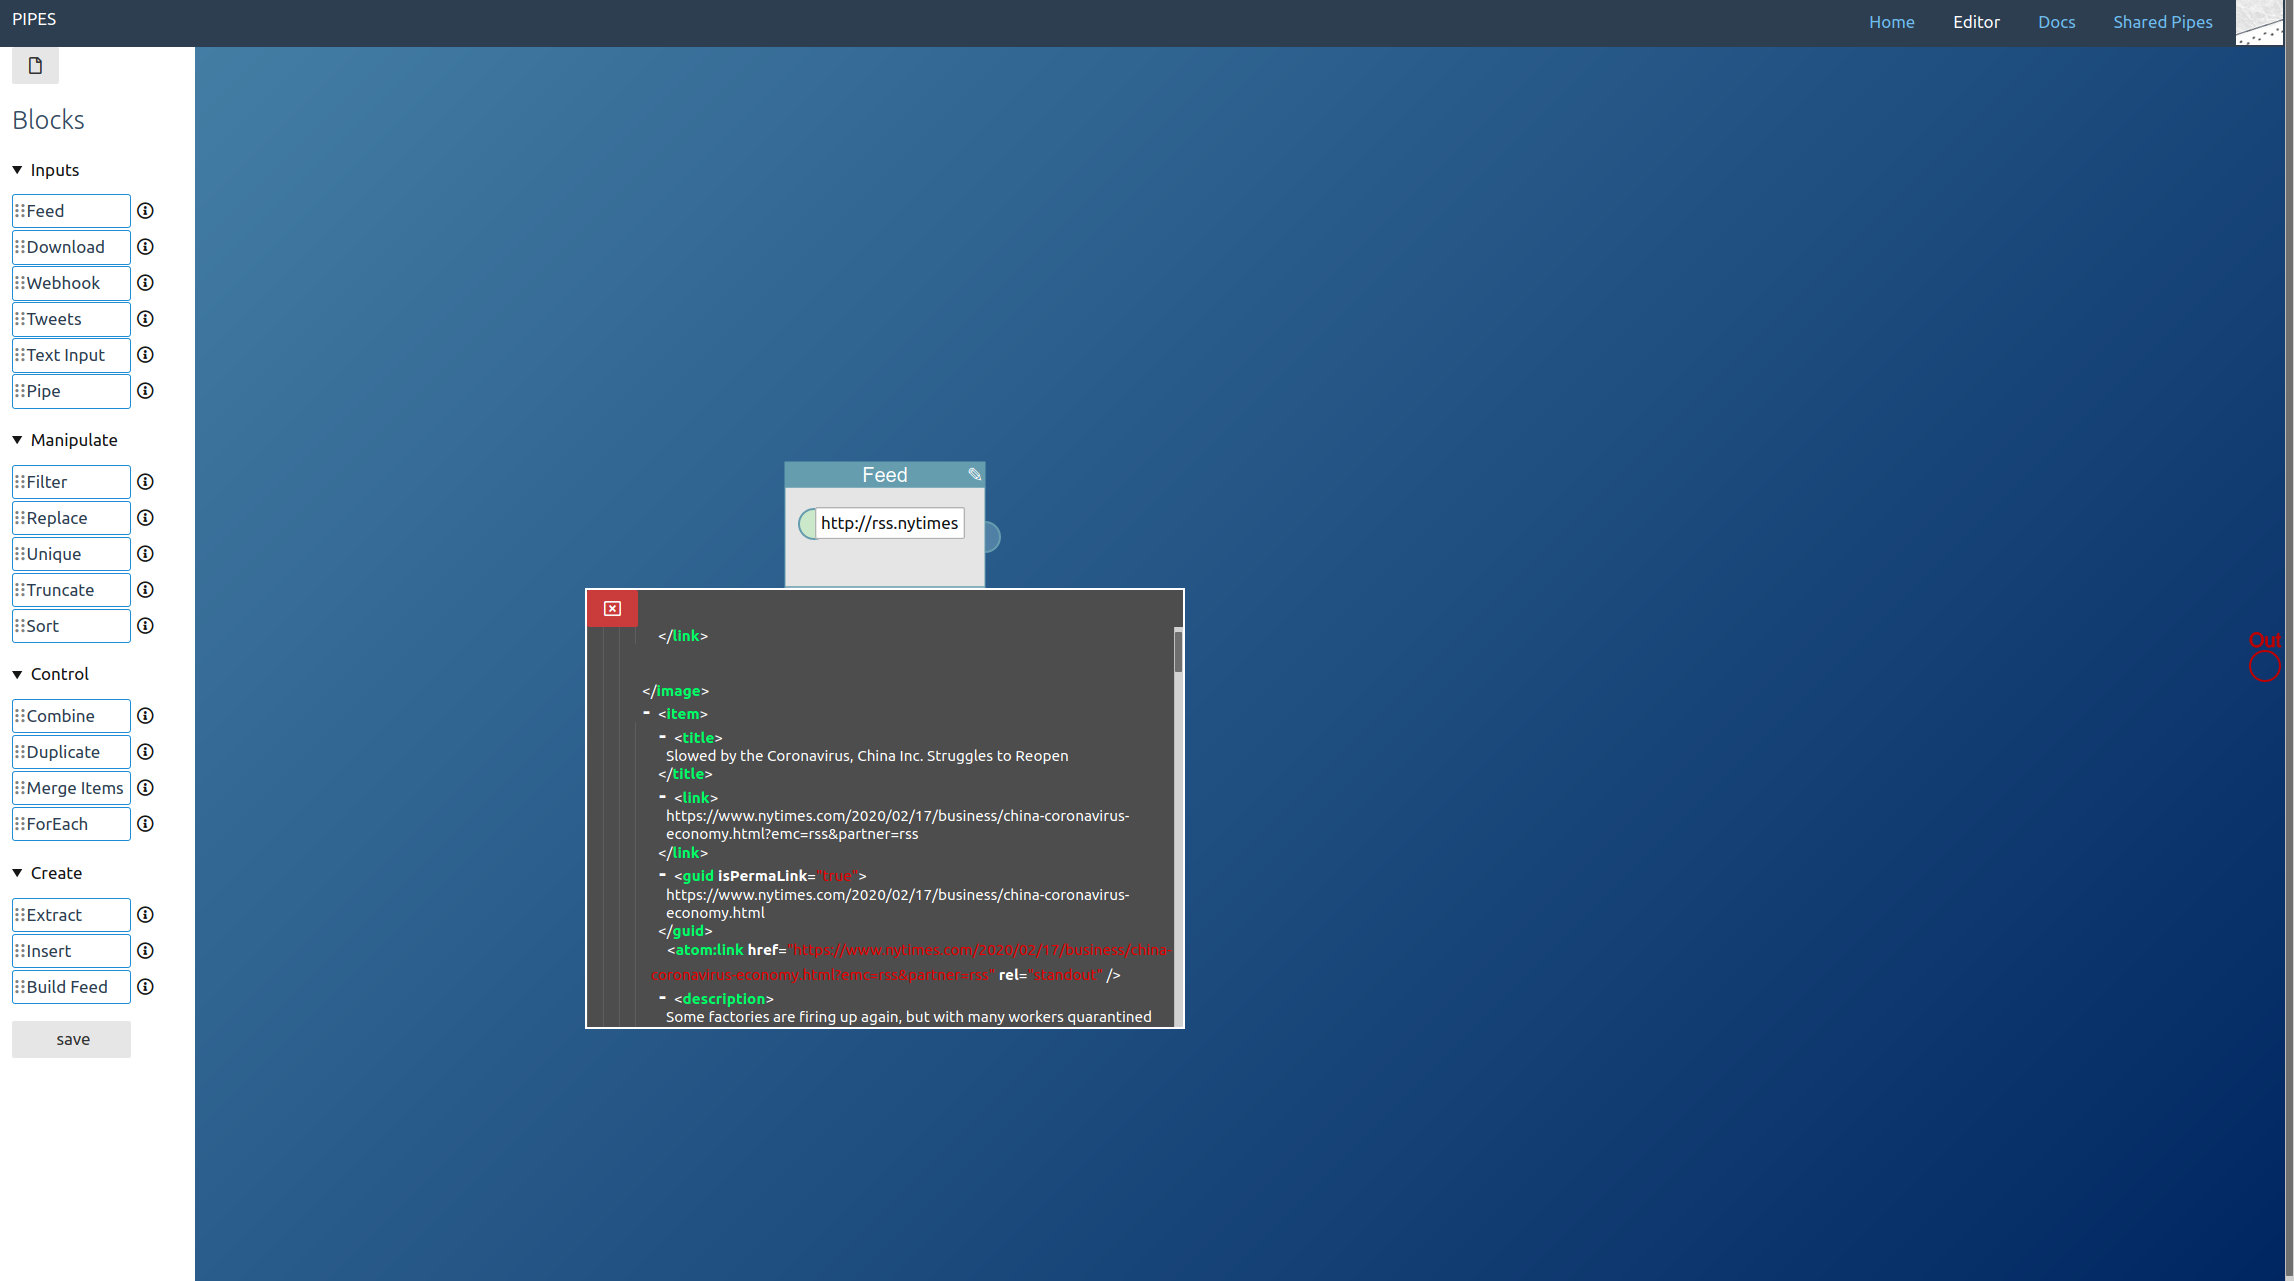
    Then enter the feed URL. You can have a look at the inspector to check whether data gets properly loaded:

    /blog/upload/filter_feed_data.jpg

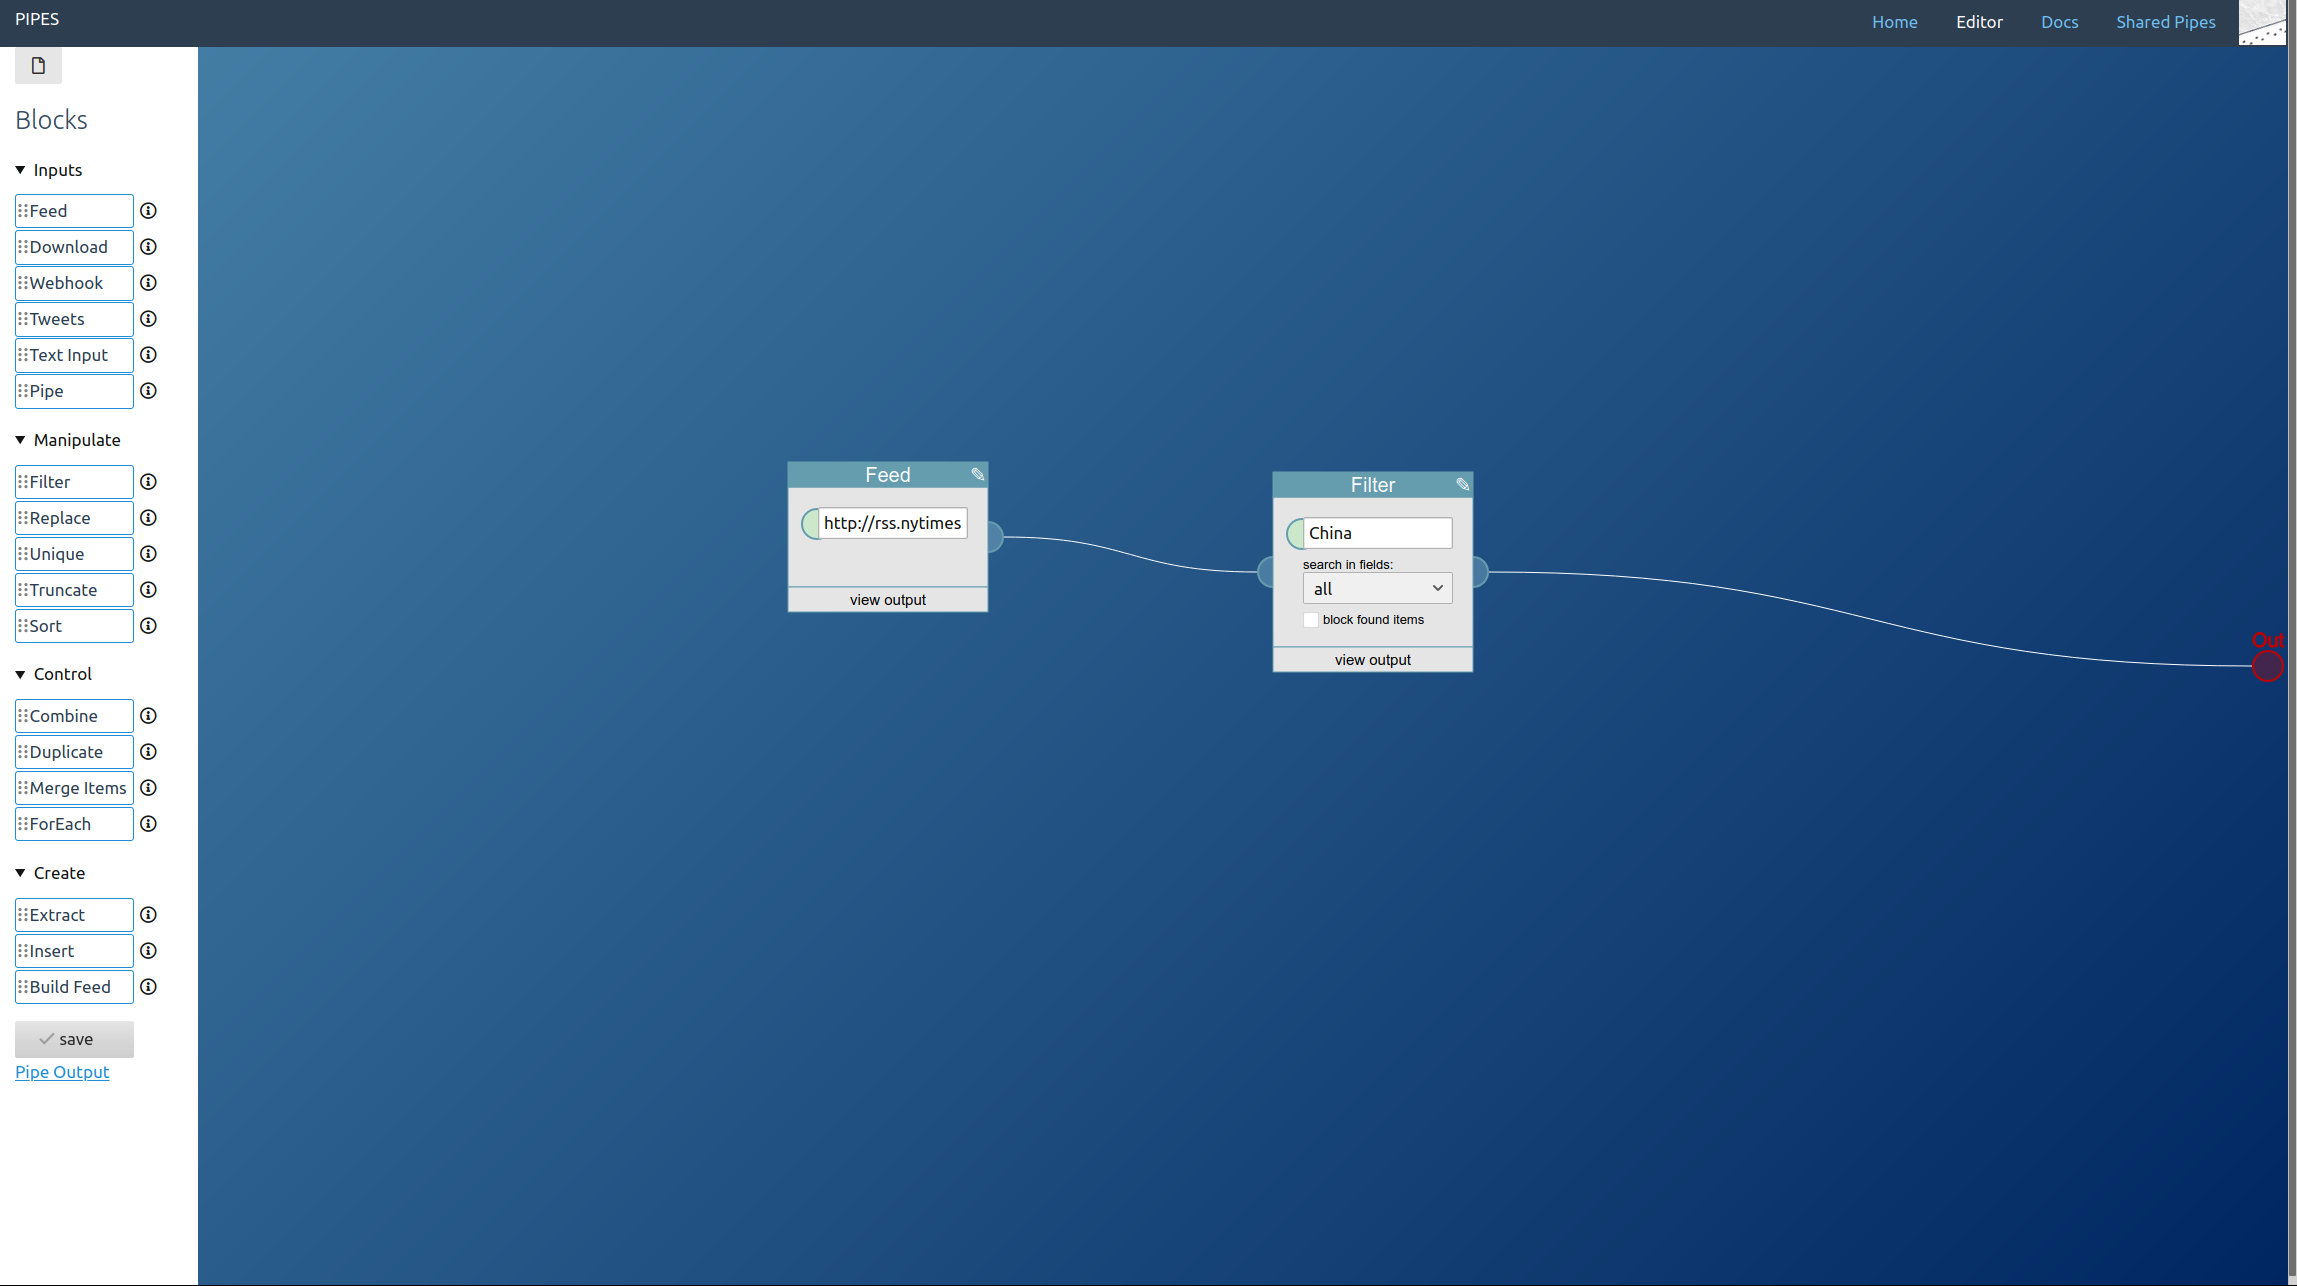
    Next step is the filtering. For that, place a filter block and enter your search term:

    /blog/upload/filtered_feed_filter.jpg

    Don’t forget to connect it to the red pipe output at the right! We won’t need any additional blocks.

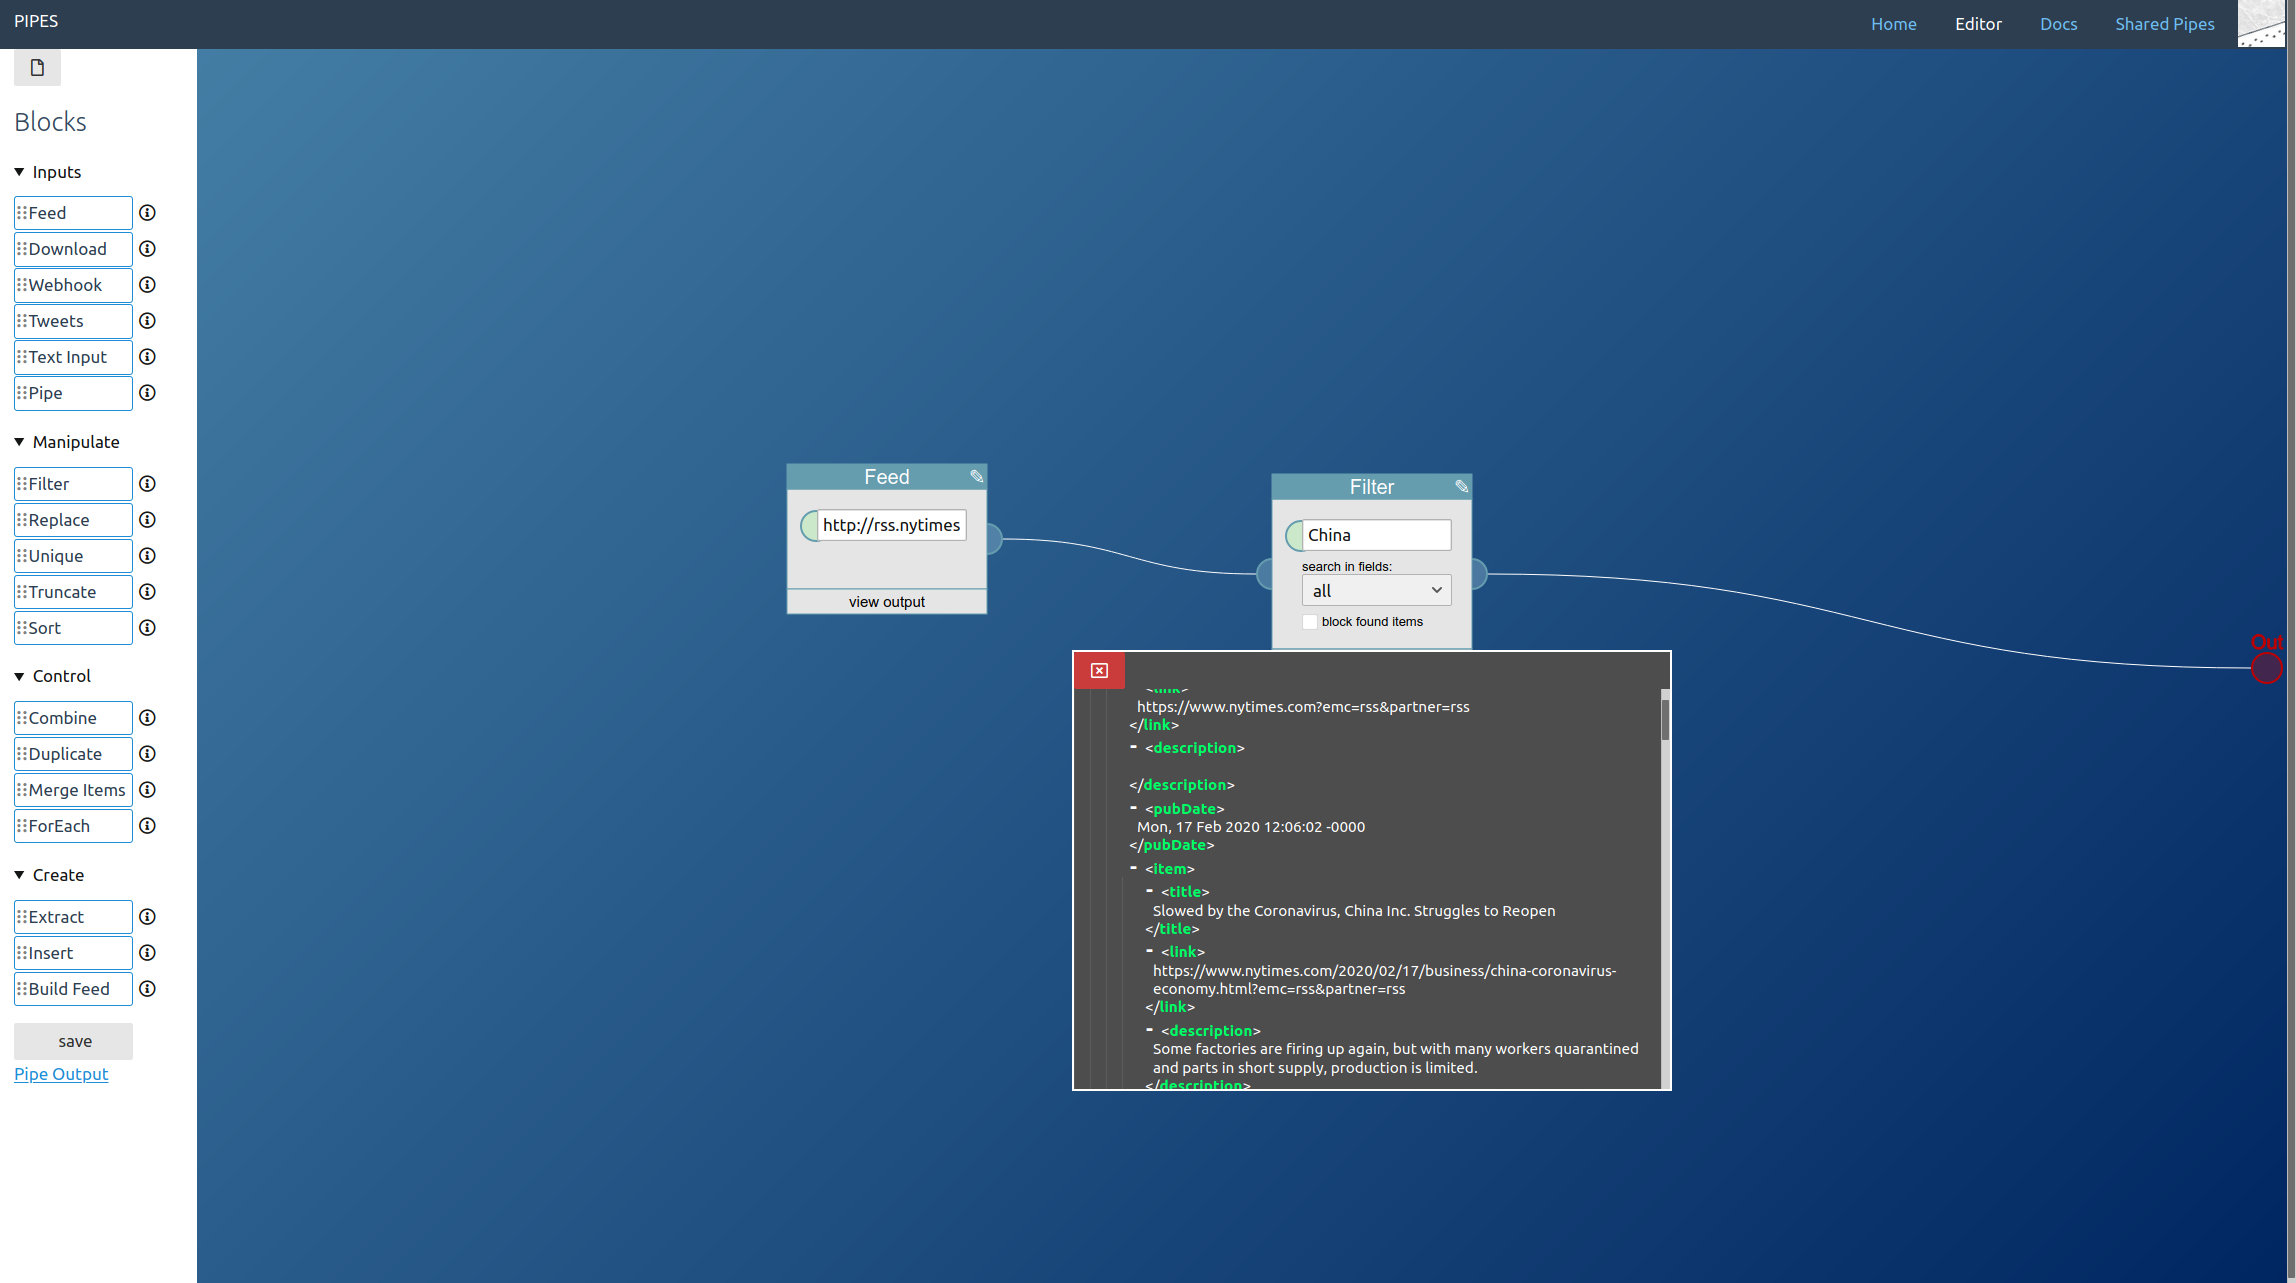
    Now only items that contain the filter term are included in the manipulated feed. You can check again with the data inspector:

    /blog/upload/fitlered_feed_filter_data.jpg

    But maybe it’s the other way around and you want to enter the keyword that should be filtered out, to remove all items that include it? Then click on the checkbox to block found items instead:

    /blog/upload/fitlered_feed_block.jpg

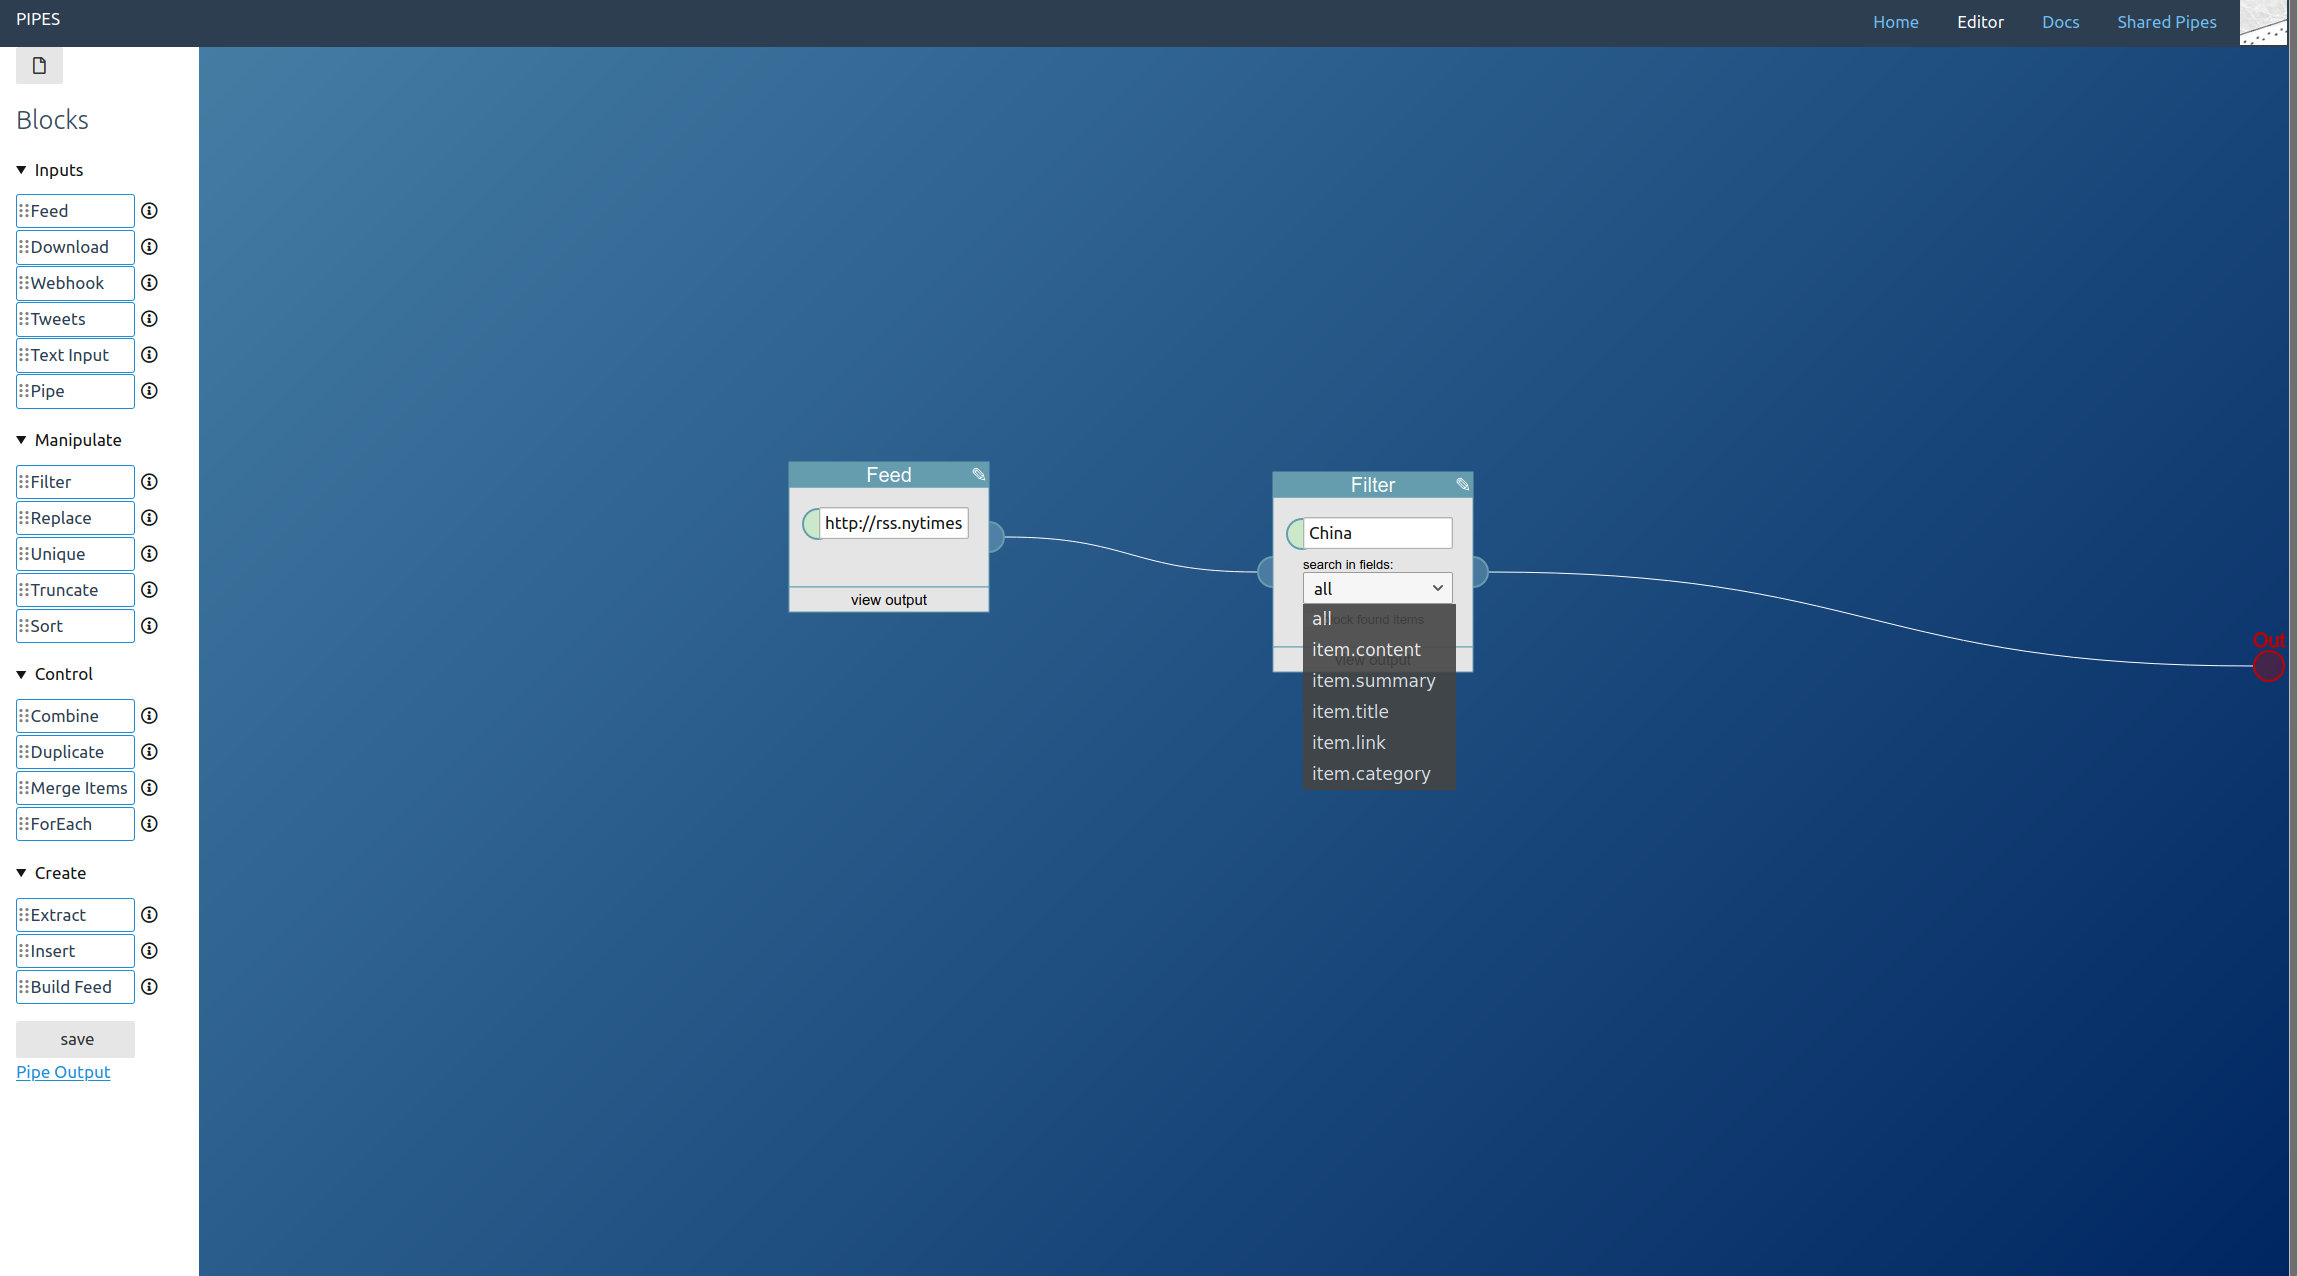
    You can also limit where to look for the keyword, to for example only filter a specific category:

    /blog/upload/filter_fields.jpg

    And that’s it! Now the feed provided by pipes will be the original feed, just filtered. You can access it by opening the link to the Pipe Output at the left:

    /blog/upload/filtered_feed_preview.jpg

    You can find the pipe used in this article here and use it as a starting point for your own filtered RSS feed.

    The next article in this series will explain how to combine multiple RSS feeds into one.